How To Perfectly Wrap A Bouquet Of Flowers For A Professional Looking Arrangement
Giving a professional-looking floral arrangement on a budget is easier than ever when you wrap the bouquet yourself. The key is following a florist-approved process that starts with proper flower prep and ends with a clean, structured bouquet wrapped in high-quality paper with ribbon or twine. It's the perfect way to finish off an affordable DIY Trader Joe's flower bouquet.
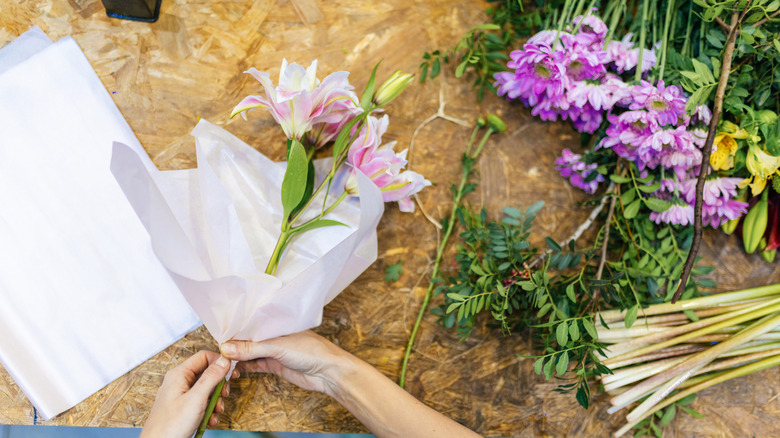
Before you reach for any paper, wrapping a bouquet begins with proper flower preparation. Once you choose your flowers, all the stems must be trimmed to a similar length — cut them at a slight angle to help with water absorption once the flowers are placed in a vase. If any leaves are below the wrap line, they should be removed to prevent moisture buildup and to give the bouquet a cleaner look overall. After trimming, arrange the flower stems into a well-balanced shape. You can make it round and even, or slightly one-sided with taller blooms in the back and shorter stems in the front for a layered look. Remember to check all angles as you make your arrangement.
When you're happy with the shape of the bouquet, many florists secure it with a rubber band or floral tape just below the blooms to hold the shape. Alternatively, you can secure it with a zip tie for a picture-perfect flower arrangement. For the actual wrap, professional florists typically use sturdy paper, like craft paper, which has structure and clean lines. Tissue paper can be layered beneath or used on its own to add softness, contrast, and visual dimension without taking away from the bouquet.
Wrap, secure, and finish the bouquet like a pro
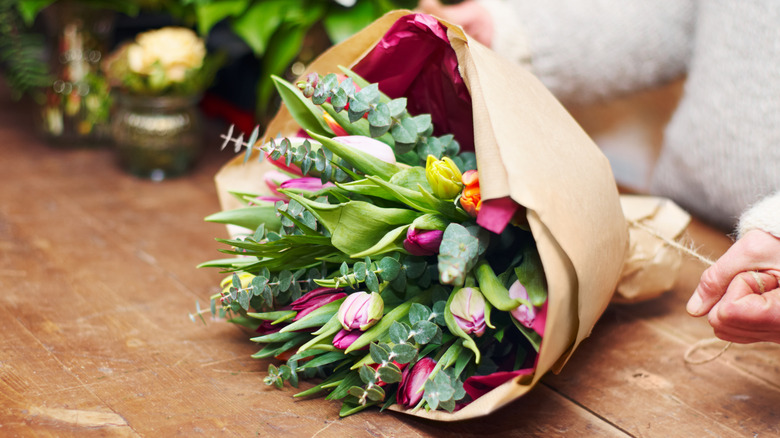
Now that you're ready to wrap, place the bouquet diagonally on a large rectangle-shaped paper, with the blooms slightly above the center and the stems pointing toward a bottom corner. This angle allows the paper to wrap smoothly and creates the cone-like shape you see in professional floral arrangements. Fold one side of the paper snugly over the bouquet before folding it at the bottom edge for a neat base beneath the stems. Wrap the remaining side of the paper across the bouquet and secure it with tape to hold the flowers in place without crushing them. The clean folds and even pressure are essential for making the wrapping look intentional rather than rushed.
Some bouquets are wrapped so the entire stems are covered, while others leave the bottom of the stems exposed for a more casual look. One benefit of leaving the stems exposed is that you can place the bouquet directly into a vase of water without unwrapping it. Whichever method you choose, when your bouquet is wrapped, tie some ribbon or twine around it to hide the tape and help secure the paper. If you want a rustic look, use twine, but for a more polished look, satin or fabric ribbon will give your bouquet a gift-ready appearance. Before presenting the bouquet, put a final professional-looking touch on it by fluffing the edges of the paper, repositioning the blooms, and making sure the arrangement feels balanced. Once you've mastered this technique, consider learning to DIY a gorgeous flower arrangement with a bottle of wine for your next gift.