Protect Your Heat Pump From The Elements With A Clever DIY
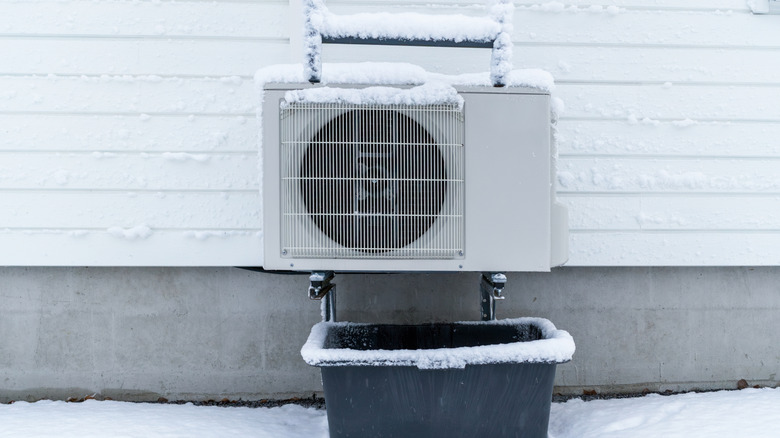
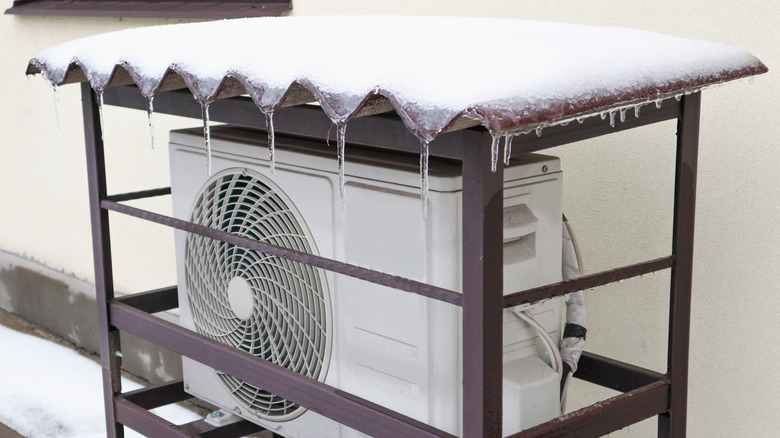
Most Americans can save hundreds (or even thousands) of dollars by installing a modern heat pump. Unfortunately, one of the downsides of heat pump technology is that some models may lose efficiency in winter. Snow and ice can block the vents and may even cause physical damage.
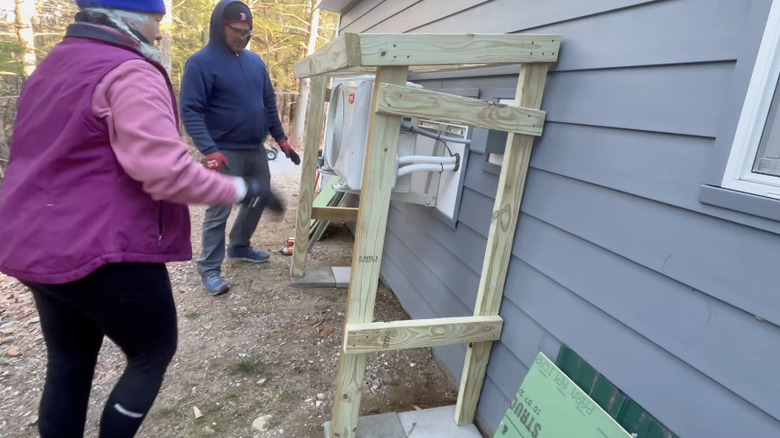
It should go without saying that protecting your heat pump from the elements is a very good idea, and online videos can provide inspiration. We're going to build a simple but robust lean-to with basic materials that are available at home improvement centers and hardware stores. The only tools required are a cordless drill/driver, a saw, and a speed square. A handsaw will do, but a miter saw or circular saw makes life a lot easier. Be sure to check out the safety tips for circular saws if you haven't used one before.
The main construction is a wooden frame made with 2x4 pressure-treated lumber that is resistant to rot and insects. A roofing panel is fitted to the top, and lattice is added to the ends. The whole project is just screwed together, so there's no complicated joinery involved. Before getting everything set up, the first thing to do is measure for the right width, height, and depth. It's very important not to make the frame too tight around the heat pump, which could restrict vital air flow. Most manufacturers recommend a foot or two of clearance, but it's a good idea to check.
How to build the frame for the heat pump lean-to
Before building the frame, you'll need to decide its roof pitch. Between 15 and 30 degrees is good; the latter is recommended in areas with heavy snow. Work out how long the roof supports need to be, allowing a few inches extra for overlap at the front. You also need two upright and two horizontal beams for each end and two long horizontals for the back.
Cut all the pieces and assemble the ends. Fit the horizontals one foot from the top and bottom of the verticals and use two rust-resistant galvanized screws for each joint. If driving them is difficult, drill pilot holes first. Work slowly and carefully to make sure everything lines up properly. Fit the angled roof beam, once again using two screws at each end.
The ground where the lean-to will sit needs to be leveled and compacted. Sitting the frame on pavers will help protect the legs from damp dirt. From there, the horizontal beams can be screwed to the ends. One goes right at the top and the other goes one foot from the bottom. Depending on the width of your lean-to, you may want to add one or two rafters to support the roof. If everything is assembled carefully, the frame should be sturdy enough that it won't need to be fixed to the house.
Adding the roof and finishing the heat pump lean-to
Roofing panels come in asphalt, steel, polycarbonate, and PVC — and they can show up in a variety of colors. Many come in eight- or 12-foot lengths, so one panel cut into shorter sections should be enough for your lean-to. Polycarbonate and PVC are easiest to use. Overlap each piece by one 'ridge' to prevent leaks. Also, bear in mind that each roofing material needs different types of screws to secure them properly, so make sure you get the right ones.
You could stop once the roof is on, but the sides of the heat pump will still be exposed. Screwing lattice panels to the ends would help break up cold winds without restricting air flow. These are available in wood and various plastics, and they are also offered in a range of colors. That being said, you may wish to paint or stain the frame rather than leave it as bare wood. Giving your heat pump some protection from snow and ice is not difficult, and the project is very affordable. Add it to your list of tasks to get your yard winter-ready, and you can benefit from a similar level of heat pump efficiency during winter as you do the rest of the year.