Transform Dollar Tree Gems Into A Dazzling Statement Piece For Your Room
It's official – charming tiny tables are trending again. Which means now is a more apt time than ever to elevate your home's interior design with an eye-catching and unique accent table that's as functional as it is stunning. Of course, you can spend time perusing the aisles of your local shops or browse online for the perfect addition, but the options can get pricey, especially if you're on a budget. Some DIY enthusiasts, however, have gotten creative and opted instead to create an intricately designed table on their own using budget items from discounted dollar stores and craft supplies you might already have around the house.
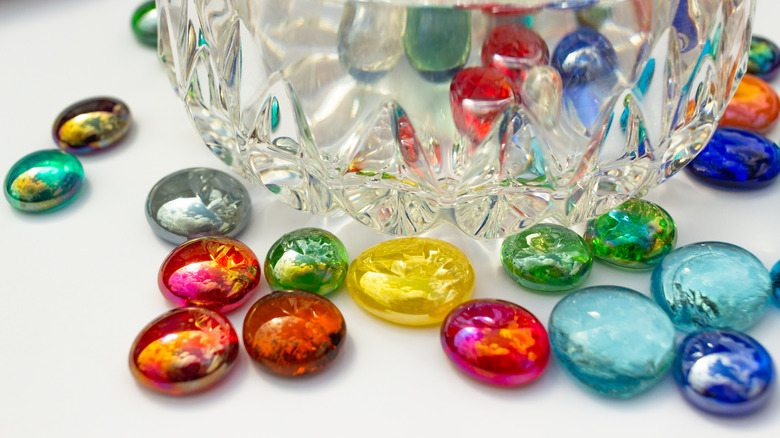
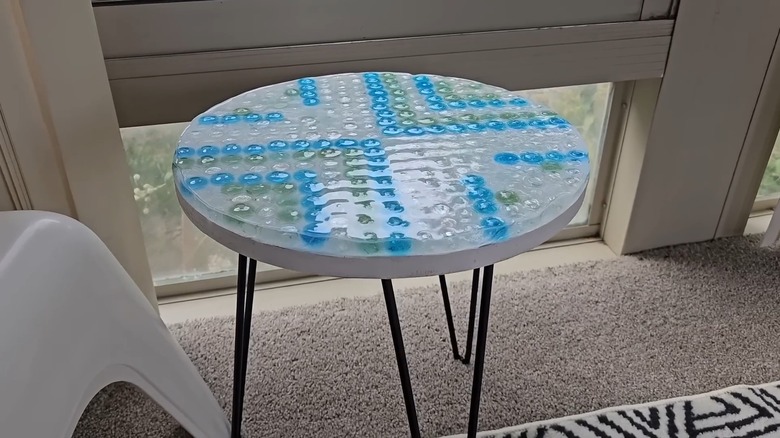
This straightforward project allows you to add an artsy aesthetic to your home with a DIY mosaic table. With the help of inexpensive glass gems from Dollar Tree and epoxy resin, you can design and create a one-of-a-kind accent table that sparks intrigue and adds charm and character to your space. One of the best parts of this DIY is how easy it is to customize.
If you choose white paint for your base, the colors of the accent gems will stand out more, but you can also paint it a more vibrant color for a table that makes a statement. You also have creative leeway when it comes to the pattern you arrange your glass gems in. You can organize the gems into a floral, geometric, or alternating color patterns depending on the desired aesthetic you're aiming for. It's easy to recreate this Dollar Tree DIY for a unique decorative side table at home.
Design a tabletop using Dollar Tree glass gems and resin
To complete this project, you'll need a spare or thrifted side table, a few bags of the Floral Garden Accent Gems, which are $1.75 a piece from Dollar Tree, furniture paint in a shade of your choice, a paintbrush, a ruler and pencil for measuring, super glue, epoxy resin and hardener, a scale, a heat gun, and an electric sander or sand paper. To begin, clean off the side table to make sure it's free of any dust or debris and apply a layer of furniture paint. Once the paint is dry, sand down the surface and use your ruler and pencil to mark the center of the table for reference and symmetry.
Arrange your glass gems in the desired pattern and use the super glue to secure the gems to the table's surface. This is the part of the project where you can alternate colors and patterns to achieve your desired aesthetic. While the adhesive is drying, use your scale to measure and mix your epoxy resin and hardener. For craft resins, this should be a one-to-one, equal parts ratio.
Make sure the surface is flat and pour the resin mixture in an even layer, coating all of the arranged glass gems. Then use a heat gun to ensure the resin dries quickly and evenly. Once the resin has dried completely, use your sandpaper or electric sander to smooth out the edges of the table until the resin coating is completely level. Once everything looks uniform, you're ready to style your new DIY table in your home.