The Hardware Trend In 2026 That Will Instantly Elevate Your Kitchen
We may receive a commission on purchases made from links.
In 2026, interior design trends are daring you to be the most expressive, authentic version of yourself. This year is all about embracing the bold, unique design elements you've been too sheepish to try until now. You'll see this daring trend affecting every room in the house — including your kitchen. As such, we're saying goodbye to traditional hardware and hello to elevated etched handles.
"Handles with subtle etched details are becoming increasingly popular. They add texture to the touch, creating a tactile, almost sculptural quality that elevates even the simplest kitchen," interior designer Lauren Gilberthorpe told Homes & Gardens. "There is a growing focus on the small details that make a kitchen feel personal and well considered. Hardware is no longer purely functional; it contributes to the overall sense of tactility, craftsmanship, and atmosphere," she explained.
This gorgeous cabinet trend is a perfect way to profess your individuality without breaking the bank. These decorative pieces can feature everything from intricate floral engraving to simple line work. Changing out hardware is one of the simplest DIY projects you can take on. It's so nonintrusive, you can even pull it off as a renter in some cases (just be sure to hold on to the old hardware to reinstall on move-out day).
Choosing etched hardware for your kitchen
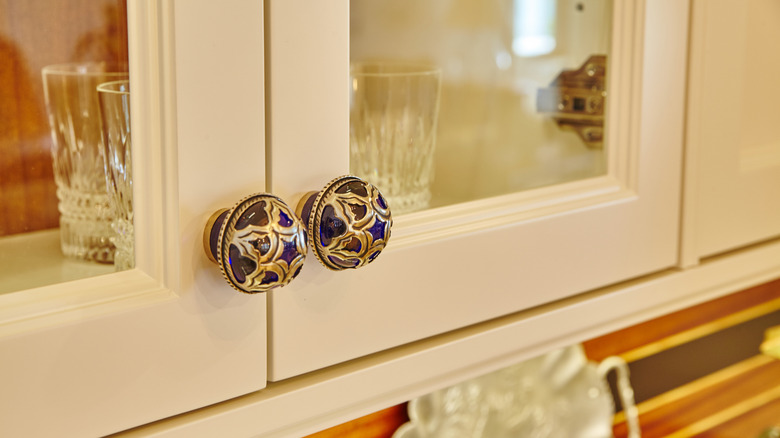
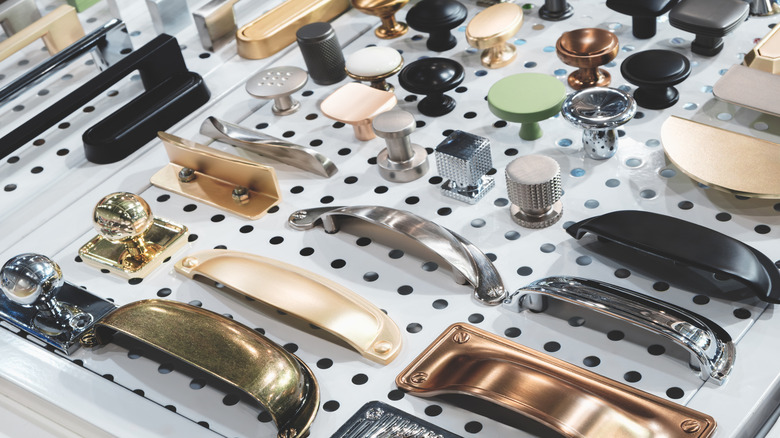
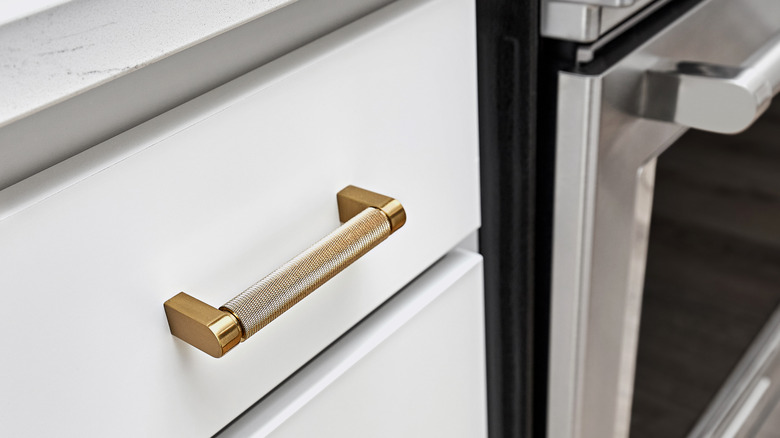
Etched hardware is a cabinet hardware trend we've seen before. These intricate pieces date back to the late 19th century. Decorative handles have weaved their way in and out of style ever since. Recently, we've emerged from an era of functional minimalism. This no-fuss style standard left little room for dramatic flourish. However, 2026 is shaping up to be a year of bold design choices and an appreciation for the finer details. "Handles are becoming more tactile and more expressive, with knurled sections, reeded details, subtle hammering, and gently rounded profiles that make a kitchen feel crafted at close quarters, because hardware is one of the few parts of a scheme you use dozens of times a day," Gareth Hull, design lead at Hendel & Hendel, expressed to Homes & Gardens.
From vintage finds to modern works of art, there is an abundance of etched cabinet handles to choose from. You could even go for a playful yet elegant design, such as the Engraved Flower Knobs by uniquehardwaresupply on Etsy. Or, deck your cabinet doors with something versatile, like the PushkaHome Black Knurled Cabinet Handles. To simplify this DIY, find a knob or pull that uses the same number of pre-drilled placement holes as your current hardware. This is also the ideal situation for a renter. If you select a pull that requires more drilled holes or a knob that requires fewer, you'll need to do some more work upfront to install your new hardware. But even if that is the case, it's fairly simple to pull off this upgrade.
How to change hardware types
Switching up your hardware from knob to pull — or pull to knob — may seem intimidating, but it's not as challenging as you may fear. Knobs require one placement hole while pulls require two. As long as the placement looks right, switching from a pull to a knob will be easier. All you'll need to do is fill one pre-drilled hole and install the knob in the other. You can also opt to fill both placement holes and drill a new hole in the center if you're installing knobs on a drawer. Use wood filler and a matching stain or paint to fill and conceal the old holes. Once your new placement holes are prepped, simply screw the pieces in.
Installing pulls is a bit more complicated, but it's still an achievable DIY project. Start by filling the knob hole. You can either measure and align your holes manually or use a handy tool called a cabinet hardware jig as a guide. It's basically a template that clamps onto your cabinet and shows you where to drill your holes. However, you'll need to make sure the jig is set to the correct spacing for your new hardware. Once you know where your placement holes need to be, carefully drill them in. It's vital that the holes are in the right place — if they're not, your pull won't screw on properly or may turn out crooked. When the holes are drilled, all that's left to do is install your pulls.