Common Installation Mistakes That May Be Causing Your Tile To Chip
It's a daunting task installing floor tiles at home without a professional. When you combine the delicacy of the materials, the importance of pattern matching, and ensuring that each tile is placed correctly and in line with the rest, you realize that there is so much margin for error. It's invaluable to read up on the tips for a perfect tile floor installation, but even then, you may still face a risk of chipped tiles. Beyond choosing the right tile style, you need awareness of the all too common installation mistakes that cause chipped tiles, like using the wrong adhesive, lazily prepping the subfloor, not using expansion joints in your flooring, and failing to address the supports underneath.
What these mistakes have in common is they all contribute to an unstable surface and foundation that tile needs to prevent cracking. Using the wrong adhesive or failing to prep the subfloor (removing dust, debris, or leveling uneven areas) prevents tiles from bonding properly, causing them to loosen. Meanwhile, another mistake is forgetting to place intentional gaps (or expansion joints) in between tiles that allow for movement or tiling over; improperly spaced joists could cause excessive stress that leads to chips. A perfect tile installation is a perfectionist's dream and a DIY novice's nightmare, which is why it pays to really understand these common mistakes so that you can avoid them.
How to avoid joist spacing and subfloor preparation issues
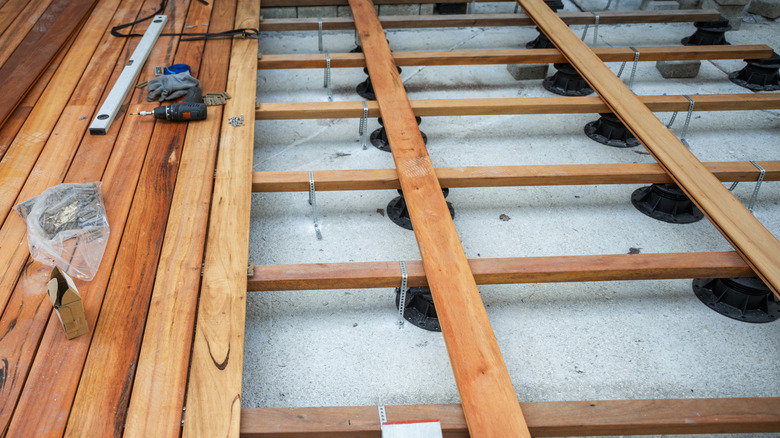
First, you need to know what you're tiling over, and that's where the issue of improperly spaced joists comes to the fore. These are the structural beams that make up the grid beneath the floor's top layers. The spacing of those joists is determined by how much weight the floor is expected to carry, which for typical residential construction is usually 16 inches on center. When joists are spaced too far apart it can lead to cracked tiles because the structure is too flexible. The floor should feel firm and stable without visible movement. If not, it indicates the structure may need to be strengthened with extra joists or ones that are closer together.
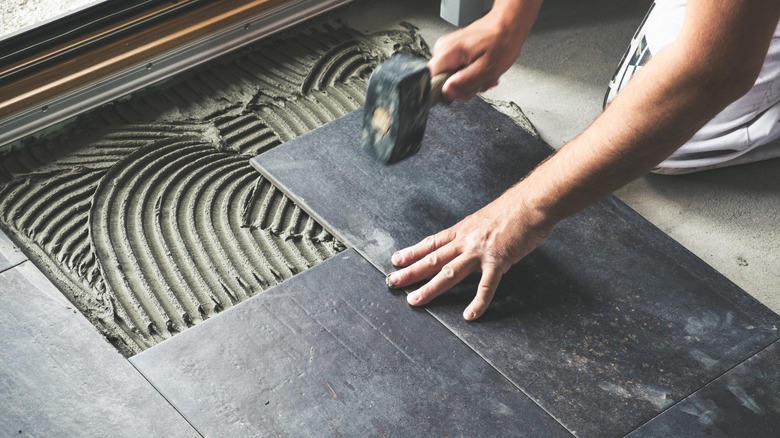
General prep is the obvious next step, and in this case, it's prepping the subfloor. Clean the working area by sweeping, vacuuming, and wiping down the surface to remove dust and debris that could interfere with adhesion. Next, check that the surface is level. If the subfloor isn't flat or properly prepared, tiles can be forced to bridge gaps or sit unevenly, which creates stress points. Even small dips or humps can be a disaster for tile installation, so it's worth understanding the importance of leveling a floor before tiling. As a rule, any dip must be no more than 3 to 5 millimeters. After that, other tips for prepping the subfloor include applying a crack isolation membrane, which acts as a buffer between the subfloor and tiles, or stretchable screed, a flexible leveling compound.
Why expansion joints and the right adhesive are critical
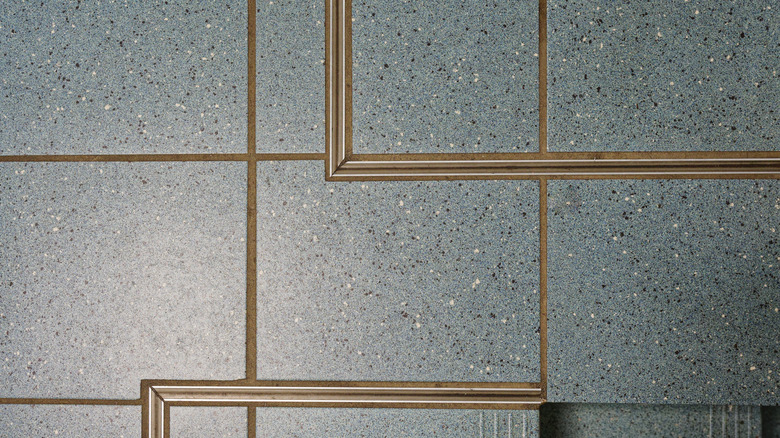
Expansion joints are not to be confused with the general gaps in between each tile. Also known as movement joints, without them DIYers effectively lock a floor in place and stop it from withstanding natural expansion and structural movement. An expansion joint will show up less regularly, which in most internal spaces is every several meters or so. This inclusion ensures that tiles don't chip when layers underneath expand or contract because of environment changes. Internal tiled floors usually require movement joints roughly every 26 to 33 feet, with closer spacing in more changeable environments such as rooms with underfloor heating. Larger floor areas and outdoor spaces need them more frequently. For this joint, silicone offers the necessary malleability.
Finally, choose the right adhesive, which depends on the tiles. A ready-mixed adhesive is not recommended for dense tiles like porcelain because they don't absorb moisture; the adhesive can't dry out properly, remaining soft and compromising the integrity of the tiles. As well as matching the adhesive to your tile material, you must choose an adhesive with the right level of malleability once it dries to prevent unnecessary stress. S1 or S2 adhesives are safe choices for floor tiling, as they contain specific polymers that improve flexibility and adhesion once dry. This flexibility is measured in "mm" of how much a solid (in this case the dried adhesive) can change shape when a force is applied. It's known as deformability. S1 offers solid flexibility (2½ millimeters to 5 millimeters) whilst working with most tile types (ceramic, porcelain, natural stone, glass, and mosaics), making it perfect for standard DIY projects. S2 (5 millimeters+), is better for conditions like underfloor heating; higher temperatures can cause stress on tiles, causing them to chip.