The IKEA Hack That Turns An Ordinary Havsta Cabinet Into A Vintage Showstopper
We may receive a commission on purchases made from links.
For DIYers, making over an IKEA anything symbolizes a rite of passage, a representation of the crafter's skill. The project is made all the more impressive when the home DIY project involves something large-ish, like the IKEA HAVSTA Cabinet – even more so when turning the piece vintage. If done right, the refurb takes the home artisan from novice to master by turning a once-plain piece into an heirloom cabinet complete with vintage trim and old drawer pulls to amp up its authenticity.
Like most well-loved IKEA pieces, the HAVSTA cabinet boasts a simple exterior and trim. On its own, it looks nothing like the newly-vintage cupboard it'll become with a little MacGyvering. To unlock this look, you'll first need some furniture trim. The style of trim you choose to decorate the cabinet with will be dictated by your home's decorative style. The DIY project also calls for some retro drawer pulls, and vintage knock-offs can be found in home and garden stores. However, if you'd like to use the real deal on this, look for them at local auctions and thrift stores.
As far as tools go, you'll need some miter shears, a glue gun, and a measuring tape. From the factory, the IKEA piece comes in three colors, including white. If you'd like something else, you'll need to paint it, so have those items on the ready. For that, you'll additionally want paint, brushes, sanding equipment, pencils, and paper.
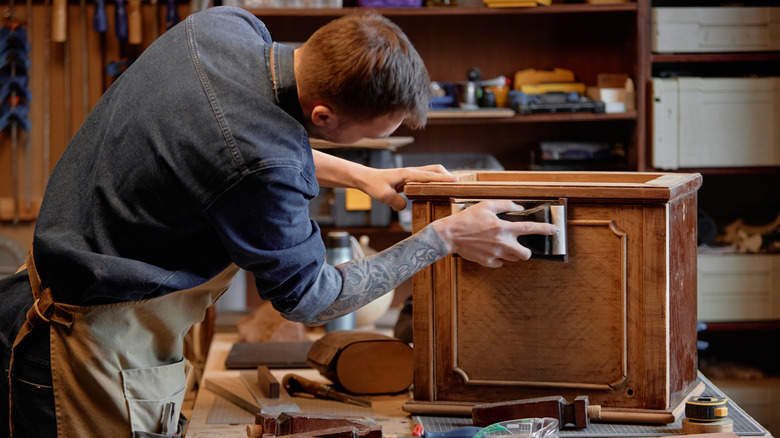
Turning the IKEA HAVSTA cabinet vintage
The IKEA cupboard needs to be assembled before you add the trim. However, if you're planning on painting it, you'll find it's easier to do that before putting the item together. You can do one solid color, though it'd be fun to paint the cabinet one color and the existing trim another color. You'll end up with blocky stripes around the front of the doors, which adds some quirky charm to the piece. You see this kind of design element from home decor brands like MacKenzie Childs. They're vintage with a twist.
If you're not sure how the stripes and curlicues of the trim are going to turn out, assess the piece's current design and map out where you'd like to put the embellishments. Drawing your design out on a piece of paper, with accurate measurement notations and blocked-in paint areas helps to visualize the design and can help you budget for how much the project will cost.
Once you're done with the preparation phase, you'll sand and paint the cabinet and trim according to your drawings. If you need to cut corners on the trim, miter shears can help. Otherwise, it may be possible just to use scissors. You may find it helpful to lay the cut trim in formation on the floor before gluing it onto the cabinet, just to give yourself one last visual. Once you're satisfied, attach the trim onto the IKEA piece with a glue gun and add the vintage drawer pulls to the doors as the final touches.