The Simple Flip That Upgrades A Basic Shoe Rack Into Better Storage Space
We may receive a commission on purchases made from links.
Sometimes, even the helpful storage items you own need an upgrade after some time. As a homeowner, you may already be looking for quick and effective ways to update your home. If you own IKEA's TJUSIG shoe rack, you are aware that it is a minimalist and sound solution to combat shoe clutter. It's designed to hold several pairs in a slim footprint so as not to take up much floor space. It's a favorite for entryways, closets, and mudrooms around the house as a designated drop zone for shoes. However, there is a surprisingly easy upgrade that turns this basic shoe rack into a more functional and attractive storage solution by simply flipping it over and adding a top shelf.
The small tweak to your already practical rack gives you a great spot for decor or extra storage without needing to take up any more space, which is important for your limited entryway or area. It also requires no advanced DIY skills (similar to the DIY shoe rack for keeping your boots neat and organized), so it's something you can do easily. The shoe rack is designed to be versatile, so in flipping it over, you still have the same bars to hold all your footwear securely. The legs end up taller at the top, creating a nice clean and open spot that won't interfere with any shoes, and adding the top shelf can make the whole piece feel more like furniture.
The steps to take for adding a top shelf after flipping your shoe rack
First, you'll want to measure and choose your board by measuring the width and depth of your flipped shoe rack. A board that can fit the top of your rack needs to be slightly bigger on all sides. You may have a board that's already lying around the house and just needs some cutting, or you may need to get a custom board, like this Baltic Birch Plywood Custom Cut Craftwood. Next, you'll need to sand it to smooth it down. You can also paint or stain your board to complement your home's aesthetic or style. You can paint it to match the legs of your shoe rack (white or black), so it looks like a whole piece. Consider incorporating some decorative vinyl stencils to the top, or stick on some patterned contact paper for an elevated touch.
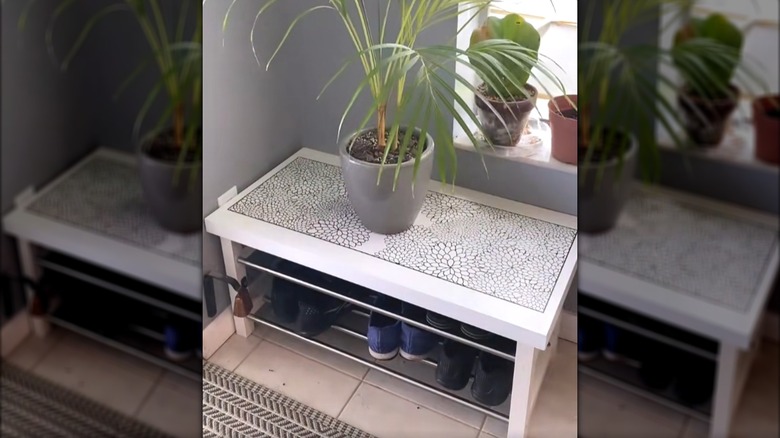
The board can sit in place on top of your rack. However, if you want to, you can secure it by attaching small L-brackets to the underside of the board to the rack's frame and screwing it down. Once it's in place, feel free to utilize it how you want. You can keep it as is for bench seating or add some baskets on top as extra storage. You can hold your keys or mail there to clear more clutter with your new entryway shelf. You can also keep it as decor, almost like an end table, and add a pretty potted plant for a touch of style. The added shelf hides your shoes for an elevated look but stays practical and functional.