DIYer Shows Why You Shouldn't Throw Out Old IKEA Billy Bookcase Shelves
We may receive a commission on purchases made from links.
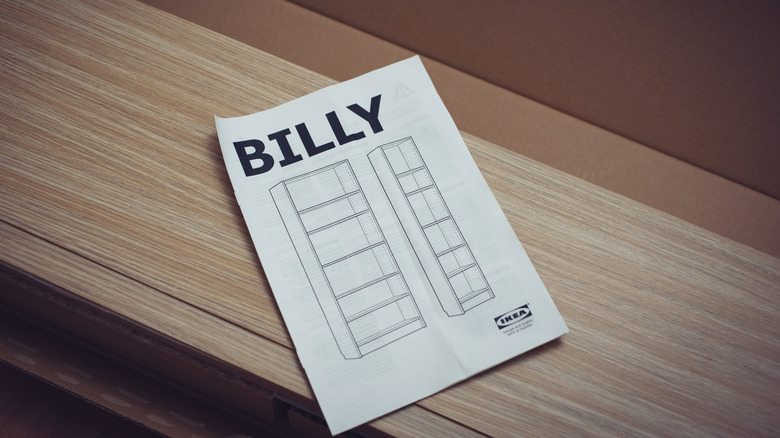
There is nothing more satisfying than finding a new use for something just as you consider chucking it out. And with millions sold worldwide, IKEA's iconic BILLY bookcase is a staple in many homes, yet it often ends up in a landfill once it begins to show its age or suffers a structural break. There are countless ways to reimagine this classic piece; you can combine it with other popular IKEA products to make the ultimate TV unit, or turn the BILLY into floor-to-ceiling shelves, or you could try your hand at TikTok user @thealuminumcarpenter's DIY, which uses the salvageable parts of an old BILLY bookcase and uses them to create a completely new shelving cabinet.
Now, this upcycling endeavor requires some slightly more advanced DIY skills, so it isn't a project you can breeze through in an afternoon. You don't have to be a master carpenter, you just need the wherewithal to work confidently with salvaged materials, combining them with a few extra items sourced from homeware and hardware stores. For this, a steady hand and a willingness to measure everything twice is as vital as a power drill.
Building the bare bones of the custom BILLY bookcase cabinet
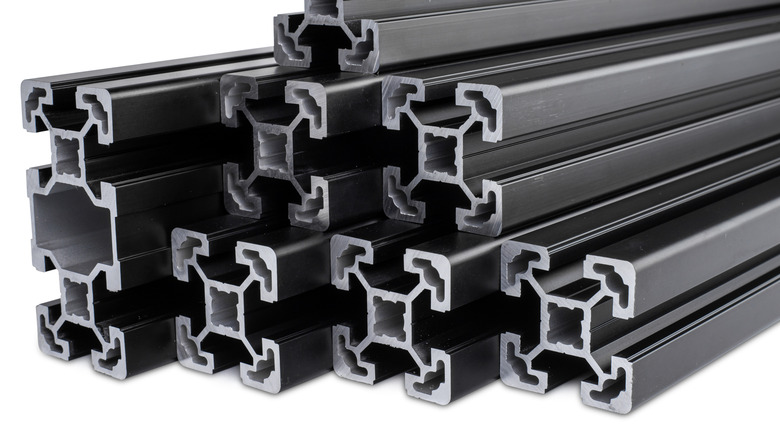
The foundation of this DIY involves building a structural frame using aluminum extrusion profiles. The 2020 T-Slot aluminum extrusion profile will work perfectly, acting as a rigid skeleton for the cabinet boards. A standard BILLY shelf is 10 1/4 inches deep, 3/4 inch thick, and 29 7/8 inches long. Shelves for the narrow unit are 14 1/8 inches long. Use these dimensions as your blueprint, and then you can begin constructing the frame by joining the aluminum rails with internal corner brackets at every junction. An L-shape interior connector like this one is good. To lock these joints together use 10-millimeter M5 button head screws. Once the screws are tightened into the profile channels to lock the joint, a black plastic cover cap is snapped over it to hide the hardware and create a clean, square finish. Quick tip: Do not fully tighten every bracket straight away. Loosely fit everything first, make sure the frame is square, then go back and tighten.
Next, insert the wood panels into the frame, locking them in place using silver joining plates (the flat connectors seen in the video). These plates act as a bridge by driving a screw through one side of the plate into the aluminum channel and another screw through the other side into the BILLY board. You're probably wondering where the piece for the back of the unit is sourced from. Rather than using the original BILLY backing, which is quite flimsy and may not be the right size anyways, using a single 1/8-inch thick piece of MDF (medium-density fibreboard) cut to size is a better idea. Secure it to the rear aluminum rails using joining plates or by screwing directly into the profile.
Adding customizable finishes
To give the unit a high-end, custom feel, DIYer @thealuminumcarpenter adds a top panel with a marble effect. If you want to replicate this, you could source a marble-effect MDF or furniture panel from a local hardware store and have them cut it to size for you. When calculating your dimensions, remember that a standard Billy shelf is 10 1/4 inches deep, as previously mentioned, and either 15 3/4 inches (if you have the narrow unit) or 31 1/2 inches (if you have the wide unit). However, you must account for the extra width and depth added by the aluminum frame, which is typically an additional 3/4 inch on each side, to ensure the top sits flush or provides a slight overhang. Because the project requires a confident DIY hand, you might prefer cutting a piece to size yourself. If so, a great option would be the IKEA EKBACKEN laminate countertop. Either way, you'll want to secure your choice of top from the inside of the cabinet.
Next, a door is needed to finish the cabinet, which requires careful measuring. Of course, you could also opt for an open shelving unit and stop here. If not, grab a ruler and measure (this is where the willingness to measure, and measure again, is key). This build uses inset doors that sit flush inside the aluminum rails rather than on top of them. Because of that, you must calculate a clearance gap so the door can swing freely. To find your door size, measure the height and width of the aluminum frame's inner opening to the nearest 1/16 inch. Following professional cabinetry standards, subtract 1/4 inch from both the total width and height. This allows for a consistent 1/8-inch reveal on all sides, preventing the door from catching on the metal frame.
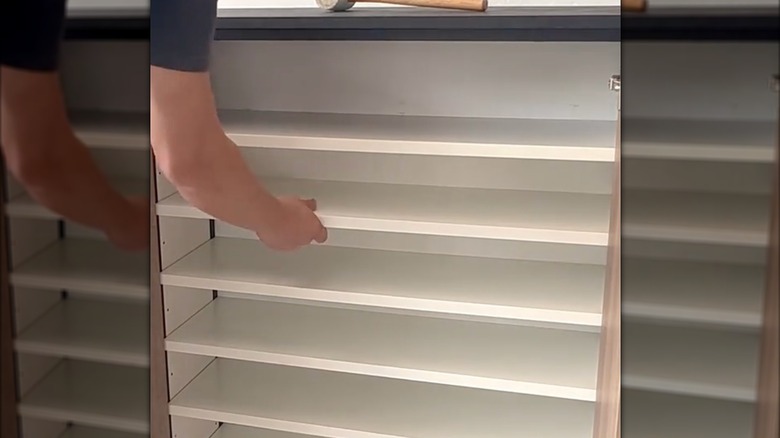
You can order custom-sized doors online or source MDF panels from a local hardware store to cut yourself. You could even have a go at building your own cabinet doors. Whichever route you opt for, the dimensions must be exact for that flush, bespoke look. Finally, to create adjustable shelving inside, insert the shelf support pins into the predrilled holes in the BILLY side panels, tapping them in gently with a rubber mallet until snug. Once the shelves are rested on top, your upcycled BILLY bookcase cabinet is complete.