11 Household Filters You Could Be Forgetting To Clean
Modern homes have so many filters hidden in all kinds of places, and most you probably don't even think about. But once they get clogged or blocked, they waste energy, shorten the lifespan of your appliances, and reduce air quality. A clogged filter forces motors and compressors to run hotter and work harder, hence their lifespan becomes shorter, because they simply wear out faster. A blocked filter can also be a safety hazard. Trapped grease and lint increase fire risk and humidity problems.
Cataloging all the filters in your home then building yourself an easy, regular routine to change them lowers energy waste, stops funky smells, helps appliances last longer, maintains air quality, and reduces fire risk. Most people know that they should change their furnace or AC filter, even if they don't do it as often as they should. But fewer people realize just how many other small filters are tucked into their kitchens and bathrooms and standalone appliances. Nor how often they should change them.
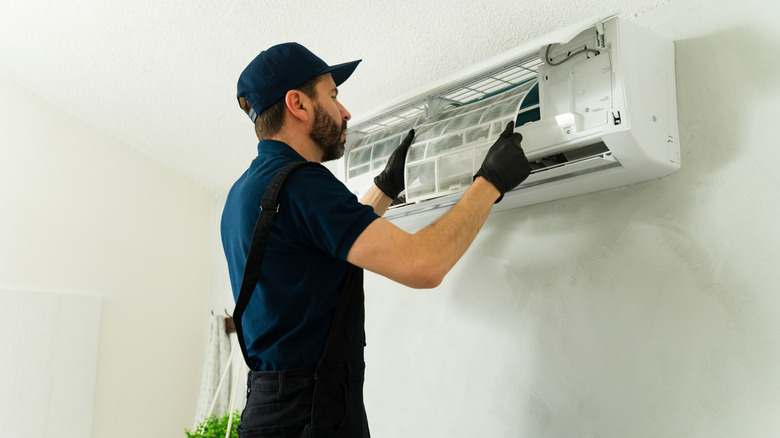
HVAC system filter
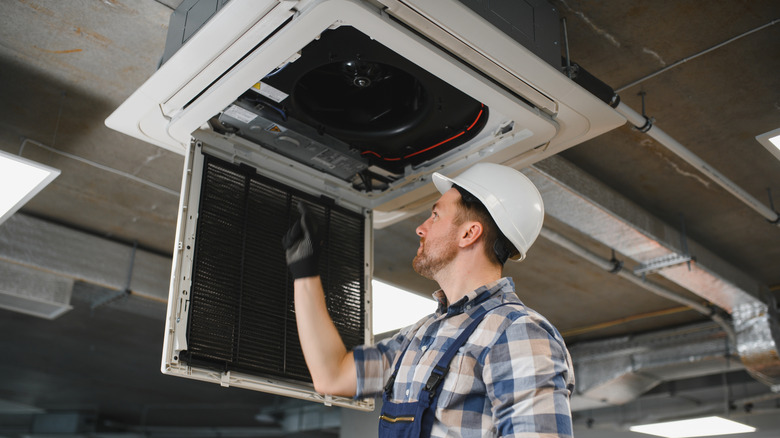
Central heating and cooling systems usually have a disposable filter sitting in the return grille, furnace cabinet, or air handler. This filter traps dust and debris, stopping passing into the main unit. The dirt gets trapped on the filter while the air passes through, over the slower and coils. When your furnace or air conditioning (AC) filter gets too dirty, airflow is choked. This makes the blower work harder, and means the system has to run longer to get to the same temperature. So you're wearing out the HVAC motor faster and wasting energy. Plus, of course, the reduced filtration can make dust and allergens circulate more, which reduces indoor air quality. And, if particles do force their way through a clogged filter, which is more likely the worse the buildup on the filter, it'll coat evaporator coils, further impacting efficiency and eventually leading to overheating or icing up problems.
Check your HVAC filter monthly and replace it every two to three months. In homes with pets, smokers, construction dust, or allergy sufferers, you may need to change the filter every month. Don't just go for the cheapest replacement filter you can find. Make sure it is compatible with your system and is the right size. If you install a filter that's even a tiny bit too small, particles get pulled in, bypass the filter, and coat the interior. Be sure to follow the manufacturer's guidelines for installation, and seat it in the right direction to avoid issues. And further reduce the pressure on your filters by cleaning the vents regularly.
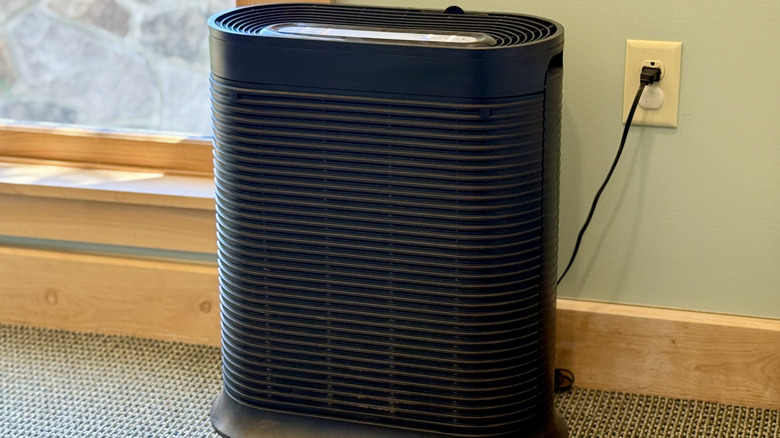
Air purifier filter
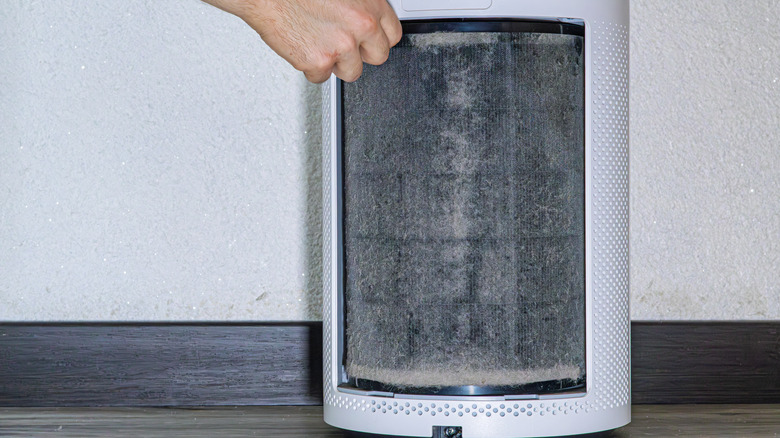
Standalone air purifiers remove dust and allergens, and usually have both a washable pre-filter and a HEPA filter. Sometimes they also include activated carbon cartridges to capture fine particles, smoke, pollen, dander, odors, and other allergens. Basically, they work to improve indoor air quality. But when the filters or cartridges don't get cleaned, they end up full of those fine particles. Then the airflow drops, the unit circulates less air through the filters, and air quality quickly starts to decrease because the filters are full and can't remove any more particles, so the machine is just pumping stale air around. And, as with the HVAC filter, once purifier filters are clogged, the motor is placed under far greater strain, so it ends up noisier and with a shorter lifespan than a machine where the filters are changed regularly.
Check your air purifier's manual to see how often it recommends cleaning or replacing these filters, as guidance varies. Some models, very usefully, have a filter-change indicator light that alerts you when it's time to check the filters. Vacuum or rinse washable pre-filters regularly. As a general rule, do this every month or two. Carbon cartridges generally need changing every three to six months, and HEPA filters need changing every six to 12 months. Again, if you know you have allergy sufferers or a large number of particles or pollutants in your home, you'll need to take more regular action. After all, purifiers only work effectively when the filters are clean, the unit is properly maintained, and the appropriate size for the room.
Dehumidifier filter
Portable dehumidifiers pull air through an intake filter to remove lint, dust, and pet hair, then pass it over cooling or evaporator coils to remove excess moisture, store it in a tank, and slightly rewarm the drier air before pushing it back into the room. Not changing the filter regularly is one of the biggest dehumidifier mistakes you can make. When that screen gets packed with all of those particles floating around your home, the machine just can't move air properly. The unit still runs and, in fact, works harder in an attempt to draw sufficient air in through the intake screen, but it becomes incredibly inefficient, wearing out the motor, costing more energy, and leaving the air in your home excessively humid. As the motor works harder to bring air in, it can force smaller particles through the filter, and these can get stuck inside vital internal components. The coils can also ice up, and the compressor or fan motor can overheat, resulting in a faulty appliance.
Check your filter every couple of weeks and clean or replace it every month or so, or after around 250 hours of operation, during the peak use season. Also, clean or replace the filter before packing the humidifier away to prevent bacteria and mold buildup. Do this at the same time as you empty the water tank for the final time. To make sure you don't forget, it's a good idea to check, clean, or replace the filter at the same time as you empty and clean the water tank.
Humidifier wick or filter
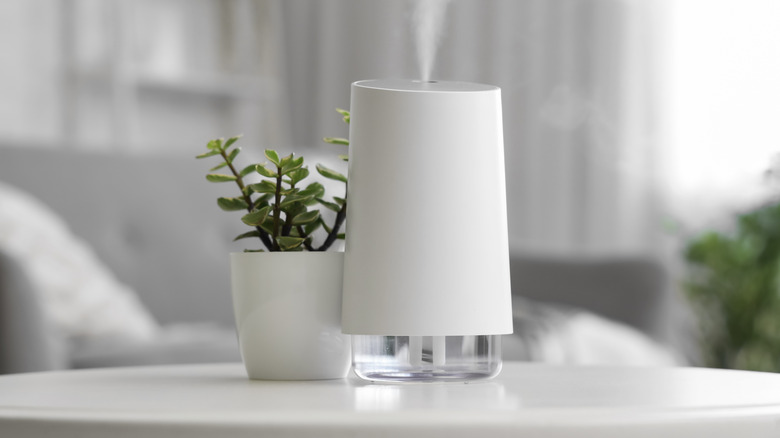
Evaporative humidifiers use a wick or filter to slowly absorb water from a tank. A fan blows across this to add moisture to air that is excessively dry. It sounds simple enough, and because the filter isn't catching airborne pollutants, you may think that it doesn't need cleaning. But the filter in your humidifier is actually building up mineral deposits and, potentially, pollutants from the water, creating a bacteria-filled biofilm. It can also harbor mold. In these cases, the fan is blowing contaminated air into your home, picking up mold and bacteria from the filter as it pushes air across it. Plus, you can end up with a white, dust-like substance settling on furniture, hard surfaces, and electronics, which is actually fine mineral deposits that have been dislodged from the wick by the fan.
With a humidifier, it's more than just changing the filter. Your humidifier needs a proper cleaning. To maximize filter life and minimize the buildup of pollutants, bacteria, and mold, you need to empty, wash, refill, and replace the tank daily. You also need to clean the filter or wick every few days to reduce bacterial and mineral buildup. In most portable humidifiers, it's recommended to change the filter or wick every 30 to 60 days. If you live in a particularly hard-water area, however, you'll need to change it at least every 30 days. And, if the unit starts to produce an odor, clean it (and probably change it) right away. Also note that you can further reduce mineral deposits by using only demineralized water, though this can get expensive over time.
Range hood grease filter
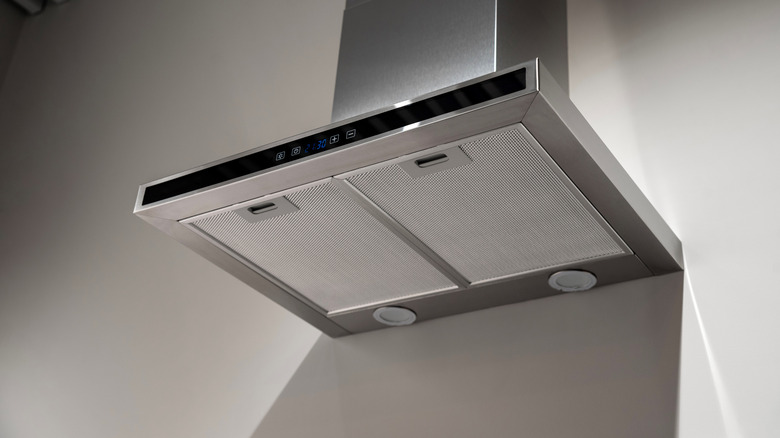
Range hoods pull odors and steam from your kitchen to an outside vent before they can affect your home. They have metal mesh or baffle filters that trap airborne grease and food particles before they can get into the fan or ductwork. Once that mesh or the carbon filter inside become soaked with grease and debris, airflow reduces and eventually stops. Therefore, the hood can't remove steam, odors, and smoke. And it won't be able to take any more grease particles, either. Instead, food odors will linger, your kitchen will be full of steam and condensation, and grease and food particles will get on the walls and ceilings. Plus, a range hood filter clogged with grease is a serious fire hazard. And worse, it's sitting right above a major heat source.
If you cook most days, it's a good idea to remove and clean the filters at least once per month, but some can go three months between cleans. The longer you leave them, the harder they are to get clean. In most cases, the filters are reusable ones, so soak them in hot soapy water or, in bad cases, a degreasing solution. You'll need to check the manufacturer's instructions, but some mesh filters can be put in the dishwasher, too. Let them dry completely before you replace them. And, while you're waiting, take the opportunity to wipe inside the hood and check that the fan and lights are working and free of grease or food particle buildup. You'll also need to replace the carbon filter every year.
Over-the-range microwave filters
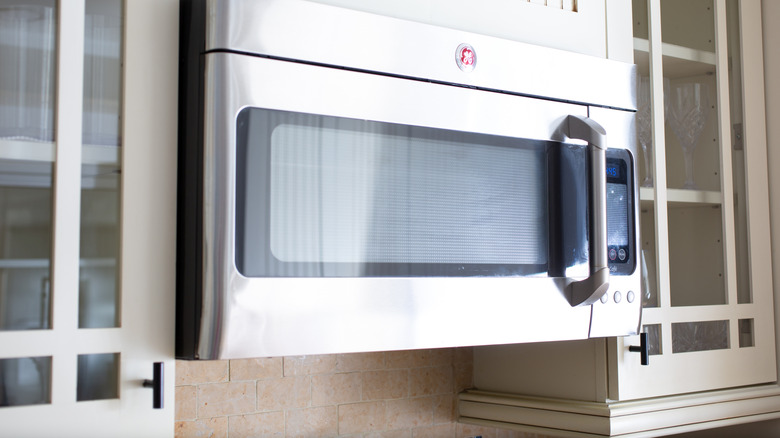
Over-the-range microwave filters tend to have a similar filter setup to a range hood, with a charcoal filter pad and a mesh grease filter. The charcoal filter traps steam, smoke, and odors, and is especially common in ductless or recirculating setups, where there is no external vent. When either the mesh or charcoal filters get full, steam and grease-laden air have nowhere to go, so you end up with condensation and grease staining on your cabinets and ceiling, and on the microwave shell. Plus, a saturated or expired charcoal filter isn't good at absorbing odors, so cooking smells linger in the kitchen. Plus, as the fan works harder to move air, it can pull fine grease particles through the filter and into the internal components. These are hard to remove. Just like a range hood that's full of grease, a microwave cleaner is another significant fire risk.
Treat the metal grease filter the same as the one for the range hood. In fact, you can clean the two on the same day and in the same way. Soak them both in hot soapy water every month to minimize buildup and make cleaning easier. You'll need to replace the charcoal filter every six to 12 months, as a general rule, since these aren't usually washable. It's a good idea to check the instruction manual for recommended cleaning and replacement schedules.
Dishwasher filter
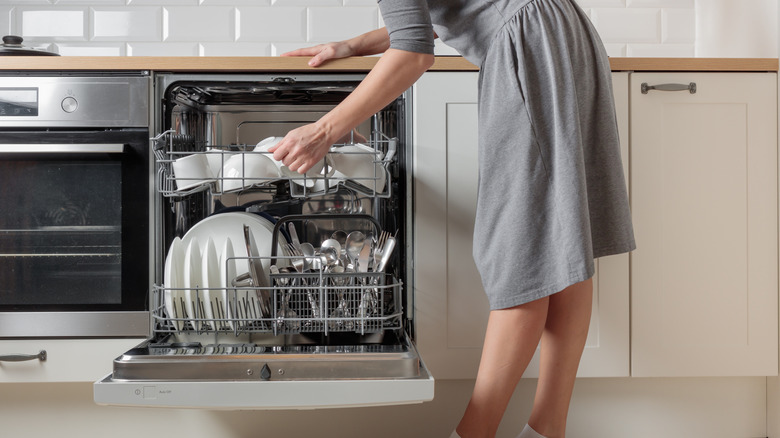
If you've got a reasonably modern dishwasher, it most likely has a manual filter assembly in the bottom. This catches all the food particles so they don't get caught in the pump, pipes, or sprayer arms. If you don't clean the trap and the filter assembly regularly, those particles rot, turn to slime, and restrict waterflow. Plus, obviously, those nasty little particles of old food get flung around the inside of the dishwasher and can end up on your plates, cups, and cutlery. You may also notice an unpleasant smell every time you open the dishwasher, and you'll see residue and cloudiness on your kitchenware. Thoroughly cleaning a dishwasher filter is important, as a dirty one can contribute to a shortened appliance lifespan, increased repair requirements, and error codes as the motor and pump have to work harder to move the water.
Removing the filter assembly depends on your dishwasher model, so be sure to check the manual or the manufacturer's website for guidance. If you only lightly use your dishwasher, for the sake of hygiene, it's worth cleaning the filter at least once per month. Cleaning every three to six months is advisable. It also depends on whether you scrape, rinse, or just load items in with no prep. For large households and those who cook a lot of starchy foods, cleaning every week is the better choice. Lift out the entire filter assembly and rinse it with hot water. Use a soft brush and soapy water to clean mesh screens if needed. Don't forget to look under the metal plate portion of the assembly, if there is one, as this is a common place for thick gunk to accumulate. When you're putting it back together, make sure it's seated properly and securely so that food particles don't bypass the filter and get into the pump, where they can cause real damage.
Vacuum cleaner filter

Depending on your vacuum, you'll likely see a pre-filter plus a main or HEPA filter that traps fine dust before exhaust air leaves the back of the unit. This is particularly common on bagless and cordless models. Once the pre-filter and main filter are overloaded with dust, you'll notice suction drops quickly, so you end up vacuuming harder and more vigorously, yet more debris still stays on the floor and upholstery. Fine particles will also start blowing back into the room through the exhaust, as an overburdened filter can no longer contain them. Your vacuum may also overheat and stop working because the motor has to work harder, generating too much heat. This can damage or ruin your vacuum over time.
Your best option is to keep on top of vacuum maintenance. Don't let the collection bin get overfull, as this can also back up into the filter. Get into the habit of emptying it after every vacuuming session. Tap loose dust out of the removable filters outside once a week and wash the filters following the manufacturer's instructions around once per month. Just make sure the filters are fully dry before you reseat them. It's a good idea to keep a spare set of filters so you can wash one set and make use of the others while the first set dries.
Dryer lint housing and cavity
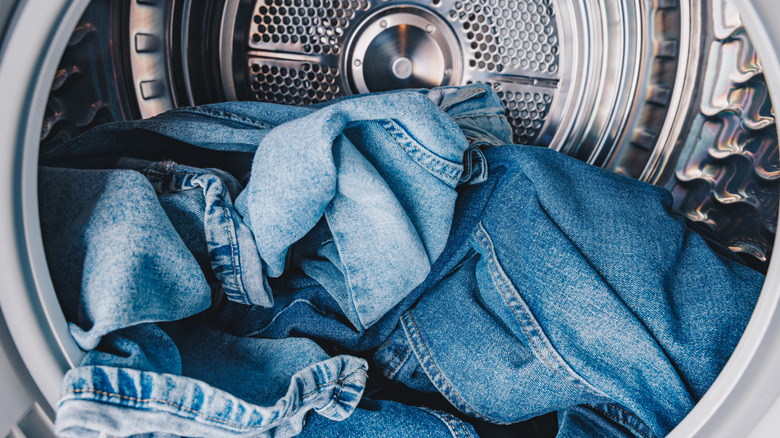
Clothes dryers contain the obvious lint screen that most people know to empty on a fairly regular basis. What they overlook is the cavity around the filter slot and inside the dryer body and vents. Clearing out the lint screen is great, but cleaning the cavity is also important. Skipping this can result in fibers getting really packed into this cavity and the dryer body, which traps heat and cuts airflow. It can also pose a serious fire risk because it's so flammable. So, if you've got a cavity packed with fibers and the machine overheats, there's a real risk that a fire can start and spread quickly. And, if airflow is restricted, your clothes take longer to dry, which uses more energy and overworks the machine.
Start with cleaning your lint screen after or before every load. Just make it part of your regular laundry routine. This helps prevent the lint trap from getting overfull and leaking out into the cavity. And, around once a month, use your vacuum's crevice attachment or a long brush to clean out the filter slot cavity and surrounding area. And don't forget to clean the dryer vent and duct, unless it's a ventless model, of course. But for vented tumble driers, have the vent and ductwork cleaned annually to minimize fire risk and maximize safety and efficiency.
Washing machine pump or lint filter
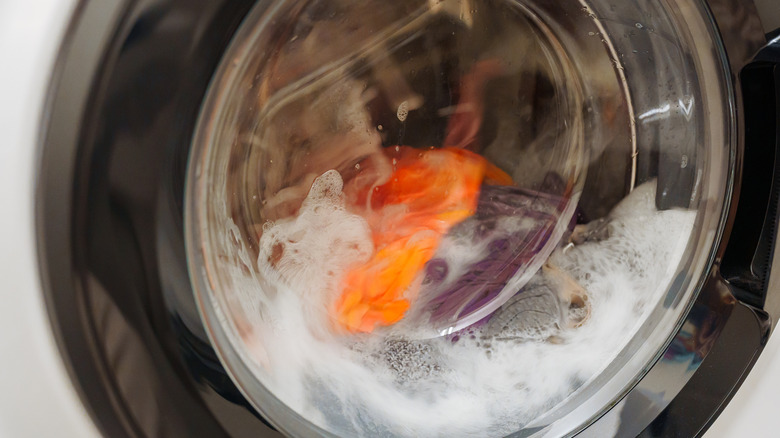
You might not realize it until it gets clogged, you see an error code on the machine, or it starts leaking water, but your washing machine has a pump filter. On front-loading models, the access panel is often located at the bottom of the front of the machine and is pushed to open. If you've never cleaned yours, you'll be amazed at what collects here. Hair, tissues, coins, lint, and other debris can get caught in the filter, so they don't make their way through to the pump as it extracts water from the machine. Over time, this random collection of items and debris builds up, slows drainage, and puts extra strain on your machine. You may also see an error code indicating that the pump filter is blocked. Sometimes water sits and stagnates, and the debris starts to decompose too, leaving your clothes musty or generally gross.
How you open the access panel depends on your particular machine and may require a small tool, but most of the time, you just push, and they pop open. Inside, you'll see a plug of some kind that you'll likely have to unscrew, and many have a small drain hose. Before you open the trap, put a towel on the floor and a shallow basin nearby to catch any water that drains when you open it. Clear out any debris and random items. Do this every one to three months, depending on how much use your machine gets. Just make sure you properly secure the trap plug to avoid leaks the next time you do a load of laundry.
Bathroom exhaust fan grille and housing
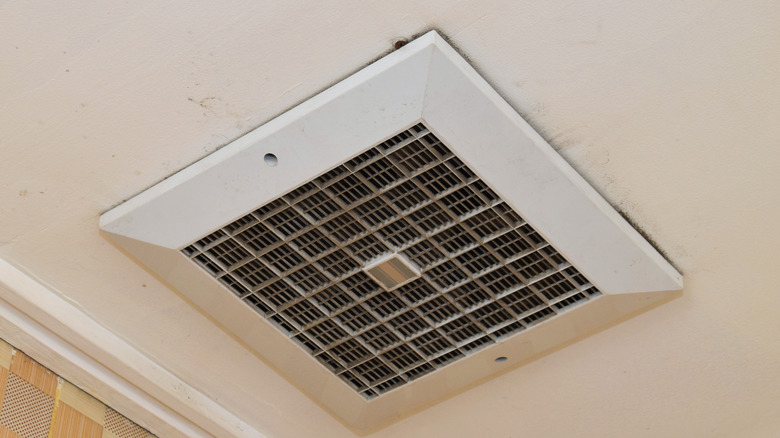
Bathroom exhaust fans pull air through a grille, across fan housing, and out of your home via ductwork. The grille isn't a traditional filter, but over time, it catches dust and lint, and spiders love to help by adding their webs to the grille to catch even more airborne particles. And the same happens inside, on the fan blades and fan housing. Eventually, this reduces airflow, making the fan motor work harder and leaving steam and odors to linger longer, which wears out the motor faster. Heavy lint buildup around the motor can act as insulation, cause overheating, and increase fire risk.
With the power to the fan turned off, clean and vacuum the cover, then pop it off and wipe over the inside and outside of the grille. Gently brush over the fan blades to remove any buildup there, too. But be careful not to bend the blades or dislodge anything. It's a good idea to tackle this job every three to six months.