A DIY Solution To Hide A Washer Hook Up Eyesore & Double Your Storage Space
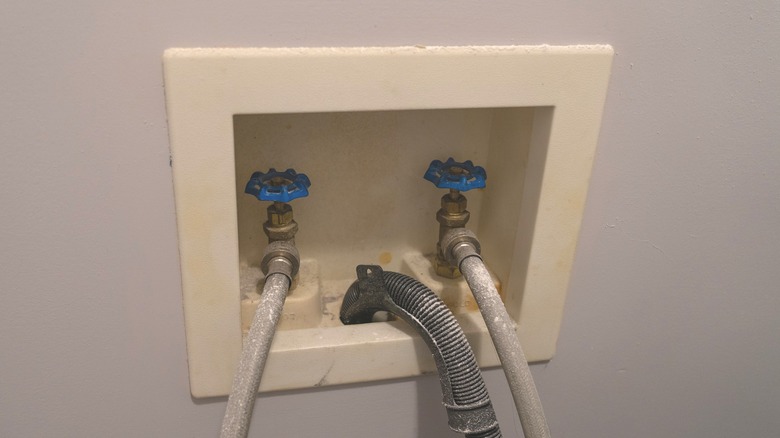
Washer and dryer machine hookups are ugly, unattractive, and imposing! No amount of decor can distract onlookers from the eyesore. Cables and pipes go from the back of the machines into the wall, typically in a square section cut out of the wall. You could just cover the cutout, but why not add shelving space while you're at it? This DIY solution from @anewgo on TikTok conceals the washer hookup eyesore while also doubling your storage space. It's easy to do at home, and it's possible to make it with scrap wood you have left over from other projects.
The creator uses L brackets, screws, and wood panels to make the shelving unit. The unit has a panel that sits vertically and another that sits horizontally. The vertical panel covers the hookup eyesore, while the horizontal panel works as a shelf above the washer and dryer. The shelf is perfect for decor and elegant storage solutions, like wicker baskets and bins. If you lack storage space, simply use the shelf to keep your soap, softener, and lint sheets or wool dryer balls. They'll be easily accessible whenever you need them. Aside from wood, screws, and L brackets, you'll also need a drill or screwdriver, a level, and paint. The paint should match your home's walls, as it'll cover the lower panel and help it blend in with the wall.
Hide the hookups and beautify your laundry room
Whether you're an experienced builder or a new homeowner, you can create this DIY solution in an afternoon. Start by finding two spots on the wall with studs that are on opposite sides of the eyesore. Use your level to help you mark the holes for screws on the studs, making sure they're at the same height on each stud. With a drill or screwdriver, secure the L brackets to the wall on the pencil marks you made.
Now, it's time to create the shelf itself! Paint the shorter piece of wood using paint that matches the wall, or use neutral paint colors, like white, tan, or gray. You may paint both pieces of wood or leave the upper one as exposed wood for a rustic-style shelving unit. There are no wrong choices here, so do what you feel works best with your laundry room.
Once the paint dries, secure the wood panels to each other with your drill and some screws. Be careful during this part, as you don't want the screws to go in crooked and come out the other side. Set the shelf on the brackets, and voila! Your DIY solution is complete. Depending on the size of your washer, you may need to pull the machine out to fit the shelf properly. Pull or push the machines so they fit, and open their lids to ensure they still open and close properly.