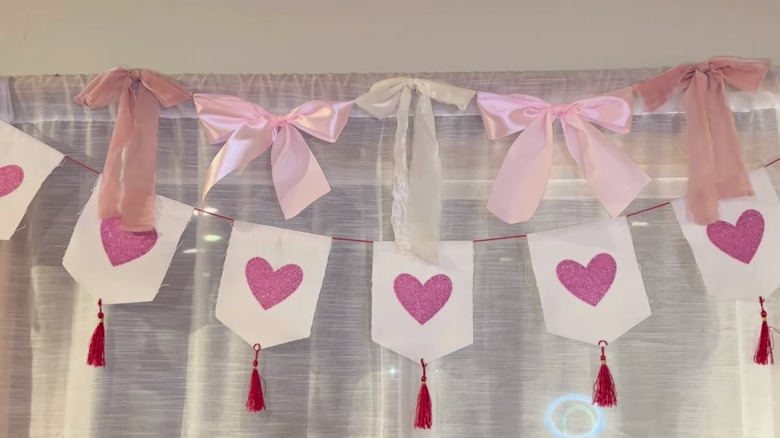
DIY A Beautiful And Affordable Valentine's Day Garland With Supplies From Dollar Tree
Garlands aren't only for Christmas. While they are a staple for winter holidays, you can find ways to incorporate them into every season, including Valentine's Day. Of course, finding some that look beautiful instead of tacky isn't always easy. Thankfully, during this season of romance, you can make your own elegant decor with just a few products from Dollar Tree. All you need to do is make several bows and attach them to create a beautiful garland in no time. It's a great start to mastering the home decor bow trend without going over the top, and it looks adorable once you are done.
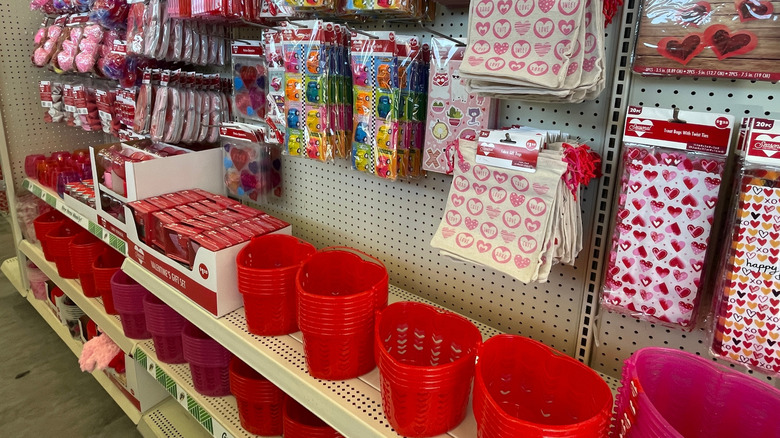
To make this bow Valentine's Day garland, you will need ribbon. Dollar Tree often has seasonal options available during each holiday at an affordable price, especially as you get closer to the holiday. Although every store is different, ribbons like these Floral Garden Assorted Pink Ribbon Rolls are good options that offer a range of sizes and patterns, perfect for Valentine's Day. You will want the majority of your ribbon to be around 2 or 2 ½ inches wide, and a roll or two that is ⅝ of an inch or a full inch wide, like this Seasonal Collection Ribbon. In addition to these, you will also need a pack of zip ties, twine, and a hot glue gun. Once you've gathered your items, it's time to get started making your garland.
Crafting the bows for your Valentine's Day garland
Making bows sounds like a daunting process, but Hound Hugger DIY on YouTube offers a fun trick: Instead of fighting with a knot to make a bow, you can just fake the shape with the help of a zip tie. Additionally, she suggests using ribbons with wire in them, as it helps keep the shape, but if you like floppier bows, a looser material can also work well.
Start with a length of ribbon and make a big loop — The YouTuber makes each of her bows out of 24-inch ribbon strips, but you can mix and match different lengths. "We're going to put the ends together to make like an awareness ribbon, you know, like a cancer ribbon or breast cancer ribbon," Hound Hugger DIY explains in the video. Then, you simply take the center of the top of the loop and pinch it where the ribbon tails intersect. To keep it all together, use a thin zip tie and wrap it around where you've pinched it in the middle. Tighten it most of the way, adjust the ribbon how you like, and then fully pull it closed. When the bow looks how you like, cut off the tail of the zip tie.
Next, take your thinner ribbon, cut a length of about 3 inches, and wrap it around the center of the bow to hide the zip tie, and glue it in place. Don't pull the ribbon too tight, as the poofy appearance adds to the soft look of the bow.
Finishing your V-Day garland & using bows as home decor
After making your bows, it's time to turn them into a Valentine's Day garland. Use hot glue or a few stitches to attach the bottom or top edges of the individual bows' loops together. Don't go all the way up to create a little V shape between them and maintain the bow's appearance. Once you have a garland that's the length you want, loop two lengths of twine and glue them on either end to give you an easy way to hang it. It's a simple way to make a rather complicated-looking design that looks store-bought.
Rather than attaching all the bows to each other, you can instead hang the bows up on a string or a ribbon for a more traditional garland. Doing so allows you to add other items in between the bows, too, such as paper hearts, sweet sayings, or even tiny heart-themed Aldi finds. Now that you know the basics, you can design one for every holiday, or choose more neutral ribbons from Dollar Tree to create a bow garland you can keep up year-round. If you need some inspiration, the Pioneer Woman's daughter proved bows aren't just for Christmas presents, and you can do the same during the holiday of love.