The Crafty DIY That Turns Your Ceiling Fan Blades Into A Statement Piece
We may receive a commission on purchases made from links.
If you have an interest in home design and enjoy DIY projects, you're probably always looking for clever ways to add creative flare to your property. You can paint accent walls to fit your style, hang string lights on your porch, and build a tile backsplash over your stove; but there are a lot of options for home decoration that are easy to miss. Your ceiling fan usually isn't in your eye line and is mainly there to serve the functional purpose of cooling the room, but it's also an opportunity to add some style to the space. You can make your own ceiling blade covers using materials from a quick trip to Dollar Tree. These covers have a sparkly exterior and easily slip onto the blades.
@anylahbanks $2.50 CEILING BLADE COVERS 🫢 #youtubeanylahbanks #fyp #fanbladecovers #dollartreediysanddecor #dollartreediy #dollartwentyfivetree #cheapandeasydiy #ceilingdecorbyme #ceilingdecoration
You'll need to buy five 20-inch by 30-inch Readi-Board white foam boards. These will serve as the main and most visible component of your blade covers. You'll also need a pencil, a box cutter, a hot glue gun, a can of Rust-Oleum metallic spray, and a ribbon roll.
Before you get started, it's important to have a good idea of the final product. Each ceiling fan blade will be covered by a foam piece that will match its dimensions. You can decorate each piece however you desire. A lot of older ceiling fans are eyesores that instantly date your home, so this is a great way to cover them without having to spend a lot of money on a replacement.
How to assemble the ceiling fan covers
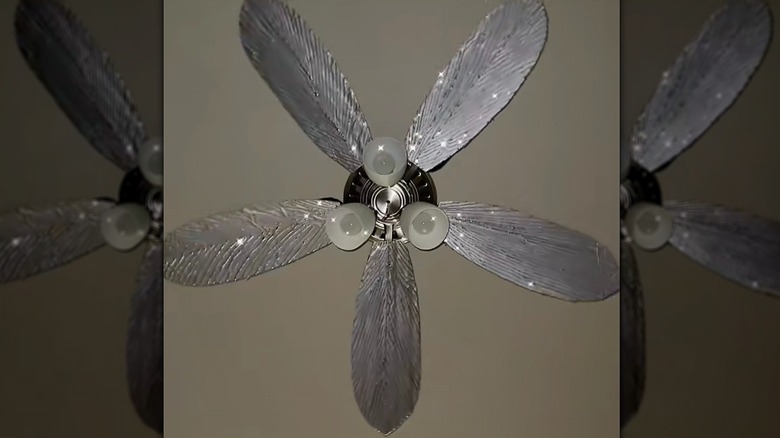
Once you've gathered the materials, you can start this enjoyable arts and crafts project. You should be able to finish in less than an hour. Start by tracing the fan blades on the foam boards. You may have to stand on a stool or ladder to place one of the pieces on top of a fan blade, and then trace around it. Use your blade to cut out your first blade cover. Since all of the blades should be identical, you can use that cut-out to trace the other pieces. Now you can decorate the blade covers as you please. You can make designs using hot glue and, once the glue dries, paint the covers with the Rust-Oleum spray. This should give the blades a reflective luster as they turn.
While the paint dries, cut two pieces of ribbon for each cover to hold them to the blades. (The lengths of ribbon should match the widths of the fan blades.) Once dry, turn the non-decorated sides of the covers face-up and glue each end of each ribbon to the covers. Now you're ready to slip the covers onto the blades. If the style set out here doesn't work for you, you can just as easily decorate these covers with paints and brushes, glow-in-the-dark strips, and sparkles. Paper is also an inexpensive way to update and outdated ceiling fan.