Stairs In Your Entryway Causing Clutter? This DIY Shoe Storage Rack Is The Solution
We may receive a commission on purchases made from links.
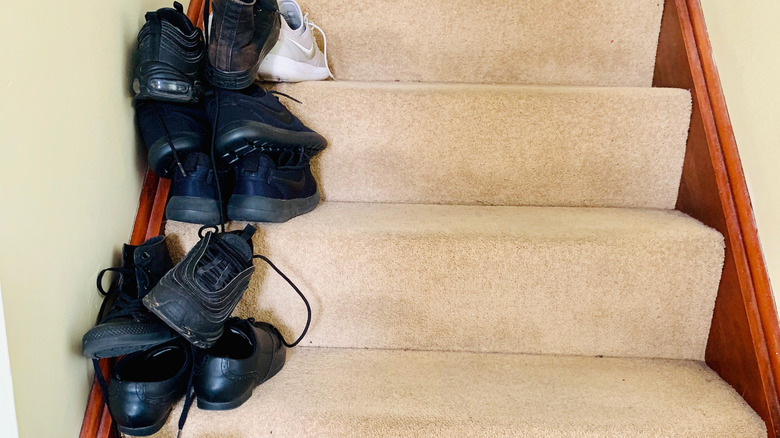
When a lot of folks come home, they kick their shoes off on the steps before running upstairs. This is concerning for a few reasons. First of all, the shoes become an unsightly form of clutter. Second, they can leave dirt on the steps, which is especially a problem if you have a carpeted staircase. But the most important reason not to leave your shoes on the steps is that they can create a dangerous tripping hazard. Luckily, there's no shortage of creative and neat ways to keep your shoe clutter organized. You could always purchase a shoe rack for your entryway, but if you have a small entry zone or a basic interest in carpentry, it's easy enough to build a stylish shoe rack that fits perfectly on the stairs. Simply install a horizontal board that extends out from about one step, then attach it to a vertical board that aligns with the bottom step.
This project is both quick and affordable. All you need are a few basic tools and some building materials from your local hardware store, like Lowe's or Home Depot. First, depending on the width of your staircase, select your wood. You can use a 1-by-6 common softwood board if you have a relatively narrow staircase, or try a wider board if you have more room, like a 1-by-8 or 1-by-12. If you're not sure which board size is best, measure the width of your staircase with a measuring tape. You will need enough room to walk around the shelf comfortably. To assemble the shelf, you'll also need screws, a power drill, a pencil, a level, a stud finder, and wall brackets like these Rudenest Heavy Duty Corner Braces. A circular saw, miter saw, or table saw will be best to cut the boards.
Assemble a few boards for a stairway shoe shelf
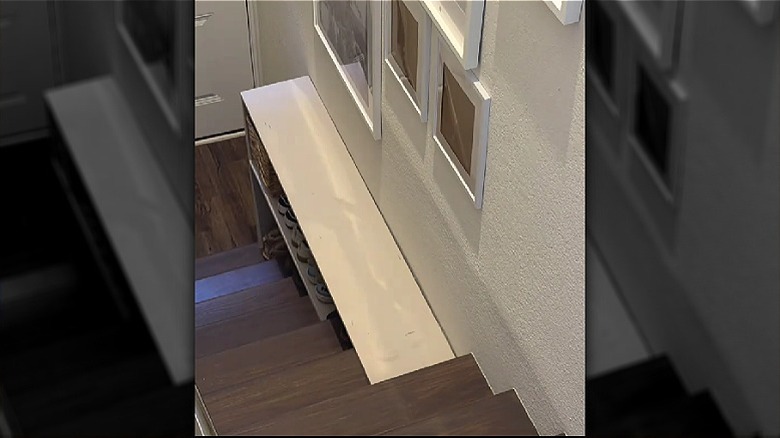
To get started building your shoe rack, lay one board flat on whichever step you choose for the height of your shoe rack, which can also serve as a console table. Most stair steps have a height of 4 to 7 3/4 inches, so if you want your console to be roughly 3 feet tall, the horizontal board will likely be placed somewhere between the fifth and ninth step. Once you've adjusted the board to ensure that it is level, stand at the bottom step and mark a line on the wall with your pencil. Next, measure and mark vertically from the bottom step of the staircase to the line you've just drawn. This is the point where your two boards will meet. Measure and cut the boards, with the length of the first equal to the vertical distance and the length of the second equal to the horizontal distance.
Place the boards where they will go on the staircase and screw them together at a 90-degree angle where you've marked the wall. Use your level to make sure the boards are plumb, then attach them to the wall studs using at least one corner bracket. You can also use brackets to stabilize the two boards together where they meet a 90-degree angle. Finally, measure the distance between the third or fourth step on the stairs and the vertical board. Cut a third board to that exact length and attach it with a bracket to make an additional shelf. Then you can paint the shoe rack if desired, let it dry, and organize your shoes on the shelves. If you require other shoe storage solutions, try this free-standing solution you can slide in anywhere you need it.