14 Pothos Hacks And Care Tips For A Thriving Plant
We may receive a commission on purchases made from links.
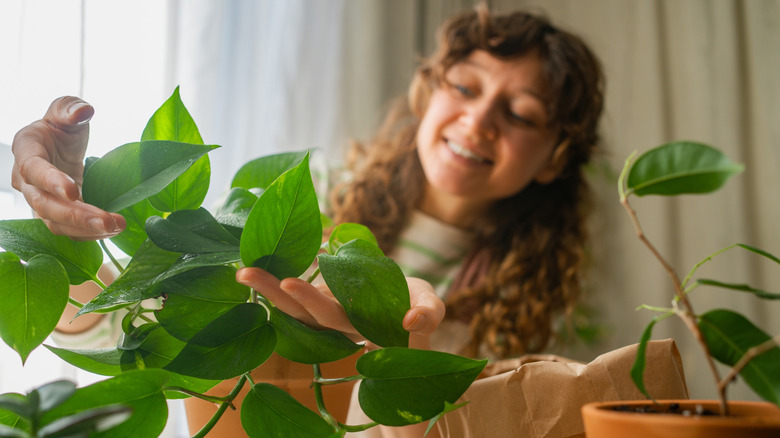
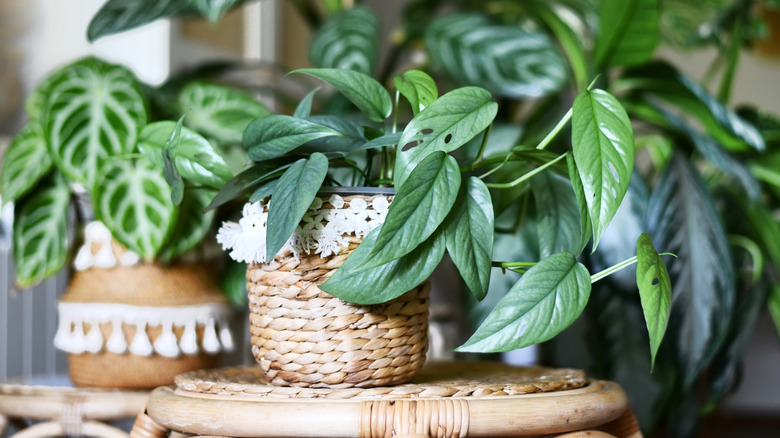
Pothos (Epipremnum aureum) are notoriously tough and forgiving. They don't, however, just turn into those thick curtains of foliage you see in photos without some effort and care from you. Often, pothos end up looking sad and spindly. So even though they're alive, they're straggly, with mostly bare vines, and the leaves that are present tend to be the same washed-out color, having lost their variegation.
So, yes, pothos are hardy houseplants and are easy to care for. But low light, irregular watering, and the wrong or depleted soil can hurt them, even if it doesn't kill them. If you want your pothos to look full and leafy, there are a few simple hacks that are very effective and can help take your plant from stringy to lush and thick. The main "trick" is to mimic how pothos grows naturally, which is actually climbing upward rather than trailing and dangling over the edge of the pot.
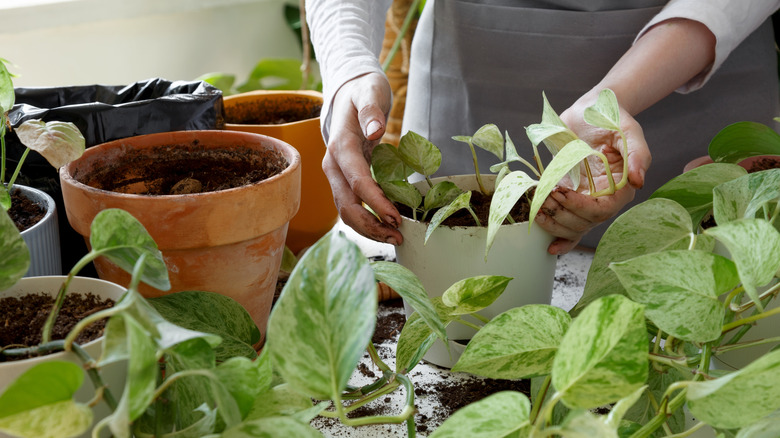
Use a chunky soil mix instead of dense, straight-from-the-bag compost
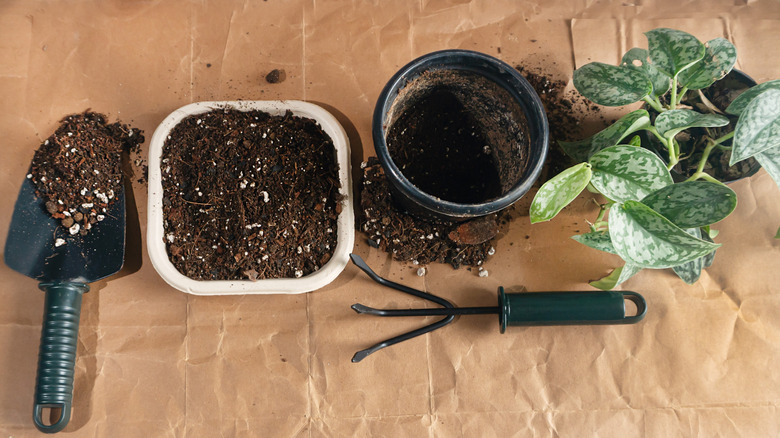
I don't recommend regular compost for pothos, as it has a habit of holding too much water and compacting around roots. This is particularly true during cooler weather when the plant uses less water, and for plants kept in plastic pots, as plastic doesn't breathe and release moisture like terracotta. Yes, pothos needs regular moisture, but it also needs plenty of air pockets around the roots and healthy, lively soil with beneficial microbes in it, which you can't achieve with heavy, wet soil. Instead, the plant will struggle and, eventually, root rot will set in, and it will die off.
Get some good-quality houseplant compost and mix it with an equal amount of perlite. This dramatically increases drainage and maintains airflow. I make most of my own soil mixes, and for pothos, I tend to do 50% houseplant compost, 25% perlite, and 25% orchid bark or coco chips. The addition of the woody material improves drainage and simultaneously feeds the soil life and very slowly releases nutrients to feed your pothos.
Water top-down to flush mineral salts
There are many types of pothos, and these particular plants don't like to stay too moist. In their natural habitat, they experience intense rain followed by fairly long dry periods, so it makes sense that, to get the best from your pothos, you should try to mimic that climate. The easiest and most effective way is to give the plant a thorough soaking, then let it dry out completely before you water again. You're much better off slightly underwatering this plant than overdoing it. Pothos can survive a bit of drought, but it can't survive being stuck in wet soil, with its roots starved of oxygen. One of my best tricks is to alternate how I water, switching between watering from the top down to the bottom up.
Watering from the top of the soil flushes out any buildup of mineral salts. It also flushes out any stagnant water. If you stand the plant in the shower, it'll also clean the leaves while watering the plant, as an extra bonus.
Water bottom-up to calm fungus gnats and surface mold
Sometimes, you'll do everything right, but if the humidity is a bit high, you can still end up with those pesky little fungus gnats all over the top of the soil in your pothos pot. Or, in extreme cases, you might even see mold on the soil's surface. If there's mold, remove the top layer of soil. You don't want those spores to spread. If you've got fungus gnats, you need some yellow sticky paper to catch them. But you also want to stop the problem from recurring.
This is why I like alternating between top and bottom watering. When I bottom-soak plants, I tend to do it by standing them in a large bowl or bucket and filling that container with water. I leave the plant to soak for about an hour, then remove it and stand it in the bathtub or on the kitchen draining board to let the excess water run out. The plant can drink its fill from the bottom up without exacerbating surface mold or fungus gnat issues.
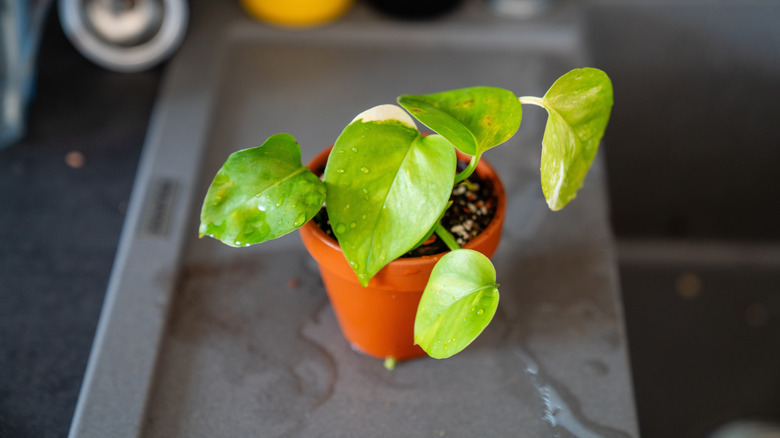
Act quickly to save your pothos if leaves turn black or mushy
With pothos, one of the first clear signs of root rot is black leaves or soft, mushy stems. If you notice black spots at the petiole bases, there's a high chance your pothos has root rot. The petioles are the slimmer stalks that join the leaves to the main stem. If these turn black or rot off, you've got problems. It's true that root rot may not be the culprit, but it is the most likely. And the sooner you spot the signs, the better your chance of saving the plant.
Yes, the main reason plants get root rot is too much water, but just watering less isn't a cure. While you do need to get your watering in check, you have to tackle the actual rot, too, because even if you stop watering too much, the affected roots are still rotting in the soil, and the rot will continue to spread and eventually kill off the whole plant.
So, if you spot blackening or softening leaves and stems, take the pothos out of its pot and gently wash the roots clean in a bucket of lukewarm water. Look for the mushy, squishy, black, or brown bits. Be ruthless and cut them away, and take a small margin of healthy root tissue when you do, too. This ensures you're not accidentally leaving any tiny specs of rotting roots that will infect healthy ones. Then, repot the pothos plant in fresh, chunky potting mix, as described above. Also note that, if you've removed a lot of root, you may need to place the remaining plant into a smaller pot, as pothos doesn't like too much room around it.
Diagnose brown spots before you start hacking off leaves
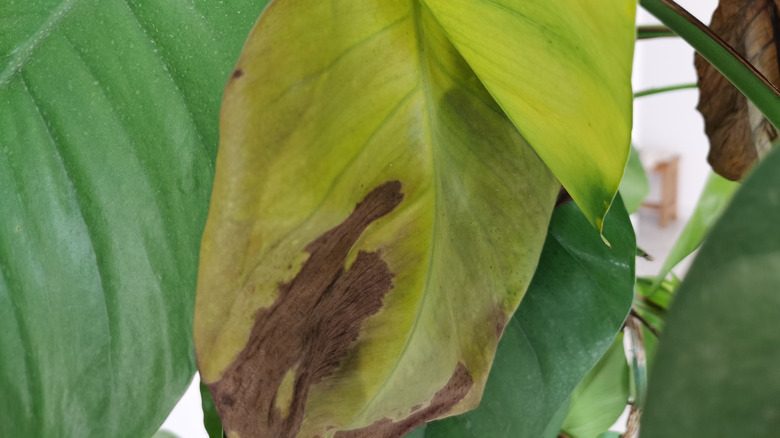
There's a lot of misinformation about just pruning off pothos leaves at the first sign of browning. Instead of doing this, you should use these leaves as clues. You need to identify the cause of the brown spots to stop them from appearing again or becoming an even bigger problem. Sun scorch, cold drafts, too much water, not enough water, fungal leaf spots, mineral salt build-up, too much or not enough food, too much constant dry air, and other issues can cause brown leaves.
Sometimes, just looking at the pattern of brown bits can tell you a lot. For example, if the tips or edges of newer leaves on one area of a plant are all brown, there's a good chance it's due to a draft, light, or heat. Brown patches on leaves pointed at a sun-facing window are probably heat or light scorched. Older leaves going brown and soft near the base of a plant often indicate stress from overwatering. Irregular tan brown spots with a sickly yellow halo are indicative of a fungal leaf spot. Once you've got a good idea what you're dealing with, you can remove the leaves and employ the fix, so the problem doesn't come right back.
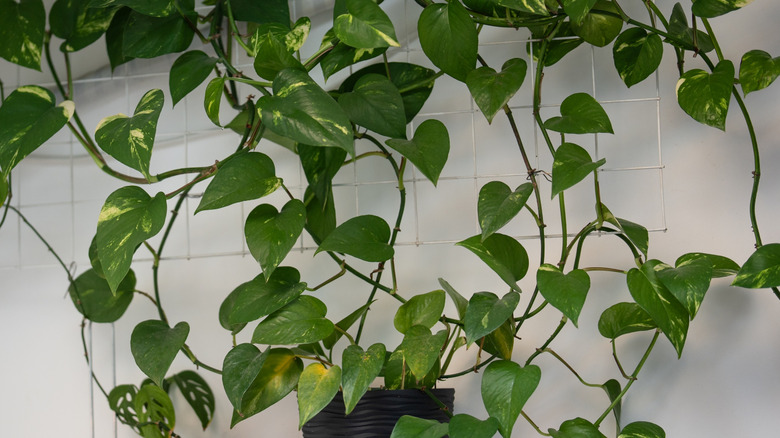
Coil long vines and bury nodes when you repot
Pothos naturally root at their node points. This is also where you get leaves popping out. But when all the nodes are left to dangle, which goes against their natural habit, you get long, spindly vines. And the leaves develop further apart, and further from the base, leaving your pothos sparse, with a thin or bare crown.
I recommend you coil some of those long vines. Basically, you coil them by hand, and tuck every third or fourth node into the soil of the pot. Be mindful that you only bury the node, not the leaf. And bury nodes that have aerial roots or root starts already, as these will anchor in the soil quickly. This action makes the plant immediately look fuller and gives it a chance to actually root and produce lots of lovely leaves close to the crown, before the new rooted portions start trailing again.
Use a ring of rooted cuttings to hide old, woody stems
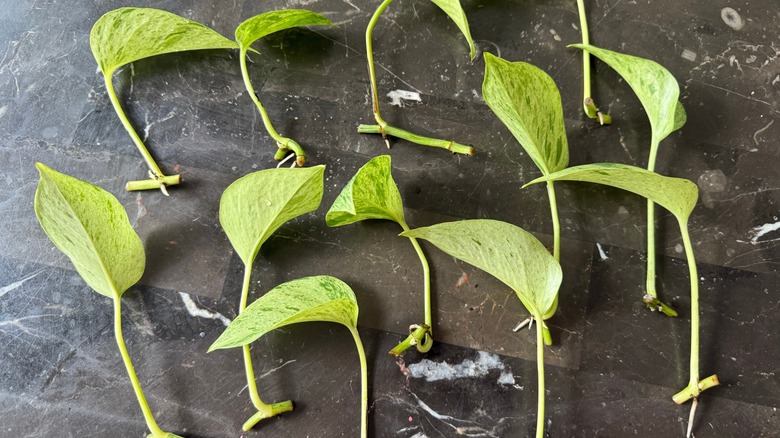
As they age, pothos vines often end up woody at the base, near the crown. The leaves die off, and you're left with an unattractive top and leaves only further down the vine. If you don't have enough lengthy vines to try the coil and bury trick to thicken up the look of the crown, you can take a few cuttings and use those instead.
Take one healthy vine or a few long healthy ones. Cut enough one or two-node sections to circle the crown in the pot without depleting the actively growing vines too much. You can root them directly in small pots of chunky soil mix or in water until roots develop, then transplant them into the soil around the mature, woody crown. As they take root and begin to fill out, they'll mask the older crown without strangling it.
Air-layer special vines before you cut them back hard

Air-layering your plants sounds much fancier and far more complicated than it really is. When you've got a pothos that you're really sentimentally attached to or one that's rare, you probably want to save it. But if it's old and neglected (maybe it only has one good vine or a few good nodes left), cutting it back or trying to coil it, or cutting and propagating those last few nodes, is risky. Which is where air layering comes in.
Find a healthy node and wrap it with moist sphagnum moss, then wrap the moss in a sandwich bag or some Saran Wrap to keep it moist. Check it every week or so and add a few drops of water if the moss is dry. In about six to eight weeks, you should see roots on the node, at which point you can safely cut the newly rooted node (propagule) and pot it up.
Grow pothos in water forever
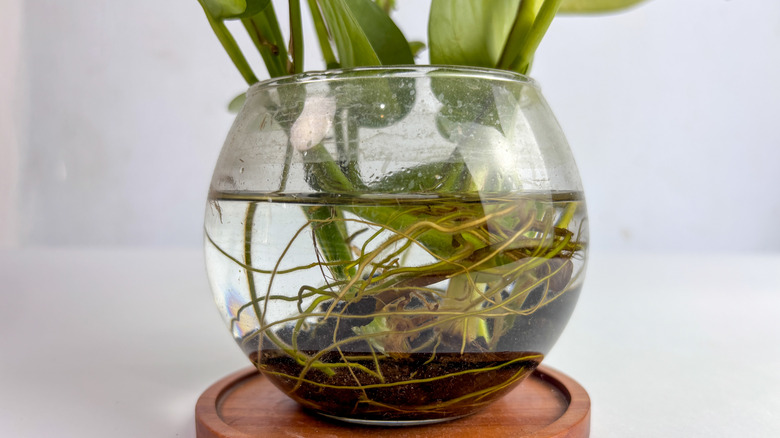
Yes, I did say pothos don't like being wet, and that's true when growing in soil, but they actually do pretty well in hydroculture, or growing in water. Roots of water-grown plants adapt to life underwater. You do need to provide supplemental nutrients occasionally, obviously. But it's pretty low-maintenance and surprisingly easy.
You can use a clear or tinted jar. I like a clear jar, because watching the roots grow is fascinating. But a tinted jar slows algae growth and lets you refresh the water less often. You'll need a pothos cutting of at least 3 inches, with at least four leaves, to get off to the best start. Place it in the clear glass container. Add a very small amount of houseplant fertilizer, or get specific hydroculture fertilizer, roughly every month. Change the water and clean the jar every week to limit algae buildup. At each water change, check for and remove dead or slimy roots.
Use a muddy mix stage when moving water-grown cuttings into soil
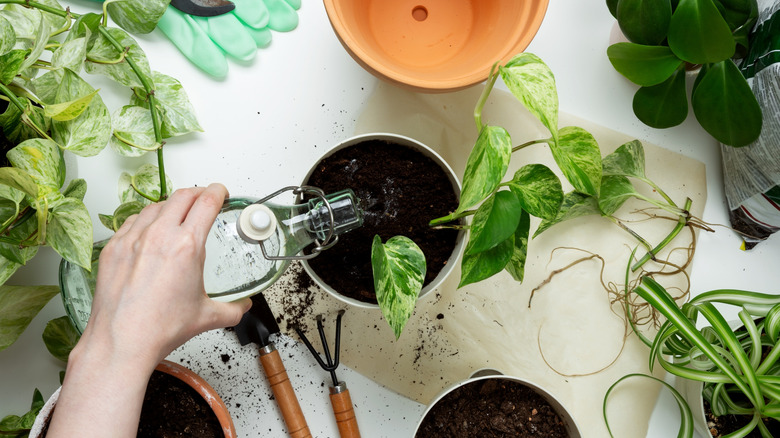
As I just said, water-grown roots adapt to living in water, so if you're taking a cutting that you propagated just in water, you need to transition it gently. Water-grown roots don't like suddenly being placed in a dry soil mix. The plant will likely end up going into transplant shock. So, go for a muddy mix transition.
Once the cutting has at least an inch or two of roots, create a very wet soil and water mix. It should be a pretty sludgy version of your regular chunky pothos potting mix. Set the cutting into this wet muddy mess and leave it for a week to ten days, where it should gradually dry to its regular consistency. During the transition, make sure the young pothos gets plenty of bright but indirect light to encourage growth and minimize stress. And don't be surprised if the little pothos does look droopy and sad for a few days while it adjusts to life out of water.
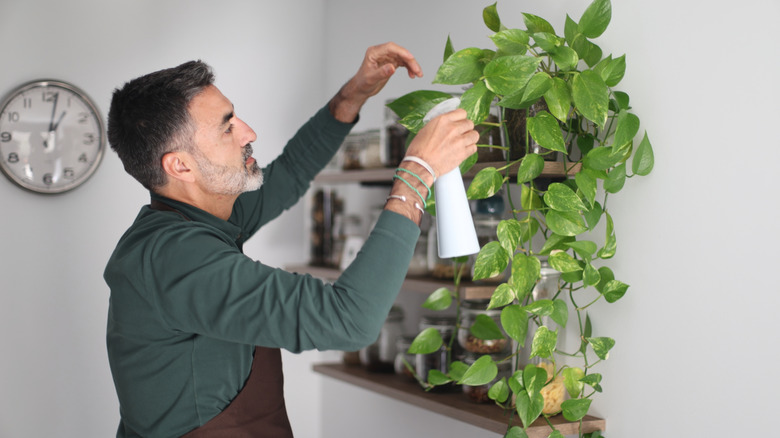
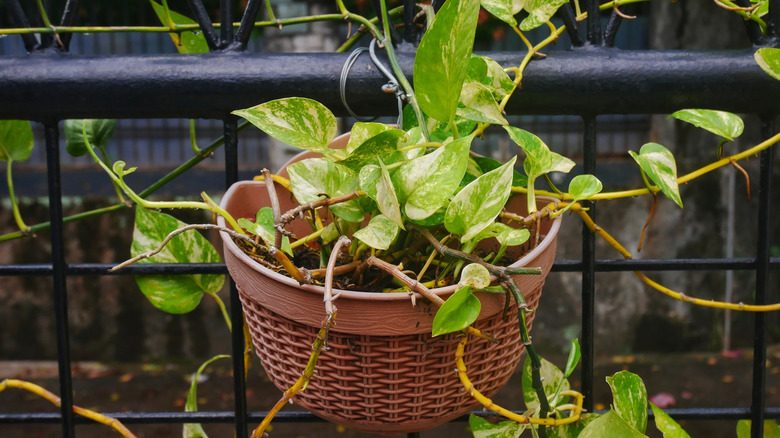
Train pothos up a support to get bigger, showier leaves
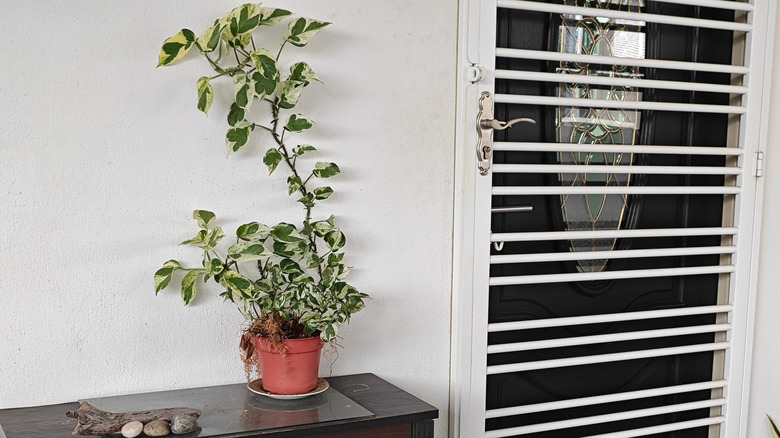
Pothos is a climber. Lots of people grow it as a trailing plant. They tend to forego any support and just let it fall over the side of the pot and trail down. But it wants to climb. That's why it produces aerial roots. In its natural habitat, these aerial roots grab hold of things, anchoring the plant to whatever it grabs so it can climb. If you encourage your pothos to grow like it wants to, you'll get lusher, fuller vines with larger leaves.
As a master gardener and permaculture enthusiast, even with my houseplants, I like to mimic their natural environment as best I can. So, I recommend letting your pothos climb. All you need to do is give it something to grab hold of. The easiest solution is a moss or coco coir pole. You can also use a trellis to get a wide, flat leafy look rather than a cylindrical totem-style. Make sure whatever you choose is securely anchored in the pot so it doesn't tip over as the plant grows and gets heavier.
If you go with a moss or coir pole, mist it occasionally. This encourages the aerial roots to grip and anchor into the column. Some people like to let their pothos run wild and climb up the wall and even across the ceiling, using coir-covered wires or trellises. If you want to try this, remember that, once you start, you are largely stuck with the pot where it is, because the vines will attach to the things anchored on the wall or ceiling. That's okay, but it does make things like repotting or even watering more of a challenge, because you have to do it in place without too much movement.
Prune plain green reversion stems to protect variegated patterns
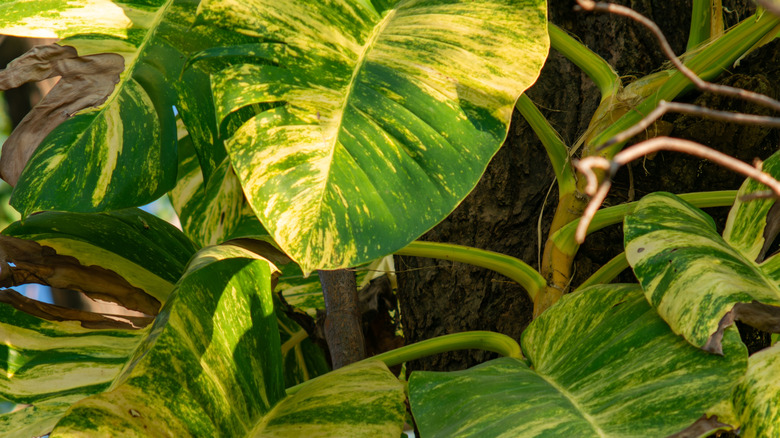
The greener the leaf, the more efficient it is at photosynthesizing. Therefore, with variegated pothos specimens, like manjula or marble queen, you'll find all-green leaves will quickly outgrow the variegated or lighter colored leaves. They'll eventually dominate, and your once beautifully variegated pothos will end up looking like a plain dark green one.
The fix is to cull these "reversion" stems. But you only take them back to the point at which the variegation begins. Make sure you cut just above a node that still has at least some variegation on it. That way, the new growth will stand a good chance of being variegated too. You don't have to cut out every plain leaf. It's totally normal for a variegated pothos to have at least some plain leaves. You only want to cut back when whole stems are reverting to plain green.
Group pothos with other plants in winter to boost humidity without gadgets
Pothos doesn't need super-high humidity. However, in winter, the air in your home is much drier than normal, because you have the heating on. Excessively dry air can dry out your pothos, and it can end up with thin, papery leaves with crispy edges. You can use a humidifier if you have one, but you don't necessarily need to go and buy one specially for this.
If you have other house plants, do them all a favor and cluster them together. And make sure you don't put the whole cluster right in the path of a hot air vent or next to a radiator. You can further boost humidity by making a super-simple pebble tray. Basically, take a large, shallow tray, like a baking tray, or a series of shallow trays, and fill them with a layer of pebbles. Then add water to just below the top of the pebbles. Sit the plants on top of the pebbles. The water evaporates slowly, increasing localized humidity, so you essentially create a nice humid microclimate around your pothos and other plants. Just make sure you refresh the water once a week.
Use cloning paste to fill gaps and leggy vines
Sometimes a pothos vine gets thin, or you end up with gaps because a leaf dropped off. This is normal, and lots of the other tips here will help you fix that issue in a roundabout way. Like coiling and rooting or air layering to get a whole new plant. But you can actually fill the gap and keep that vine intact without propagating a new plant.
Cloning paste, or keiki paste, like this special cytokinin formula from Miracle Labs, doesn't work for every plant, but it's amazing for pothos. Keiki paste is a waxy paste usually made of a carrier like lanolin and a high concentration of cytokinin, as well as key minerals and nutrients. Cytokinin is a potent plant hormone that triggers new foliar growth. To use it on your pothos, find the empty node that you want to fill with foliar growth. Make some small nicks in the outer layer or skin of the node. Take a cotton bud or a toothpick and apply a small amount of the cloning paste. Follow the directions, and don't use too much. A little goes a long way. And don't overstress your plant by applying the paste to too many nodes at once. Just do one or two, let them grow, then do another one or two in a few months.