How To DIY Your Boring Cork Board Display Into A Statement Piece
Why put up with a plain, boring cork board in your kitchen, when you can DIY a gorgeous version for very little cost? There are plenty of clever ways to repurpose an old cork board with simple materials you have around the house. But what if all you're searching for is a way to breathe some new life into your favorite organizational tool? It's actually pretty easy to upgrade your regular cork board into an aesthetically pleasing, Pinterest-worthy work of art. Simply use a striking piece of fabric and some fun colored thumbtacks to give it a colorful new look.
All you need for this budget-friendly DIY is an old cork board, colorful fabric, scissors, craft glue, an old credit card, multi-sized wood stars, thumbtacks or pushpins, and paint. Be sure you get enough fabric to cover your entire cork board. It should be able to fold over the edge completely on all sides. Some fun fabric choices to consider are vibrant colored tartan, floral, or gingham. But you can really use whatever fabric speaks to your personal style. You'll be using the wooden stars to craft custom thumbtacks. Pick whatever wooden cutouts you're drawn to for this craft. You can also opt to buy pre-made unique push pins at places like Office Depot or Etsy. Now that you have your materials gathered, let's tackle this DIY together.
How to customize your cork board
Start by laying down your swatch of fabric. Place your cork board over the fabric. Use the cork board as a guide to cut the fabric, leaving about a half inch to an inch wide perimeter that can fold over the edges. Cover the entire front of the cork board, as well as the edges, with craft glue. Carefully drape the fabric over the cork board. Use your old credit card to smooth the fabric over the cork. Secure the edges with your finger. Allow the project to dry.
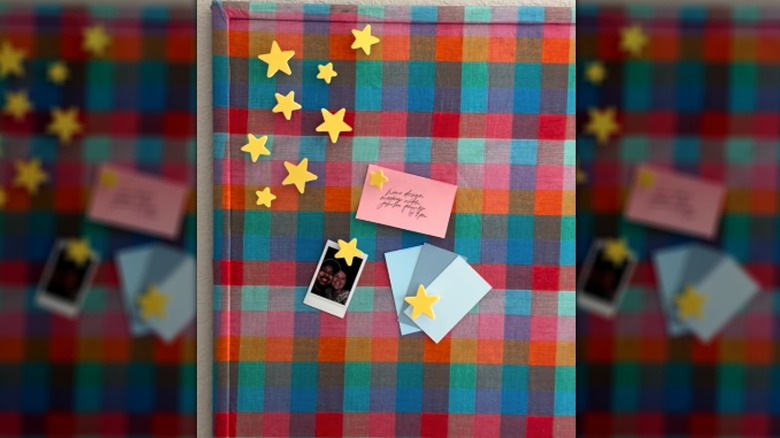
Flip the board over and apply a line of glue where the fabric ends. Secure the fabric to the back so the edges are tucked away neatly. While that dries, glue your wooden stars to the thumbtacks. Once these are dry, paint them a color of your choice. Yellow, sparkly gold, baby blue — whatever looks best to you. You can then finish off your thumbtacks with a layer of Mod Podge to seal everything up.
Once everything is dry, you can hang up your cork board. Push your pins into place, and voilà! You have a revitalized, stylish new piece of decor. Not only does this DIY offer an excellent way to decorate your basic cork board, but it also serves as a practical way to cover up the wear and tear of old cork. Further customize your new cork board by incorporating different types of unique push pins, mementos such as Polaroids and old concert tickets, or hooks for hanging up important items.