Close The Gap Above Your Cabinets With This Sleek DIY Upgrade
We may receive a commission on purchases made from links.
Your kitchen cabinets help to create your overall room design. If you have an empty space between your cabinets and the ceiling, you may not know what to do with it. Some people turn it into a storage area to hold plants and decor. Others might try to cover that empty space with a trendy art piece. However, since most people aren't tall enough to reach the overhead area, it often becomes dusty or neglected. So, instead of leaving the empty space there, you could close that gap with a sleek DIY upgrade. Using some support boards for framing, screws, wood paneling, a brad nailer, paint, and crown molding, you can extend the cabinet faces and beautifully enhance your kitchen space.
You'll need some necessary tools to get this job done. You will need some horizontal support boards, like 2-by-2s and 2-by-4s, that can attach to the ceiling and the top edges of the cabinets and line the row of cabinets vertically. You also need to get wood paneling for the front of cover cut to size. Caulk, brad nails, and your brad nailer are needed to secure everything together. These GRK Cabinet Screws are ideal for the wood, because they prevent splitting and include washers to help clamp to the wood tightly. Since ceilings are not always level, it's helpful to add some molding at the top, like this Sunnyglade Ceiling Crown Molding Trim. Keep in mind if you have corners to go across, you will need to cut your trim at a 45-degree angle with a miter saw so the pieces meet cleanly. Finally, choose your paint color to either match your cabinets or contrast them to create a different aesthetic and complete your design.
How to build above your cabinets
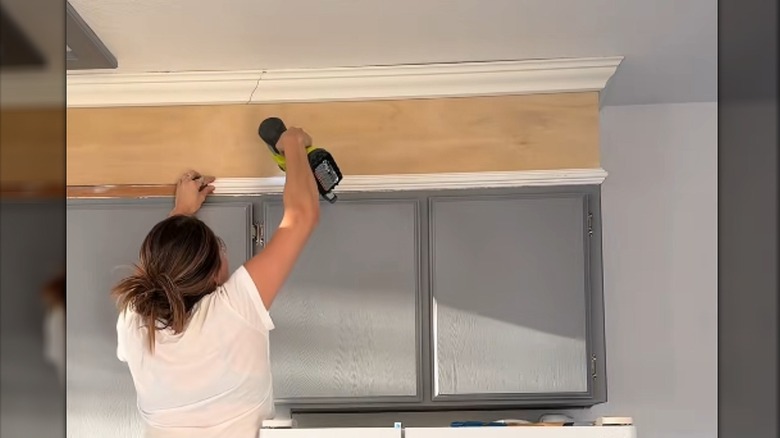
First, prep the cabinets by removing any existing trim or molding and removing chunks of old paint for a smooth finish. Measure and attach one support board along the top edge of your cabinets and one into the ceiling joists above. Position these about ½ to 1 inch back from the front edge to leave room for your molding to be flush to the cabinet face frame. Use a stud finder to locate solid framing in the ceiling to screw your supports into. Next, cut pieces of the support boards spanning the gap from the top of your cabinets to the ceiling, and position them vertically as added support for the paneling.
Next, measure and cut your plywood panels across the full length of the gap, and secure with your brad nails to the vertical and horizontal supports. Your ceiling may not be exactly square, but adding the crown molding to the ceiling and across the tops of the cabinets will cover any uneven panels. Measure and cut your molding to fit the full length, securing each piece to the support boards along the ceiling. You'll use the 45-degree cut for the corners. Add in a smaller piece of trim underneath the molding to cover gaps or spaces. Caulk the edges where your trim meets the paneling to seal gaps.
Finally, sand for smoothness and fill any nail holes with wood filler and let dry. Then prime and paint the paneling to match your cabinets. You can paint the cabinets another color if you want to change it up. If you have a smaller kitchen, consider a cabinet color to help make it look bigger, such as beige or gray.