Repurpose Empty Pringles Cans Into Eye Catching Wall Art With A Creative DIY
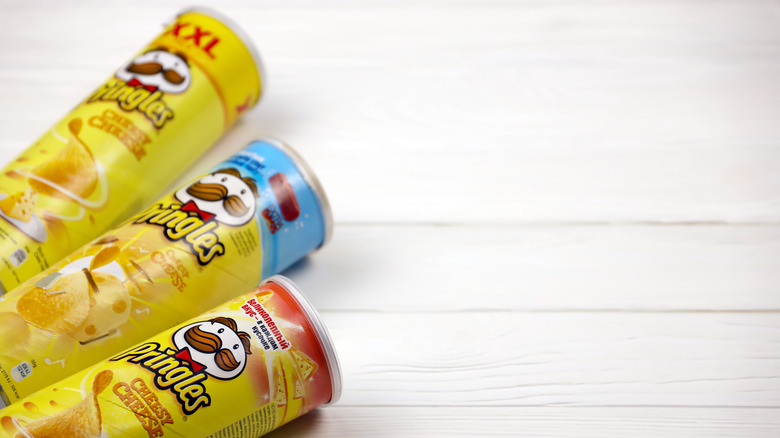
The party is over, and your guests have devoured all the snacks you served them, including various flavors of Pringles. And now you're left with a pile of those cylindrical cans that you have to get rid off. Instead of tossing them out, why not repurpose them? You'll be amazed at how easy it is to transform empty Pringles cans into DIY wall art that looks high-end (but costs almost nothing).
This simple craft project works well with the standard size 10-inch cans. The idea is to wrap the cans in beautiful table runner paper and then glue them together to make what will look like a joined set of decorative wall vases. With that in mind, get a table runner of a color and pattern that'll stand out or blend in with the rest of your room's decor. A plain golden glitter design like this Pamela Leigh Glitzing Table Runner, or a rose gold version like this Efavormart Glitter Table Runner, are great options. Now, discard any remaining particles of chips from the Pringles tubes and get ready to create your eye-catching wall art.
Upcycle your Pringles cans into a luxe DIY wall art statement piece
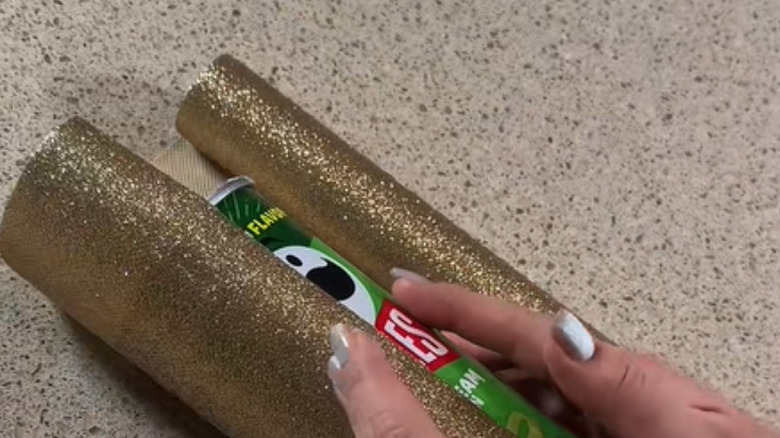
Place your Pringles tube sideways on one end of your table runner. Wrap the glitter material around the can and, using a pencil, mark the point where it fully wraps around with about 1-inch overlap. Use a ruler to draw a straight line down that mark and, with a pair of scissors, cut the roll along this line. Once again, place your tube at a corner of the glittery paper and wrap it fully with the now-resized paper (the glittery surface should be on the outside). Apply hot glue along the seam of the can from top to bottom and stick one edge of the glitter paper here. Apply the hot glue again, this time on top of the attached glitter paper along its edge. Now, stick the other end of the glitter paper to it.
@2sistersstory From Simple Cans to Elegant Wall Decor✨ An unexpected way to turn everyday items into elegant wall decor ✨ Minimal shapes, soft gold texture, and greenery come together to create a refined statement piece for modern interiors. Perfect for: • living rooms • entryways • accent walls • minimalist & modern homes Simple materials. Elevated result. #diy #decor #design #craft #homedecor
Next, neaten the can's open end by carefully folding the excess glitter paper over its top rim and pushing it into its interior. Now you have your first glittery cylinder for your DIY wall art. Repeat this process for all five tubes.
To assemble your elegant art piece, place your wrapped cans side by side in a row, then stagger their heights for a high-low effect. Apply hot glue where they touch and hold them together in a firm grip for about 30 seconds to allow the glue to bond. Finally, mount your art piece on the wall using adhesive tape. And now you have wall art that looks like one of those budget-friendly tricks HGTV stars use to fill up empty wall space.
Customization tips to make your DIY wall art more beautiful
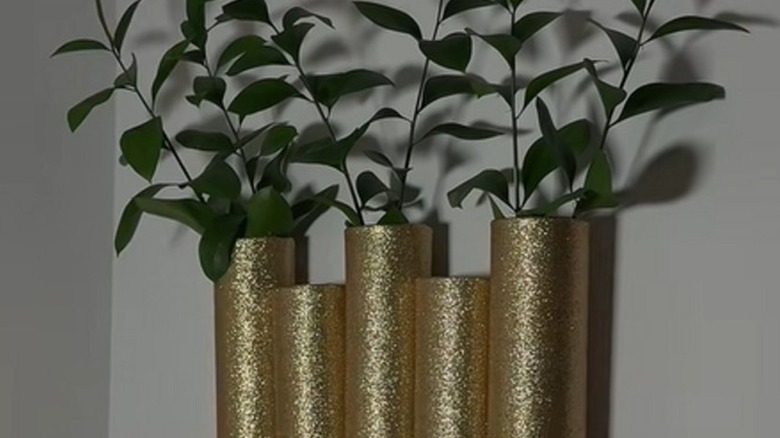
To complete the look of your DIY wall art, you can drop some greenery, like the LYRWI Eucalyptus Artificial Stems, into the tubes or faux flowers. These will help your centerpiece create that calm tranquil feel that's associated with having plants indoors. You can also customize this DIY wall art by mounting the cans on the wall in a different way. For example, after wrapping each can in the glittery paper, attach each one individually on the wall so you have separate wall vases.
And just because this wall art uses table runner paper, it doesn't mean you should be limited to that. You can use leftover fabric to wrap the tubes using the same process. Alternatively, using wallpaper might be an even easier option since they have a sticky back side, so there's no need for the hot gluing step. Having these different materials you can use is a plus since you get more options for customizing your wall art. And finally, feel free to borrow some of the ways to style vases in your home and use them to jazz up these DIY wall vases.