Turn An Old Tuna Can Into The Cutest Planter For Succulents
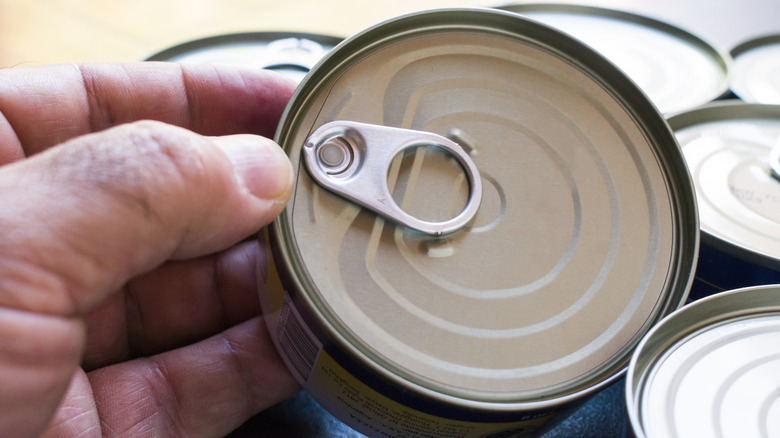
Succulents are generally some of the easiest plants to take care of, only requiring direct light, infrequent watering, and minimal maintenance. Additionally, most succulents favor shallow containers, so there are many unexpected items that can offer just enough room for their compact root systems and soil. If you're looking for cute mini planters that can elevate your stunning succulents into statement piece houseplants? There's no need to head to a store to buy pots — you can simply turn an old tuna can into an adorable and durable planter for your petite plants. You'll need a clean a dry tuna can, decorative bits like twin or ribbon, and of course, soil for your succulent. Some basic tools like a spoon and a small hammer and nail will also be helpful.
Most tuna cans are made of aluminum or tin, which is designed to safely contain and preserve food or other contents. These cans are lightweight, durable, and unlike their clay or glass counterparts, they're resistant to chips and shatters. Not only are you saving a few bucks by repurposing your old tuna cans into mini succulent pots; you're also making a more sustainable choice by reducing consumer waste. If you're not a fan of tuna, you can also repurpose the shallow containers for canned chicken, sardines, pet food and more!
Create a charming succulent planter by wrapping a tuna can
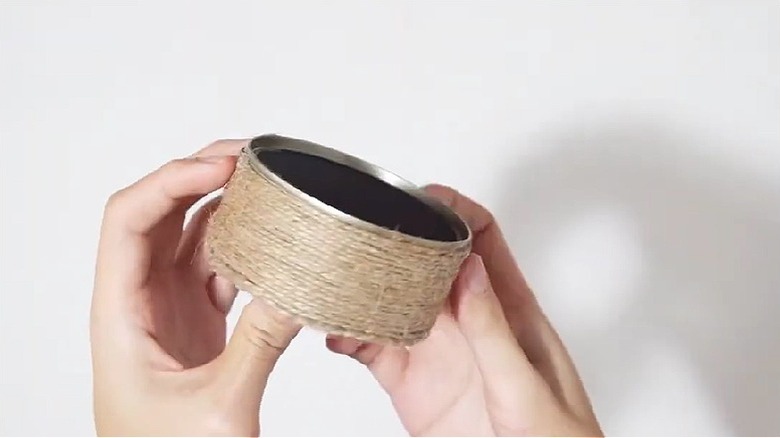
First, fish that empty tuna can out of your waste bin. Remove the tuna can's sticker label completely, then wash the can thoroughly with warm, soapy water to get rid of sticker residue and odors. Dry it completely to get rid of any moisture. As you're washing, be cautious of the sharp rim to prevent cutting your fingers. Once the can is clean and dry, you can press the sharp rim edge flat using a small hammer or the back of a spoon. Create drainage by carefully punching holes in the bottom with a hammer and nail.
Next, start decorating your tuna can. If you're into rustic, farmhouse aesthetics, wrap some twine tightly around the can. Adhere both the beginning and the end of the twine using glue gun or superglue to the outside of the can. For a pop of color, you can wrap the can with ribbon or washi tape instead.
Preparing and planting in your tuna can planter
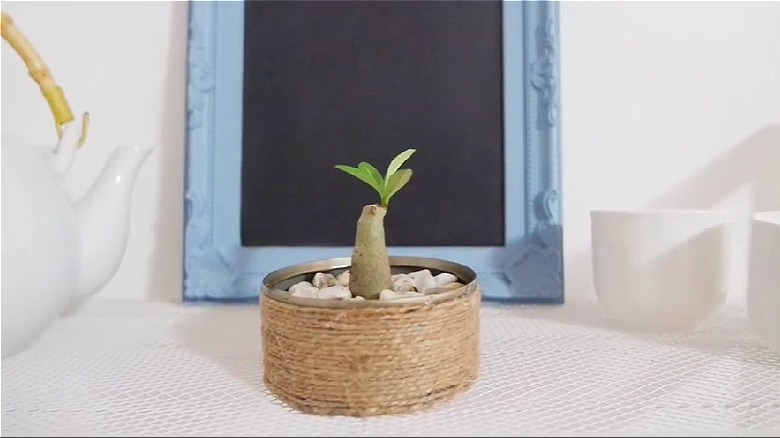
Once you've finished decorating your planter, fill the tuna can with a well-draining potting soil. You can purchase this at any gardening store DIY your own succulent soil. Remember that spoon you used earlier? You can use it again to carefully transplant your succulent of choice from its original nursery container to your new tuna can container without pulling on the leaves. After gently placing the succulent of your choice inside the planter and nestling it into the soil, Dress the top of the soil with small, decorative pebbles for a pretty, finished look.
Make sure to pick succulents that will stay naturally small and have shallow root systems so they won't outgrow the tuna can planter. Species like the Plover Eggs Plant, Lithops, and many Echeverias will maintain a tiny size all their lives. Haworthias also fit great in these little planters, only growing to around three inches wide. Depending on the species you choose and where you place your tuna can pot, follow these basic care tips for succulents inside and outside your house.