The Ultimate Spring To-Do List For The Garden Of Your Dreams
There's just so much to do in spring. It's tough to know where to start and what to prioritize. Maybe you should just get planting ASAP and do the cleanup later, or maybe you should be mulching, repairing, building, planning, and so on. And then you get Fool's Spring, where you get those few really lovely warm days early in the season, and you have to resist the urge to get outdoors and plant all the things because the weather is telling you it's safe. But there'll probably be another cold snap in a week or two, and all your efforts will be wasted. Hence the term "Fool's Spring." Even though I'm a master gardener, my enthusiasm for seeing seedlings poke their heads out of the soil means that I've been caught out by these early warm days more often than I care to remember.
But spring is when you set the tone and the success rate for the whole growing season. Getting the right spring tasks taken care of helps your garden be more productive. Spring prep, when done right, can boost flowers, plant growth, and blooming season length, and helps reduce pest and disease issues, too.
Plan your wild areas to boost garden health
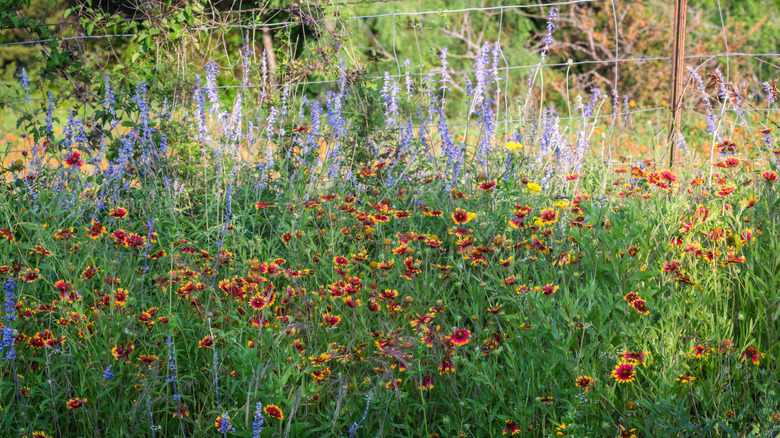
Even if you're not a permaculture nerd like me, I still recommend you keep a couple of wild patches in your garden. That doesn't necessarily mean huge swathes of your yard need to just run to weeds and dead brush — although, I personally do let weeds grow in parts of my yard, because, sometimes, they're useful. I also keep a brush pile tucked out of the way down by the compost bins.
However, if you don't want to go quite that green and "crunchy," you can keep your re-wilding as simple as planting some native wildflowers, like a meadow mix, as these are fantastically pollinator-friendly and support all kinds of beneficial insects. Adding a stumpery or a log pile is also a brilliant plan, as it provides a habitat for useful insects, small critters, and fungi. And, if you really want to make it look like part of your garden's design, make a little feature out of it, rather than trying to hide it. Just don't use any pesticides or herbicides around the area. These kind of simple permaculture techniques boost biodiversity and overall garden health.
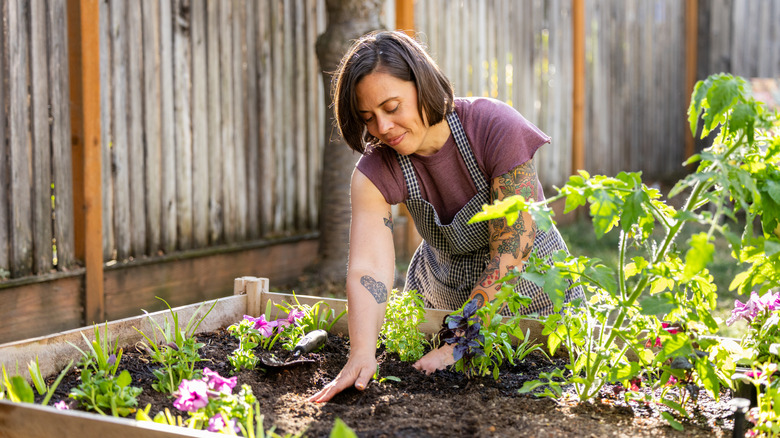
Replace plants that didn't perform well or didn't make it through the winter with native ones

Sometimes plants look great in the nursery or in photos online, but in your garden, they don't perform. Or perhaps need tons of maintenance, or they're not really suited to your growing zone nor your specific soil conditions, and they don't make it through the winter. Be ruthless and get rid of them. As they say in my neck of the woods, stop trying to nail jelly to a tree. The only real exception here is if you're willing to consistently provide the high level of maintenance one of those plants needs to thrive in your location, or if, for example, you have a drought-tolerant plant in a wet or heavy bed and can save it simply by moving it to a drier spot or even a container.
If you do remove plants, before you replace them, look to your soil. See if it's claggy (heavy and dense) or has a nice open crumb structure. Look for signs of life, like worm castings or actual insect activity. If it's too wet or heavy, or everything in the bed looks like it's struggling, add plenty of compost or rich, organic matter that will break down and improve the quality of the soil. And when you choose plants, select varieties that tolerate your growing zone, the microclimate or your specific garden, and your soil.
Cut out dead and damaged wood, but leave flower buds alone
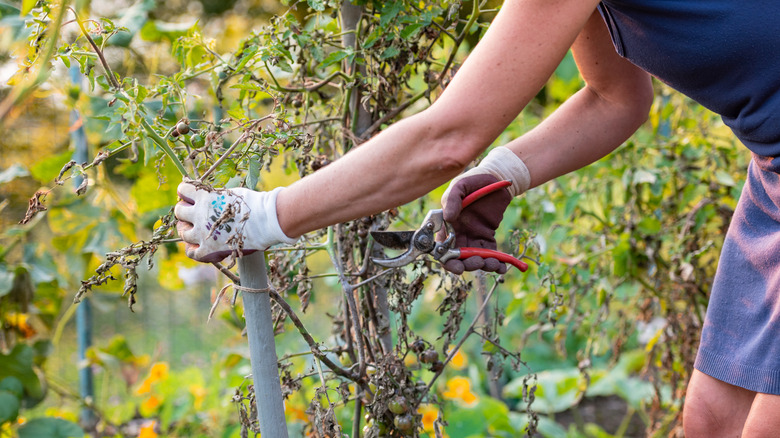
After winter storms, heavy snowfall, and ice, shrubs and trees may have taken a real battering and show damage you didn't spot earlier. On a dry day, take a good look at trees and shrubs, specifically watching for dead tips, broken branches, and stems that are rubbing one another and causing significant damage. These are the ones you want to remove.
There are caveats, though. You are only making safety cuts, removing dead and irreparably damaged wood. Cut back damaged limbs that pose a real risk to humans or animals if it falls. Also cut out significant damage, like splits and obviously dead wood that will encourage pests, rot, and diseases if left. Only cut back to healthy wood, though. Don't be overzealous, and don't try and get fancy with shaping cuts, because you don't want to harm buds and limit this year's growth.
Divide tired clumps that flowered less or flopped open
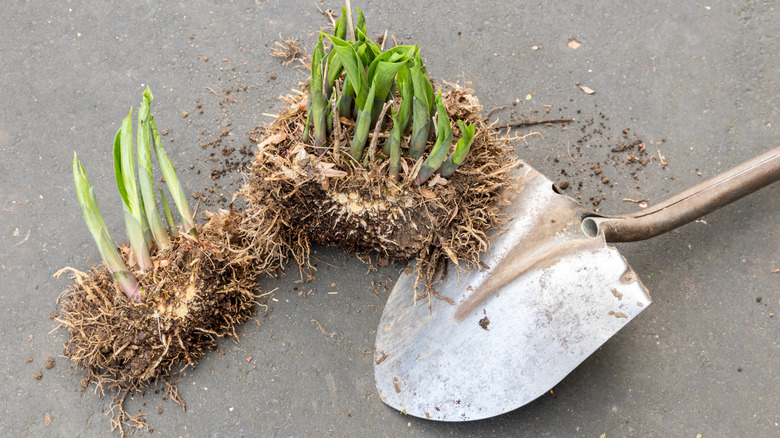
Eventually, many perennials end up crowding themselves. You'll find that they flower weakly, flop open into a ring, or develop a bare center, or a combination of these issues. You don't necessarily have to discard them, though. Assuming the soil is still reasonably healthy, dividing the sad-looking perennials should be enough to reinvigorate them. And you get oodles of free plants.
Gently lift the whole clump. Remember there's likely roots spreading beyond the crown, so start digging a little way away from the actual plant. Once it's out of the ground, gently wash off the soil. I use tepid water so I don't shock the plant. Depending on what specific plant you're splitting, you should be able to see natural approximate division points. Unless they're bulbs or tubers that split on their own with a gentle tug, make sharp, clean cuts at the division points. Discard woody or hollow centers and keep the vigorous outer sections. Replant those, leaving plenty of room for each one to mature to its full size.
Pre-install stakes and supports for plants you know will need it later in the year
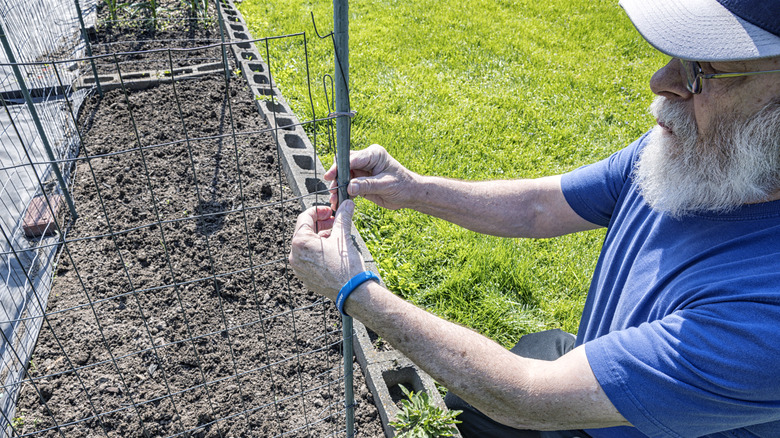
This one is surprisingly simple and effective. Struggling to stake huge, mature stems and inserting stakes into a big mass of mature roots is difficult and can easily damage the plants. If you don't stake or offer support at all, some plants, like pole beans or ornamental climbers won't ever reach their full potential. And others, like tomatoes and taller perennials, will fall over, sprawl onto pathways, or snap their stems.
Whether it's a new planting or a perennial that's only just starting to wake up, getting your supports in now is much easier than waiting until the plant is tall and full of leaves. In spring, your planning should be done, so even though your tomatoes, for example, aren't ready to outside yet, you already know where you'll plant them. And you know where your delphiniums are, even though they may only just be poking their heads up. So get your cages or cane and string support setups in place already. If the supports are already in place, you can gently tie the young plants onto the supports as they grow, keeping them stable and helping shape and support them without damaging stems or root masses.
Secure loose pavers, steps, and edging stones before someone trips
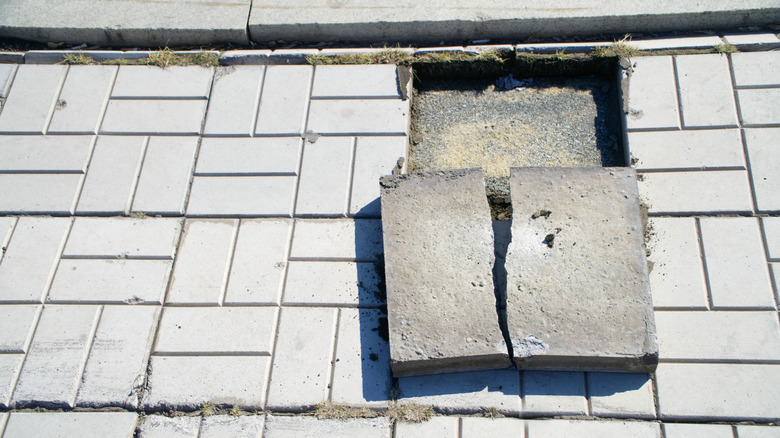
Even if all of your pathways and hardscaping was perfect when you put the garden to bed in late fall, winter has this uncanny way of causing destruction and damage with absolutely no help from you. By the time spring rolls around and you're actively using the garden again, there's a good chance you'll find a wobbly step, an unseated paver, or a loose handrail. This is obviously dangerous and needs correcting before someone has an accident.
Test all the hard surfaces and handrails in the garden, and check fence panels and posts, too. If any are loose, reset them. You may need to lift a tread or a paver, re-level the area underneath, then reseat it. While you might get away with compacted sand or fine gravel in some instances, if the rest of the path or steps are set with concrete, you may have a bigger job on your hands and require professional help.
Test hoses, nozzles, and drip lines for leaks and blockages
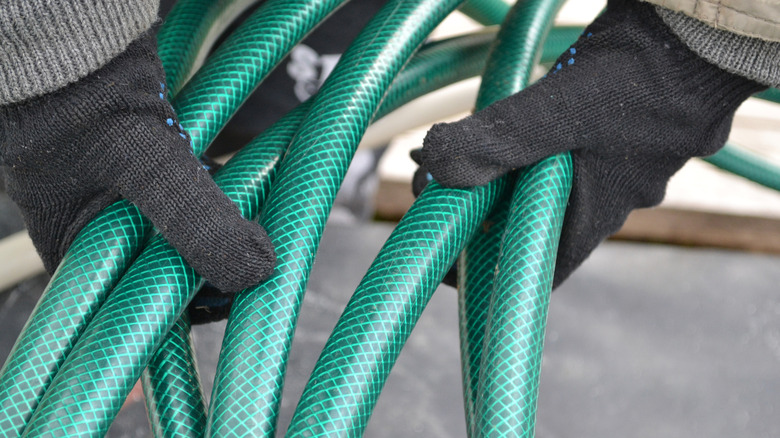
It's not just hardscaping at risk from a rough cold season. Winter can also work its special magic on your watering systems, especially if you didn't drain and store them properly. Between bad weather and local wildlife, there's a good chance something could be wrong with whatever setup you use for irrigation.
The only way to really find out is to set it all up and run water through it. Test every hose, valve, sprinkler head, drip line, and faucet. Check hoses closely for pinhole leaks and, if there are any, consider either patching it or repurposing that hose as a soaker hose or as a buried irrigation line once you poke a few more holes in it. If you didn't do it in fall, now is also a great time to flush all your lines to clear grit and built-up dirt.
Give containers a full reset instead of just topping them up
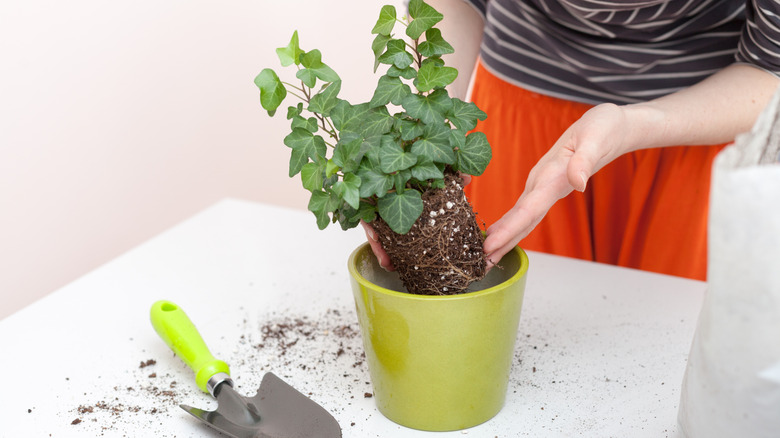
Containers that haven't been touched for a few seasons should be fully reset in spring, even if you only plant annuals in them every year. With containerized soil, a few problems crop up. Firstly, the amount of food or nutrition in the soil in a pot is finite and determined by the quality of the soil you used and the size of the pot. Sure, you may have been feeding it, but that creates another problem in the form of mineral salt buildup, which can burn plant roots and make the soil inhospitable. There's also less microscopic life in container soil after a few years, leading to less healthy plants. Potted soil can also develop a hard crust on the surface that stops water penetrating properly.
So, I strongly recommend you lift any plants and remove as much old soil from them as you can. Tease out the roots and remove any that are girdling the outside of the root mass. If it's rootbound, you'll need to increase the pot size, too. Empty the pot, take the chance to give it a good clean, and then repot the plant using fresh, high-quality compost with plenty of rich, organic matter in it.
Deal with weed magnets along fences, edges, and cracks
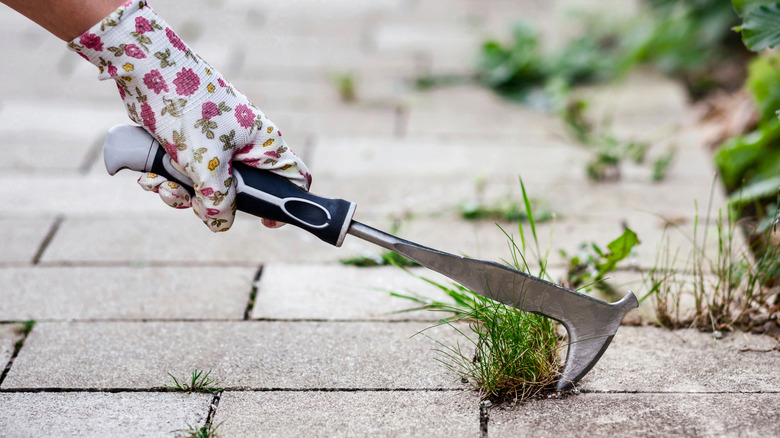
While the whole garden is technically at risk of getting weedy, there are certain areas that are pretty much guaranteed to sprout weeds every year: cracks in or around pavers, small gaps near walls, that little tiny strip of soil along the fence line. These tend to be the earliest and weediest offenders. Spring is the best time to tackle these areas, before the unwanted plants really get established.
Get outside when it's fine and dry, and start weeding. Take the time to dig out runners as best you can, and getting as much tap root out as possible. If you want the areas bare, you can lay a thick layer of cardboard, followed by mulch like gravel. But if you want to make use of the space, plant low-growing ground covers that will grow quickly and perform well in poor soil. I tend to go for vigorous ground covers like creeping phlox or creeping thyme, that block out weeds, look pretty, and need minimal maintenance. Between pavers, obviously this may not work, so instead, pack the gap with compacted sand to block light and help stop weeds pushing back through.
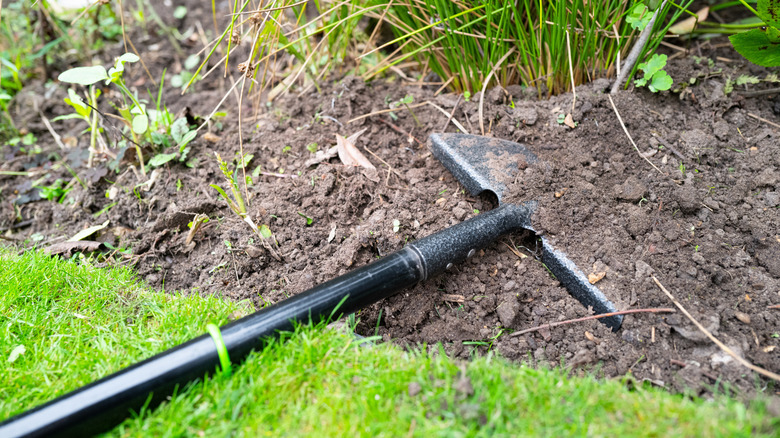
Start the long process of fixing compacted soil
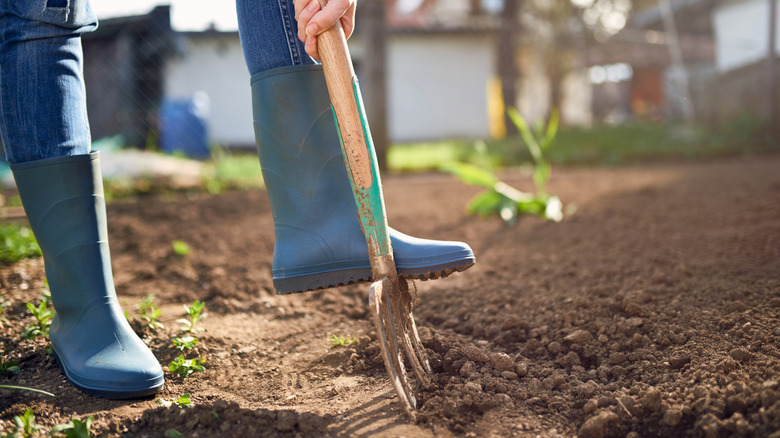
We all have rough spots where soil has become a pathway or an extension of the hardscape. It happens a lot at the edges of beds or near gates and entryways. Once-fertile soil turns into compacted hardpan, and nothing will grow there apart from a sparse covering, extra-tough weeds, or grass. You can fix the compacted soil, but it's not the fastest, and spring is the best time to start, as your fixes then have a whole year to start to work.
Grab your garden fork and push it into the compacted soil. Don't lift the soil, though. Just insert the fork and gently rock it back and forth. Do this all over the compacted area to aerate the soil and allow water to start to flow through. Then cover the patch with a thick layer of mulch. There are plenty of mulch options for your garden, but in this case, I'd use compost or wood chips. Over time, these break down and work their way into the soil. If you use a good compost, you can also plant straight into it and actually use the space while you're waiting for the area to return to full health.
Top dress your beds instead of digging them to pieces
My specialism is permaculture, and a big part of that is not upsetting the natural order of things. I rarely recommend digging, especially in beds that are already in place. You've been working to build good soil structure, improve soil health, and encourage all the good critters, decomposers, mycelium webs, and beneficial soil organisms. As soon as you start digging, you upset that wonderful balance you worked so hard to create. Digging up a plant or two is one thing, digging over a whole bed is super destructive and rarely necessary.
Top dress your beds with compost. Literally just clear the weeds off the top and cover the bed with a few inches of beautifully rich compost. It's super-easy, pretty quick, and, if you use your own compost, it's essentially free. Plus, less digging equals less backache. You can plant straight into the compost layer, and the compost gives the bed a strong shot of balanced nutrients.
Turn your compost heap, or start composting if you don't already
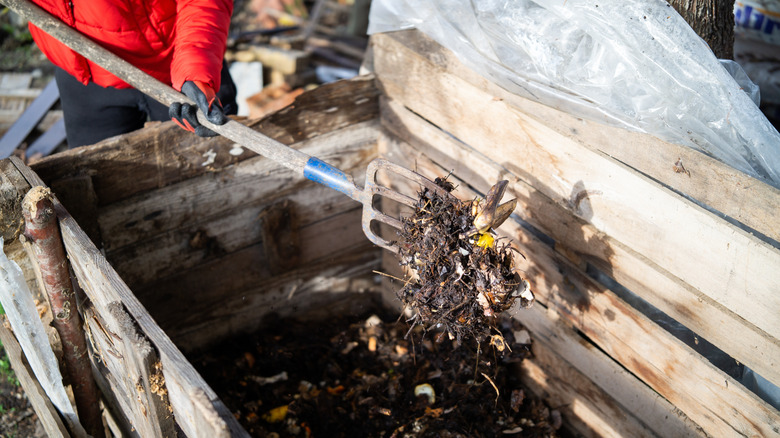
Everyone should compost. It lets you turn garden waste and kitchen scraps into nutrient-rich mulch for your garden. It's basically free fertilized soil. If you already have a compost heap that's been brewing all winter, get in there and turn it.
Turning the pile in spring lets you see if it's close to being ready yet. If it's not ready, breaking it apart redistributes the different levels of decomposition and the busy little worms and organisms responsible for composting. It also restructures the pile, letting plenty of fresh air in. And makes sure if there are any overwintering insects or rodents, they vacate the area right away. If you don't already compost, I recommend you start, even if it's just with a small compost tumbler or a little heap behind the shed.
Clean bird feeders and baths to reduce disease spread
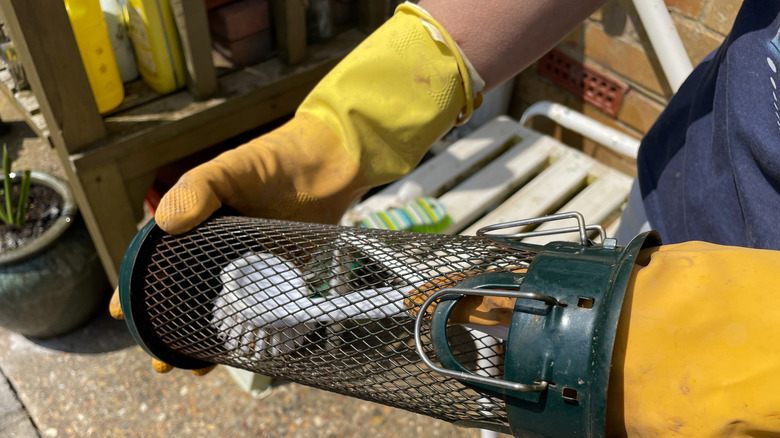
Birds are great little pest controllers. They eat a huge amount of pesky insects. Plus, they're great for spreading seeds and some even help with pollination. And, of course, many people understandably love to watch them feed in the garden. The problem is that bird feeders get dirty and can spread disease if they're not cleaned out regularly.
I recommend you properly clean your bird feeders by emptying them out and givng them a thorough soak and clean. This ensures you're not feeding moldy food and that your feeders start the year clean, as they'll have gotten a lot of use over winter when food is scarcer and caloric needs are higher. Make sure you rinse all the soap off and dry the feeder thoroughly before you refill it.
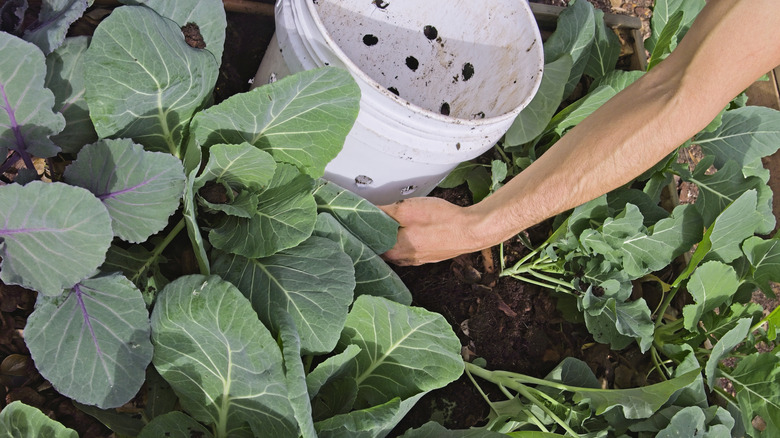
Compost in place to quickly build soil health in depleted areas
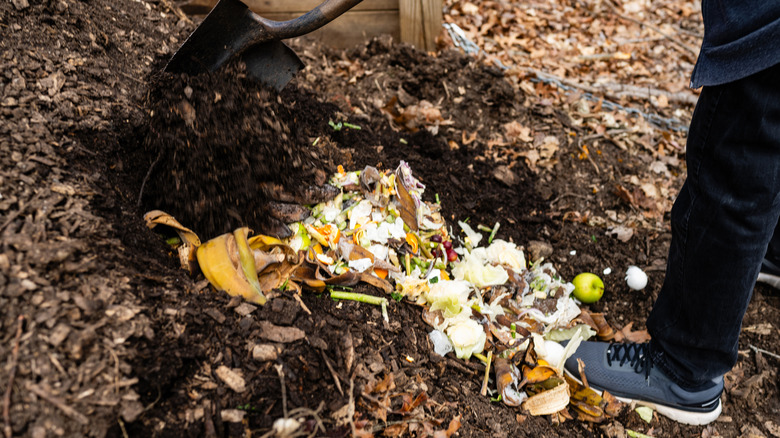
Now, generally I don't like digging deep into whole beds. But when you've got an area that's depleted or that you know will be home to heavy feeders, composting in place is brilliant. It's also a great way to compost if you don't have a compost bin.
It's ridiculously simple. You dig a shallow trench near where you'll be planting. Pile the soil to one side of the trench. As you get garden waste and kitchen scraps, add it to the trench and cover that part with the soil you dug out. Work your way along the trench, filling it with scraps and covering them. The soil life will very quickly break down all of this waste into nutrients for the plants and organic matter to help soil structure.
Re-edge your beds for a crisp, neat look
Grass inevitably creeps into your beds and tends to wake up earlier than almost everything else in the garden, so can take hold in early spring if you're not vigilant. And, over winter, with wind, rain, snow, and ice, mulch and soil slump outward toward the edge of the bed. Re-edging the beds in spring, especially if you cut on a slight angle, has a surprisingly significant impact on how your garden looks.
A natural fade, which is where you stop edging, often sold as a "natural" look, doesn't really work. Grass will quickly take hold of the whole bed and become a constant battle. An hour with a half-moon edger, and your garden beds look like you hired a pro landscaper. You'll also cut any questing grass runners.
Refresh mulch in established beds to smarten them up and minimize weeds
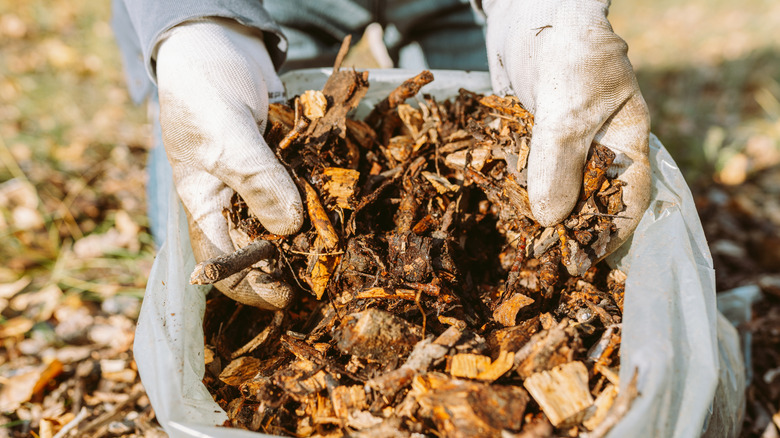
There are so many benefits to mulching your garden beds in spring. It protects the soil and builds organic matter naturally, as worms, rain, and plants gradually break down the mulch and pull it into the soil. It also helps with water retention, drainage, and soil structure. And, for established beds, winter can strip or thin out existing mulch, making the bed look tired and leaving the soil exposed.
Adding a fresh layer of good quality mulch refreshes the look of your beds and makes them appear landscaped and well-maintained. I use wood chips for perennial beds. For edible and annual beds, I tend to use straw or compost, as they're easy to work through. I also use living mulch in the form of fast-growing ground covers around mature plantings, as they rarely need refreshing and look fabulous.