This Affordable DIY Turns Simple Materials Into A Satisfying Garage Storage Solution
We may receive a commission on purchases made from links.
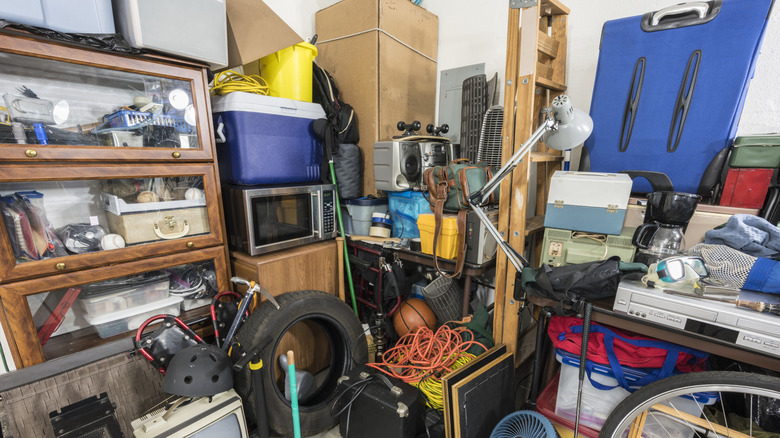
It's common for garages to be one of the most cluttered spaces in the house. They are just an easy place to leave things that we don't use often. Everything from Christmas decorations to boxes of dusty books to old tools tends to pile up there.
If you're interested in parking a vehicle in your garage or even setting up a ping pong table, you might have to reorganize the space. One of the best ways to reorganize is to put up shelves and install racks. Ideally, a shelving unit should cover an entire wall, maximizing space for storing boxes. But many of these large units cost hundreds of dollars. You can save a lot of money by simply building your own. This project will allow you to build a shelf that perfectly matches the dimensions you need for your room.
For this project, you'll need a measuring tape, a pencil, a Kreg pocket hole jig, a level, a circular saw, a power drill, and a pack of ¾-inch screws. As for materials, you'll need wood glue and several plywood sheets. The number of sheets depends on how large you want your shelf to be (you should measure the room prior to purchasing these materials). These sheets should be at least ¾-inches thick, because otherwise your shelf will lack structural integrity.
Before you get started, it's important to have an idea of how your final product should look. This shelf will have a square plywood frame, and inside that frame, there will be cubbies made up of intersecting boards. This is commonly referred to as cube storage, one of many budget-friendly solutions for reorganizing your garage.
How to build your cube shelf out of plywood
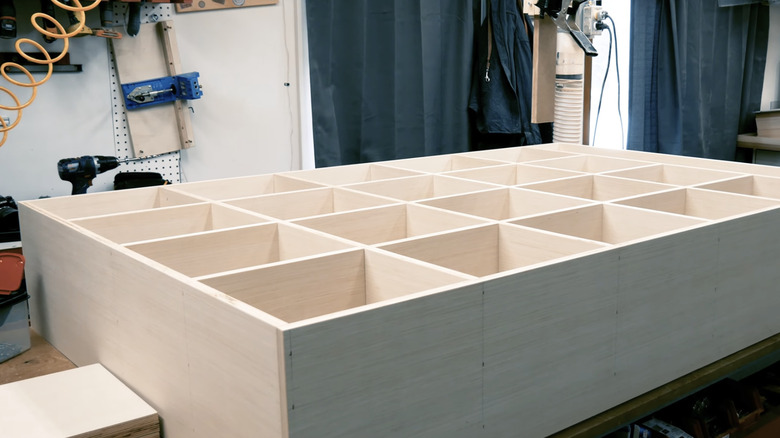
Before you leave the hardware store, ask the employees if they can cut your plywood boards lengthwise. These cuts will determine the depths of your shelves. So, for instance, if you plan to keep 12-inch-by-12-inch boxes on the shelves, each board should be cut 12 inches wide. Once you get home, set aside four of the plywood boards to make up your frame. Then set aside additional plywood boards that will run vertically inside that frame. The remaining boards need to be cut (all the same length) to run horizontally between the vertical boards.
Next, use your Kreg pocket hole jig to drill three pilot holes at the ends of each board (except for the top and bottom boards of the frame). Then screw the frame together. You may not need one, but a carpenter square can help with this step. Next, screw in your vertical boards an equal distance apart from one another, using your level to ensure that they are plumb. Cut two spacers that you can use to set the horizontal pieces in place. For each piece, set up the spacers, squeeze glue onto the proper spots, place your horizontal board in place, and then sink your screws. You can also install hooks on the sides of the shelf to hang coats and golf bags.
There are plenty of ways to add some pizzazz to this shelf. For instance, you put a couple coats of Minwax wood finish on it for a rustic look, or you can use some colorful paint.
You can also use cube storage as a laundry room storage solution or to reorganize cluttered kitchen countertops.