9 Unique Ways To Upcycle Thrift Store Photos And Artwork
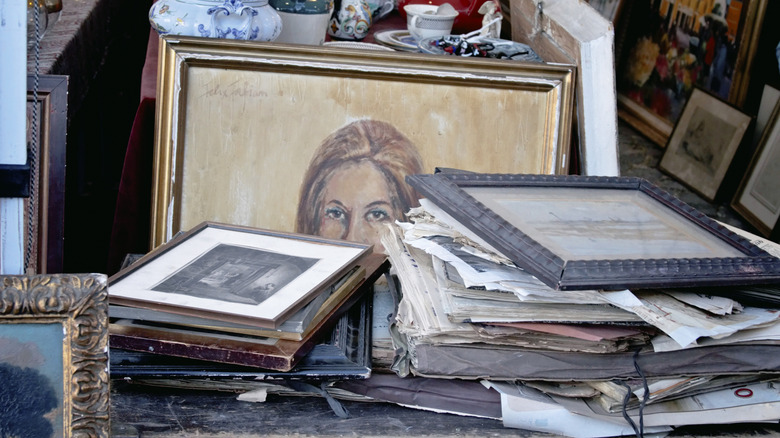
If you're a dedicated thrifter, you're probably aware of many of the tips for buying art for your home at a thrift store, but one stands out for thrift fans who want to make the most of their art purchases – pieces can be altered. The fact that most thrift stores offer tons of framed and unframed art and photos at vastly reduced prices is just one reason why you may want to thrift your wall art instead of buying from home decor stores. Thrifted art is the perfect starting place for unique DIY projects that transform artwork and photos into pieces to get excited about.
There are lots of ways to upcycle your thrifting treasures. Some methods manipulate the art or frame to blend in or to look vintage, personalized, or more high end, like distressing old photos or adding a wax treatment. Others are about adding something whimsical or beautiful to the image, such as creating a new collage out of a collection of photos and artwork.
Upcycling thrift-store art and photos is not only an effective way to save money, but it also assures that you've created one-of-a-kind art pieces. It's fun to search for thrift-store finds that speak to you and then stretch your creativity as you ponder how to make them your own.
Match the art's background to your wall color
What if you are drawn to a thrift-store print but the background color doesn't work anywhere in your home? Or perhaps you'd like your piece of thrifted art to blend organically into the room, like it truly belongs there. A perfect solution is to simply cut out the print's background and replace it with a different background. If you want the art to blend in seamlessly, create a background with the paint color that's on the wall, or use a leftover piece of your existing wallpaper.
Distress vintage thrift store photos

You'll often find old photos in thrift stores that you can distress for art projects, such as mixed-media works, decoupage, wall art, and more. Begin by roughing up the corners and edges with a scissor blade, then lightly sand the photo's surface. Rub distressing ink on the photo and edges, and add bits of vintage washi tape if desired. Dab a bit of sepia-toned alcohol ink around the edges, roll on a light coat of diluted white gesso with a brayer roller, and finish by stamping with vintage images, such as those that mimic hand script.
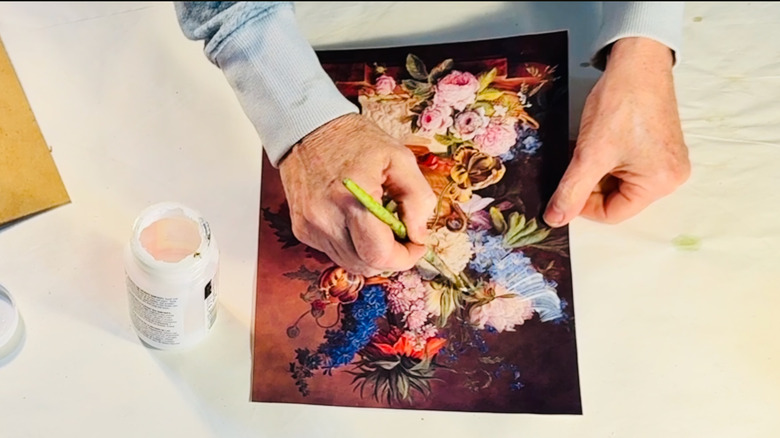
Crop a piece from a print to decoupage onto an another object
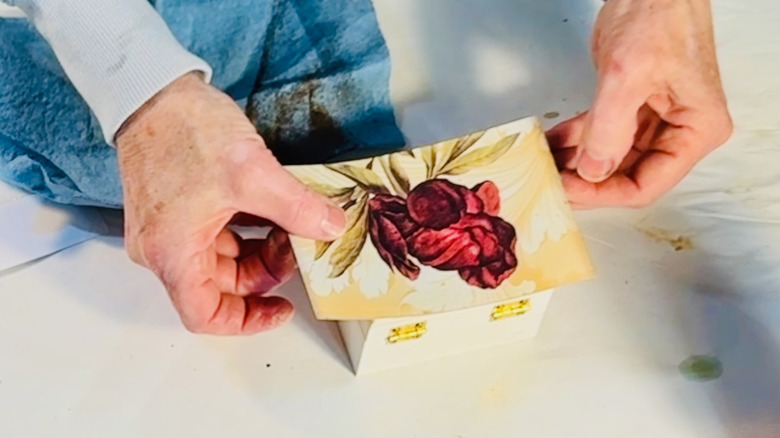
Sometimes you may buy a thrift-store print in which you like some elements but are not enthusiastic about others. Consider cutting a favorite part from the print and using it to decoupage items like wooden boxes, furniture, coasters, lampshades, and more. Cut your desired piece of the thrift store print with an art knife, affix it with spray adhesive to the object, and trim off any excess parts of the print. For a vintage look, sand lightly to rough up the print piece and then apply antiquing wax.
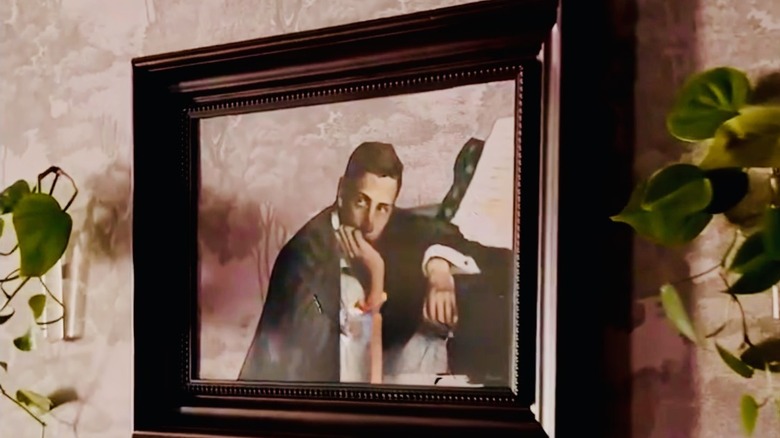
Paint unexpected elements onto thrifted artwork
Thrifters with a sense of humor may enjoy adding elements to paintings and prints that don't belong, adding a whimsical element to the art. Pop-culture characters and scenes are among favorite subjects for these DIYers, like adding Star Wars characters into classic prints. For this thrift-store art upcycle, it helps to have some artistic talent, but you can start out with simple additions and see if your art skills can make this upgrade work.
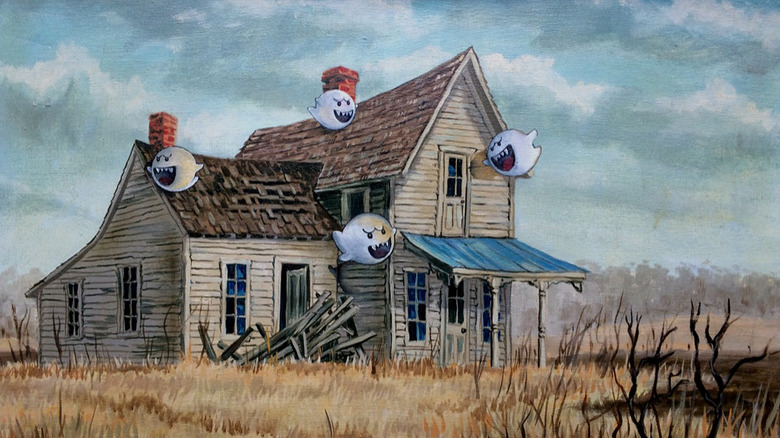
Apply collage and other 3D items to a vintage print

If you like the idea of adding elements to a piece of thrifted art but don't feel you can draw or paint well enough, consider creating a collage. Use the original piece as a background, or cut it apart and utilize individual components from it. Enhance the art by adding new elements in a pleasing arrangement or one that tells a story. You can even add objects with more dimension to them, such as craft-store butterflies or small seashells. Carefully glue elements down with a glue stick or decoupage medium.
Give artwork an antiquing wax treatment
Not all thrift-store art looks as vintage as you might like, especially when the art's coating is so shiny it looks new. You can make any art print or photo look more vintage and the colors more subdued with water-based antiquing wax. Bonus: While wax is not the optimal protectant for art, it does provide a protective coating. Simply dab it on with a cloth or soft brush. Give it a second coat if the first coat doesn't age the art sufficiently, and allow 24 hours for wax to dry.
Add words or quotes to thrifted art
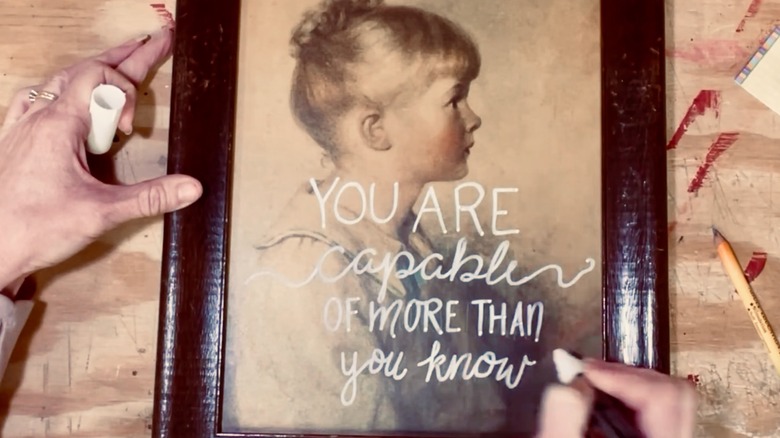
It's said that a picture is worth a thousand words, and sometimes adding your own words to artwork makes an even more powerful statement. You can use words, quotes, poems, song lyrics to thrift-store art and photos in several ways — hand-lettered with a chalk-art or paint pen, calligraphy, rubber stamps, rub-on letters, stencils, and more. You could even add dimension with Scrabble letters. This approach is a superb way to personalize vintage art and would be great for gift-giving.
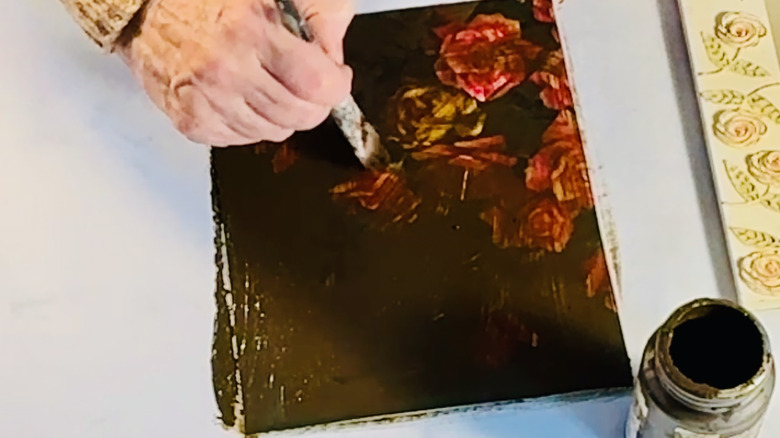
Coat artwork with decoupage medium for an oil-painted look
You can achieve the unexpected richness and texture of an oil painting in a plain thrifted piece of art by brushing decoupage medium on it, ideally in multiple coats. The trick for the oil-painted look is two to three coats of the medium, crisscrossing it across the item to mimic brushstrokes seen in a painting. Then dab on a final coat with a sponge. For a more vintage look, you can add antiquing wax as seen above.
Elevate vintage art with an upgraded mat and frame
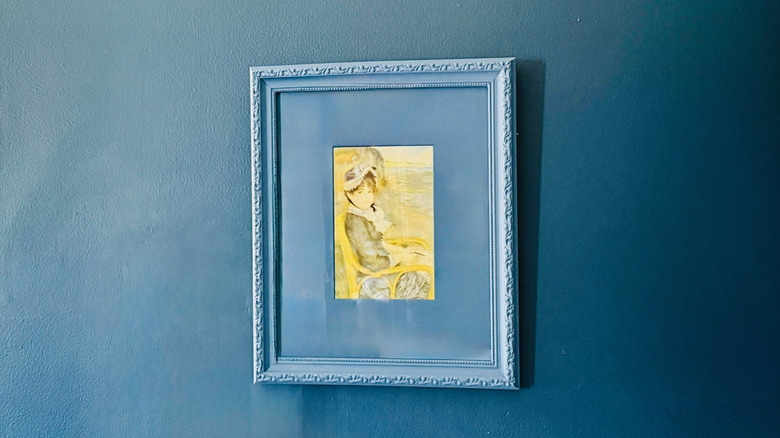
It's often the frame that drags down thrift-store art, so whether or not you manipulate the picture, you can upcycle the piece by giving the frame a glow-up. One easy way to give thrift store art a modern, sleek touch is to give it a contemporary frame, but here are three suggestions for upgrading the frame. Create a color-drench effect by painting both mat and frame the same color. For a vintage picture, consider gilding the frame with gold leaf or metallic paint. Or cover the frame with colorful scrapbook paper.