No Pricey Tools Needed — The Affordable Essential You Can Start Seeds In
We may receive a commission on purchases made from links.
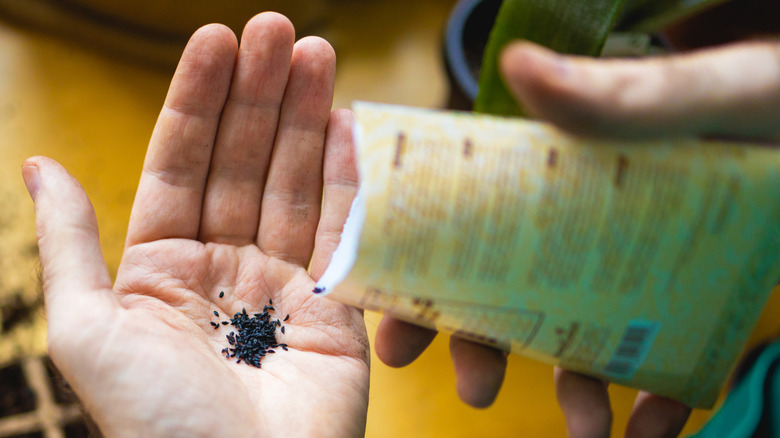
If the complex seed-starting kits on the market feel intimidating, there's good news: you don't actually need specialty trays, humidity domes, or expensive grow systems to get started. Believe it or not, cheap Solo Brand Plastic Party Cups – around just $0.16 each — can work just as well as a pot when used correctly. Seeds don't care about branding or cost, all they need is proper drainage, breathable soil, a light source, and a moist growing medium for successful germination.
Healthy seedlings rely most on proper soil, moisture balance, and light, rather than on the container they are planted in. A 16-ounce plastic cup offers good depth for early root development, which is extra helpful for plants like peppers or tomatoes that can outgrow shallow starter cells quickly. The extra vertical space can delay transplanting and reduce early root binding compared to thinner tray compartments, giving your sprouts a better chance at survival.
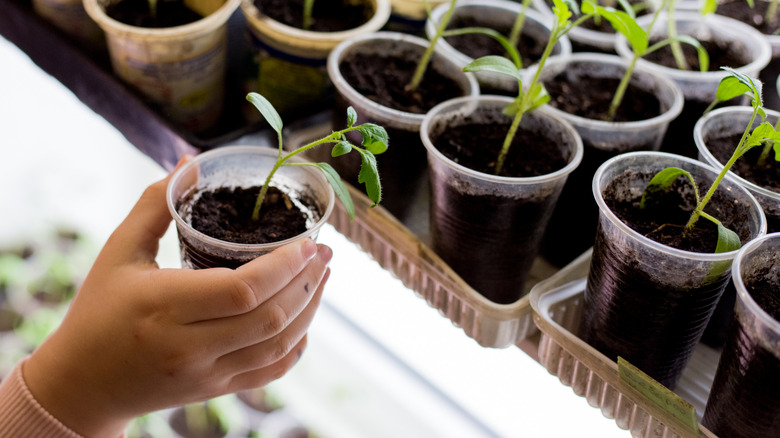
Depending on the type of Solo cup used, beginners may enjoy an extra advantage: visibility. Clear cups allow you to monitor root growth without disturbing the plant, making it easier to figure out when it's time to transplant. Even if you have limited windowsill space, you can grow an abundant spring garden with this smart tip because Solo cups are lightweight, easy to group together, and simple to label. When used properly, plastic cups can function less like a shortcut and more like a scaled-down nursery pot.
Setting your Solo cups up correctly so your seedlings don't struggle
The only real modification a plastic cup needs is drainage. Horticulture programs note that poor drainage is one of the quickest ways to lose seedlings to root rot or damping-off disease, which is a common fungal issue that can result from overly wet soil. Before putting anything in the cup, punch or drill several holes into the bottom so any excess water can drain out. While not everyone adds these holes, they can definitely add some wiggle room for beginners starting seeds.
Soil choice matters just as much as drainage. It's best to use seed-starting mix rather than standard soil or potting blends, since it's lighter, less likely to have pathogens or pests, and designed to hold moisture without becoming too compact. Loosely fill the Solo cup and avoid tightly packing in the soil — compressed soil limits the airflow around roots. Generally speaking, seeds should be planted at a depth about two to three times their size, however it's important to check the packaging of each type of seed for specific instructions.
Watering technique can make or break early growth, but there's more than one way to do it. Some gardeners prefer bottom-watering by placing the Solo cups in a shallow tray and allowing moisture to absorb upward through the drainage holes. This prevents overwatering. However, it is also common to top water the seeds and then cover the cup with plastic wrap for 3-6 days until sprouts begin to show. Covering the seeds helps to retain warmth and moisture. You may also combine methods by top watering until you see sprouts, then switching to bottom watering. Long term, depending on the species, there are some plants you should only be bottom watering.
Growing strong seedlings and knowing when to remove from their cups
After sprouting, it's time to shift focus from germination to strength. Weak light can cause seedlings to become "leggy," in which case their stems become overstretched as they search for light. This can be avoided by finding a brighter window or lowering a grow light closer to the plants. Consistent airflow and moderate watering can also encourage sturdier growth.
Knowing when to transplant is also vital. Once roots begin reaching the sides and bottom of the Solo cup they're in, but before they circle heavily, it's time to transplant the seedling into a larger container or outdoor bed. With a clear cup, circling and root length is be visible, otherwise, gently flip the cup upside down to pop out the soil and check the root ball. You can also look for roots poking out of the drainage holes, or transplant as soon as the seedling develops a few sets of true leaves, which appear after the initial sprout leaves. Transplanting at the right time prevents root binding and allows for continued healthy growth.
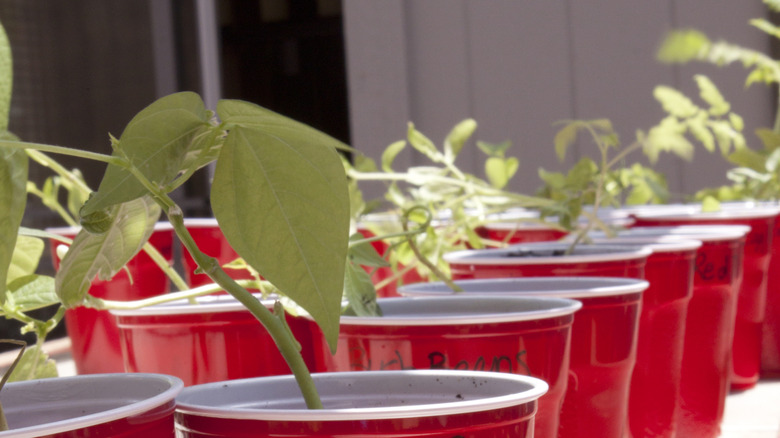
Before moving seedlings outside, they need to be prepared, and what that means is hardening off your plants. Move your sprout cups outside in dappled light for about 1-2 hours every day, increasing the time little by little over the course of two weeks to prevent shock. After successfully starting seeds, it's important to thoroughly wash and dry your Solo cups before your next round. With the right care, the simplest container can grow surprisingly resilient plants.