8 Beautiful Ways To Upcycle Old Photo Frames For Plants And Yard Decor
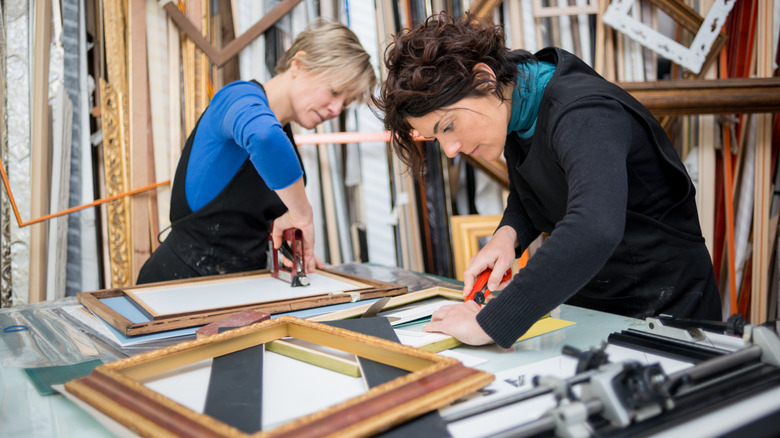
If you have some picture frames hanging around your house that you don't know what to do with, don't toss them out just yet. Not only are they one of the easiest items to thrift, but there are so many creative ways to repurpose picture frames. A few of those involve upcycling them to use in your yard or as plant decor inside your home. These projects are budget-friendly and they help give new life to discarded materials. From a unique mini garden to a hanging plant shelf, to a planter box that you can display indoors or outdoors, there are so many beautiful additions to your decor that you can make with frames you already have.
The reason that picture frames work so well for so many projects is their sturdy yet versatile structure. They can easily double as plant supports, vertical displays, or creative and decorative yard art. You can customize them in almost any fashion to suit your style by staining or painting them, and even using different inserts. Alternatively, you can wrap an ugly frame with some pretty fabric to make it more appealing.
Most of the tools needed to complete such a project are fairly basic and inexpensive, so it's easy to quickly transform a photo frame with a simple DIY. These projects help you to be more environmentally friendly by reusing items, too. Here are some of the brilliant things you can make from old photo frames for your plants and outdoor living space.
1. A hanging shelf for indoor plants
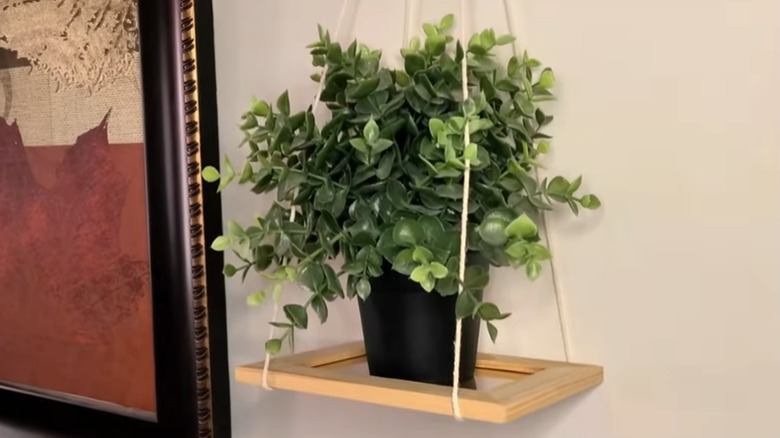
Take a wooden picture frame and replace the paper insert with some poster board. Leave the glass insert to aid in supporting your plant pot. Glue two pieces of twine to the back of the frame so that they come out on either side. Make sure the twine is long enough to create your hanging shelf, and sturdy enough to hold your plant. Then hang the frame, place your plant on it, and voila — you have a new plant shelf.
2. A planter box for inside or outside
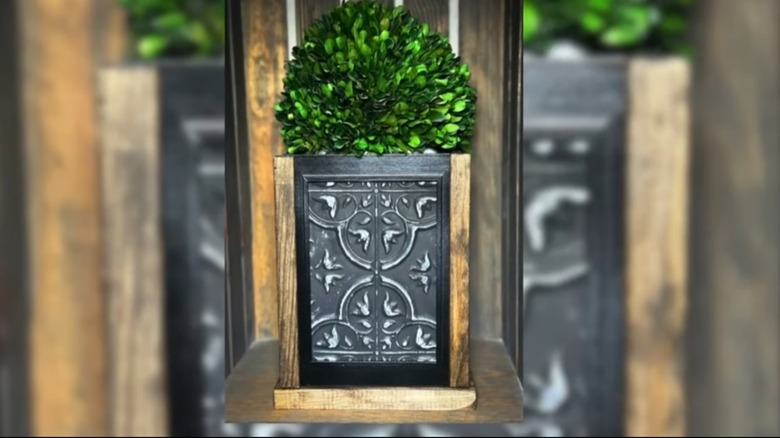
Line up four photo frames and glue them together vertically at the edges. You can brace the insides with some blocks to ensure it has support. Use clamps after gluing to hold the frame so your box dries in place. Find stylish inserts to use in place of glass. Measure and cut a square of wood to fit the bottom as a base, and some wood trim. Paint and glue everything together, affixing the frame box securely to its base. Insert your plant, and mount it wherever you'd like.
3. A living plant picture frame
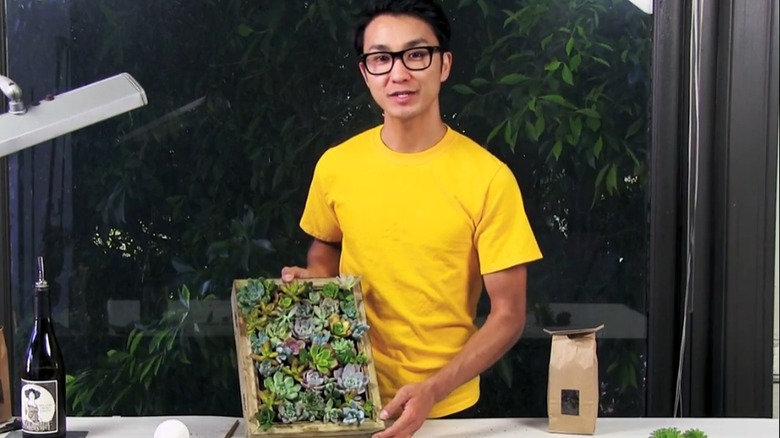
For this, you'll need small plants like succulent stems and also some soil. If you can, find a frame that's an open box with mesh wiring on the top. (If you can't, simply add some chicken wire over a frame and glue it to a box.) Trim some landscaping fabric, like TICONN Heavy Duty Weed Barrier Fabric, to line the bottom. Add your soil, then insert your plants with the mesh part down, and water. Wait a few weeks for roots to grow and bond with the soil before hanging.
4. A greenhouse for your plants
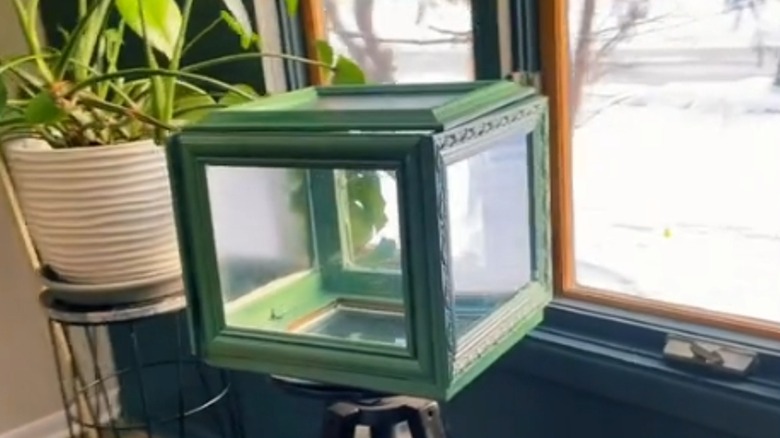
Clean six picture frames and remove the hardware, saving the glass. Get some door hinges — these QANQIUPLE 2 Inch Folding Hinges for Wood could work — so you can screw all of the sides together to create a box. Next, fill in all of the gaps and cracks with wood epoxy. Once that dries, you can paint the frames on the inside and outside. Add your glass inserts back, gluing them in place with silicone.Place a pot or box inside, fill that with soil, and add your plants. Your greenhouse is complete!
5. A rustic or vintage yard or garden sign
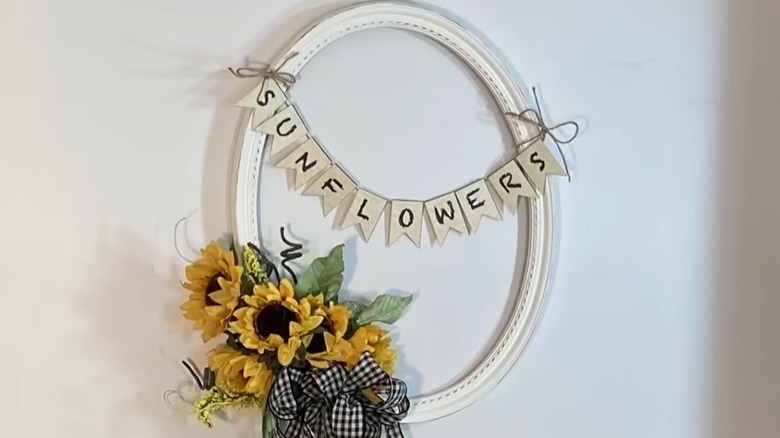
For this easy project, you'll just need some chalk paint, faux flowers, ribbon, and twine. Print small, banner-shaped letters that spell out what you'd like your sign to say. Paint your frame, and once it's dry, you can use a sander to give it a distressed look. Glue and wrap your flowers and bow to one side of the photo frame. Glue the letters to the twine going across the front, tying the twine around the frame. Place your sign on display in your yard or garden.
6. A plant propagation display
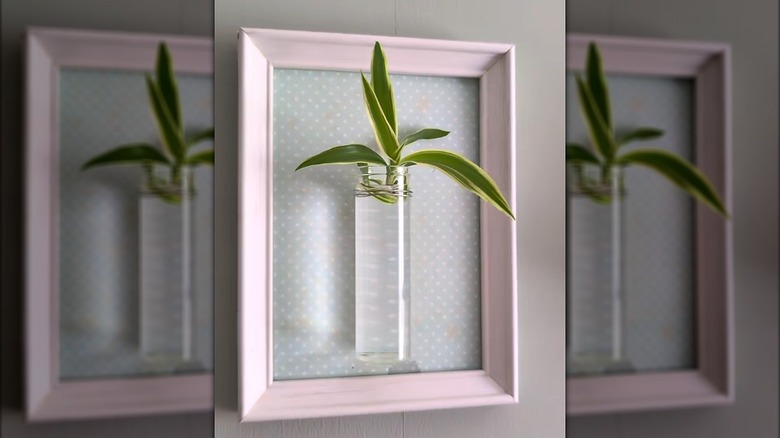
First, remove the glass from the frame. Cut a paper insert and glue it to the inside. Take your propagator jar and set it down where you want it in the frame, making marks on either side to show where the wire will go through. Cut or drill holes on the marks through your paper and frame backing. Wrap the wire around the jar and through the holes to secure it in place. Mount the frame on the wall, then add water and your plant cutting.
7. Art for your outdoor space
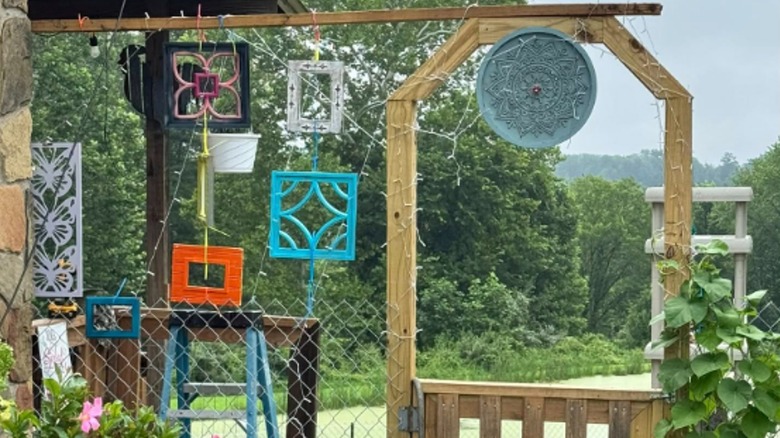
Gather some photo frames in different sizes and shapes, and remove their glass and inserts. Get some spray paint in various colors (or use just one color, if you prefer) and paint your frames. Use bright colors to add charm and whimsy to decorate your backyard area. Grab some zip ties or strong wire and hang the frames in rows from your archway, gate, or pergola. You could also add some twinkly lights for additional ambience in the evening.
8. A drying rack for herbs
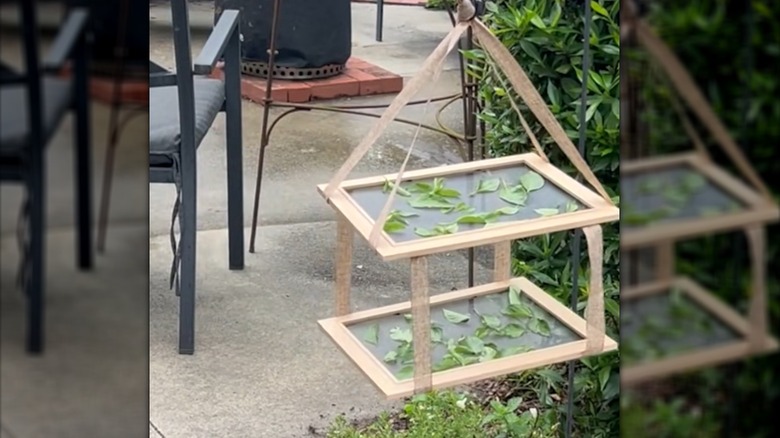
For this, you'll need two 8x10 wooden frames with the glass and inserts removed. Find some mesh screening, cut it to size, and staple it around the back edges of each frame. Get some ribbon or twine, and cut four long strips of equal length. Attach those to the four corners of one frame. Cut four shorter strips and use those to attach the other frame, creating a lower shelf. Tie the longer pieces together at the top to create a hanger to use outside or inside and dry your basil, sage, and other herbs.