15 Home Renovations That Can Easily Go Wrong And How To Be Prepared
We may receive a commission on purchases made from links.
Renovating your home can be exciting. But it can be a lot of work, too. For instance, you may have to spend time researching and saving your favorite designs to Pinterest boards, managing contractors (or their disappearances), or hunting for the best free AI interior design tools to save on professional fees. Still, despite going through numerous YouTube tutorials and receiving sage advice from friends, Reddit, and remodeling forums, there's plenty that can go wrong.
With overspent budgets, sleepless nights, and missed deadlines, surviving a renovation is already hard enough. But it'll all be for nothing if, ultimately, it isn't worth the toil, money, and effort. So, to help you avoid crying over spilled paint or a caved-in roof, we've compiled a list of 15 home renovations that can go wrong. These include removing load-bearing walls, undertaking major electrical fittings, tiling your shower area without waterproofing, building your own deck, replacing garage doors, and plenty more. We'll also highlight how you can be better prepared before tackling these massive projects.
Knocking down a load-bearing wall
Tempted to try an open layout for your small kitchen to make your home airier? Or, maybe you aspire to take down a part of the wall to create space for a door or widen the hallway? Before taking the hammer to any wall, ensure it isn't load-bearing — holding the roof or upper floors up. And if it is, install temporary supports to redistribute the weight. If you mistakenly take one down, you might notice the doors or windows refusing to latch closed, subtle dips in the floorboards on the upper floors, or cracks in the drywall. In the worst-case scenarios, your home's structural integrity may be entirely compromised, with the roof partially collapsing, which can cost thousands of dollars to rectify.
To avoid these issues, always consult a structural engineer before knocking out any wall. This is especially true if they're towards the center of your house, run at 90 degrees to the joists, or you're in a traditionally framed home. Having the necessary expertise and tools, an expert can determine whether the obstructive wall in question is bearing major load, if any installations (plumbing, drainage, or HVAC pipes) are in the way, and how best to redistribute the weight with beams and support systems after this wall is removed. Also, have an inspector sign off on the changes and get the necessary permits to avoid problems when selling your house.
Tiling in the shower area
Thinking of revamping your bathroom by installing shower tiles? Ensure the walls are waterproofed, or you may be in for nasty repairs. Although most shower tiles can handle water, grouts can't since they're made of porous materials. Without a waterproofing membrane in place, moisture can work its way behind the tiles, causing them to loosen and pop out. The moisture may also soak into the substrate, which is usually plywood or cement board, turning it into a breeding ground for mold and rot. Worse, this water damage may seep into adjoining rooms.
To avoid any soggy shock down the road, install a liquid-applied or sheet waterproof membrane, like the XFasten Shower Waterproofing Membrane Fabric Sheet, before the tiles go up. Have the contractor run a flood test, wherein they'll plug the drain, fill the base floor with water, mark the level, and let it sit for the night. If the water doesn't budge, it means the walls are adequately waterproofed, and the tiles will likely set correctly and stay put.
Tackling major electrical work yourself
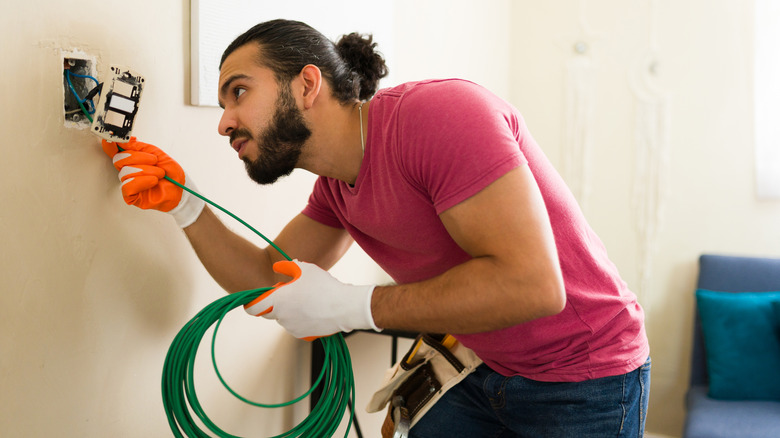
When you need to wait for months on end, pay exorbitant prices, or want minor changes made, you may feel tempted to undertake electrical work yourself. But plenty can go wrong if you don't put in the requisite work or follow the set codes. For instance, you may botch the wiring, overload the circuits, use the wrong wire gauge for the circuit's amperage, or fail to secure cables properly (or put them next to the water spigot!). This creates major fire and safety hazards. Plus, these mistakes might void your homeowner's insurance. It also isn't unusual to miss out on the critical locations where you actually need new outlets and connections. Remediating this usually requires ripping out the drywall, or working with aluminum wiring if it's an old home.
So, to be better prepared, look through the electrical plan and envision how you'll use the space, where you will place furniture, and the kind of appliances you'll be using. Mark those locations so you won't have to cut through the wall later to install new outlets. That being said, except for small battery-powered fittings, save major electrical work and wiring for a licensed electrician.
Building your own deck
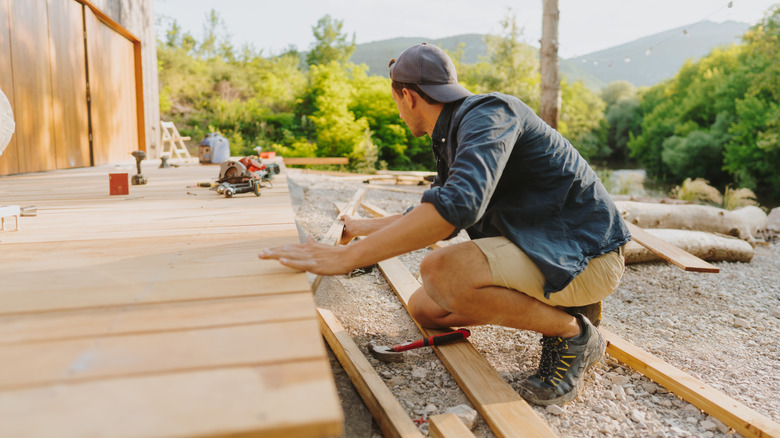
The fantasy of sipping matcha while listening to chirpy birds on a slow morning may motivate you to build a deck. However, if you aren't experienced with structural carpentry, there are several ways you can mess up this upgrade. Decks must have a strong, stable foundation, be securely attached to the house, have protective flashing, and have the appropriate fasteners. Otherwise, the structure will shift and pull apart from the house, endangering life. Even if you've got the basic structure right, but place the screws or the wood incorrectly, you can wind up with a deck with cupping boards — not what you had in mind when you planned a summer barbecue.
The best advice when building the perfect deck is to hire professionals who have the necessary licenses and experience to carry out the job. You can handle the finishing details yourself to save a little money. But if you choose to DIY from scratch, review load requirements, local codes, and proper joist spacing before starting. Don't skimp on waterproofing, or the deck will rot. Also, stick to corrosion-resistant fasteners. Be meticulous during the planning stage, as even one tiny misstep can cost dearly in the long run.
Undertaking major garage door repairs or replacements
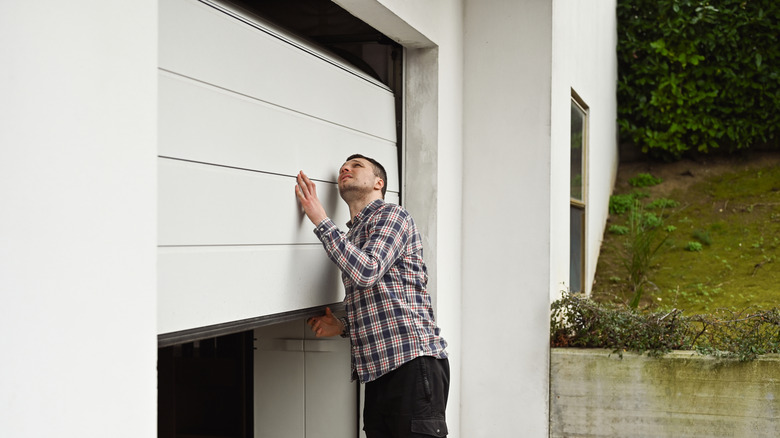
Repairing or replacing your garage door may seem like a manageable DIY project, but it involves significant risk. Garage doors are held up by torsion or extension springs and cables, which store a high amount of tension and energy. If you aren't too careful or lack the specialized tools, they can snap, instantly releasing the stored tension and causing you harm. Besides, a garage door can weigh up to 400 pounds. If it malfunctions or your hands get caught in the track, you can wind up with major injuries. And saving on professional fees isn't worth the ER visits.
With garage doors, it's important to draw a line between what is safe to DIY and what isn't. Generally, you can carry out routine maintenance projects, like oiling the roller tracks or replacing an opener unit. But anything that involves springs or cable systems is best left to professionals, given the razor-thin margin for error.
Repairing cracked or flaking paint
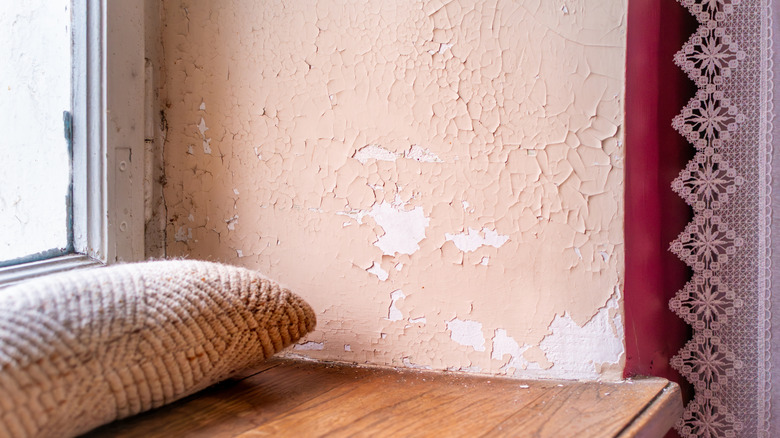
It's frustrating when paint starts peeling, flaking, or cracking within months of application. But it'll be even more frustrating if you repair it poorly, or do so without addressing the underlying problem. If it's an old home that has been painted several times over or you're a novice trying to make do with a single layer of paint, it's likely your walls or trims are undergoing mud cracking. This occurs when you apply the paint too thickly. Since it doesn't bond well with the surface, it disintegrates or bubbles over when temperatures and humidity levels change. And if you thought you could remediate it by simply sanding it down lightly and repainting, you'll be back to square one in a couple of months.
The first step when you're trying to fix chipped and peeling paint for a seamless finish is to remove the flaking material, sand the area smooth, wipe away the dust, and apply a high-adhesion paint primer. However, be sure to wear protective gear, as sanding down old paint can release lead, which is toxic — even more so to kids and expecting women. Apply thin coats of paint, and ensure the previous layer has dried completely before adding a second (or third) coat, or it'll crack again.
Relocating a bathroom fixture
Moving bathroom fixtures like the toilet, sink, or vanity a foot or two may seem like minor adjustments, but such layout changes can become complicated real fast. You may have to reroute the waterpipes and drain line for the sink, which requires opening up the flooring or walls. In the case of toilets, you must plan for the gradient of waste pipes as they connect to the sewage system. If you fail to do that, your toilet can get clogged and give off a smelly odor. It's even harder when relocating the shower, where you must tinker with the supply lines and plan for waterproofing. And if you forget to turn off the water valve, the resulting flooding will cost thousands in repairs.
Replacing taps or other fixtures in the same location is manageable for a confident DIYer. Of course, always disconnect the water pipes before such an undertaking. If you're dead set on moving them elsewhere, evaluate the existing plumbing layout and consult professionals about feasibility and cost. They'll know if you can make the adjustments without running into compliance problems. You don't want a quick swap job to turn into a structural headache.
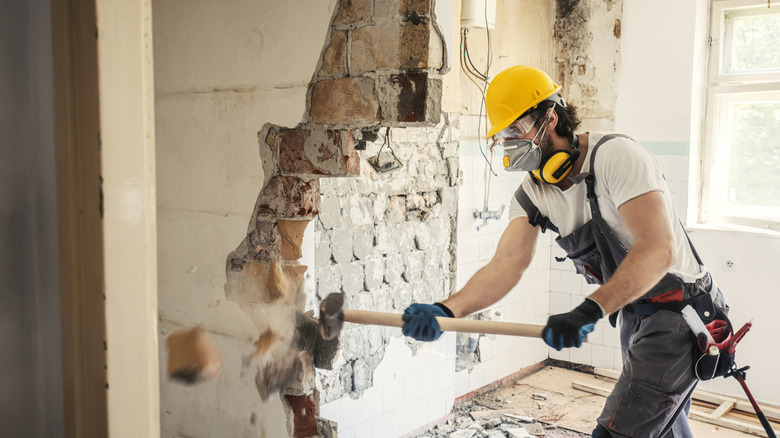
Dismantling the flooring in old builds
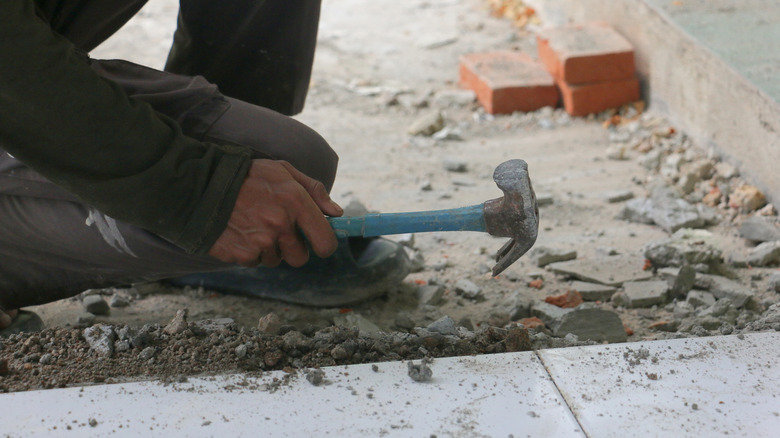
In homes built before 1980, flooring materials often contained asbestos. So, when you set out to demolish, dismantle, or replace the flooring, odds are you may set the fibers free, contaminating your home. Having a professional test the flooring before a demo is far cheaper than having the entire house remediated — assuming you discovered the contamination promptly.
Unfortunately, you can't tell whether a flooring contains asbestos from appearance alone, but there are a few signs. For instance, they may appear discolored or show fibers where they're cracked or damaged. But asbestos is also used within the inset or the adhesive, which is just as dangerous. So, have the materials tested before you take the flooring apart. If the flooring is intact and in stable condition, overlay it with a new flooring to lock in the fibers forever, where they won't hurt anyone (and disclose this when you're selling the house). But if removal is necessary, have licensed asbestos professionals replace the old flooring to minimize risk.
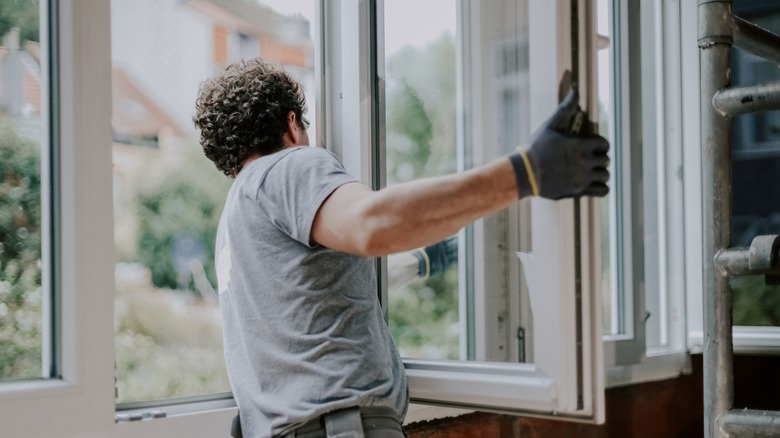
Replacing your home's windows
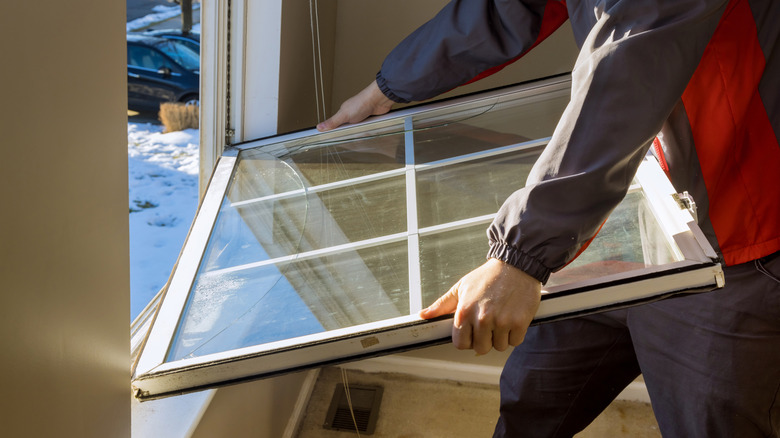
Replacing windows isn't cheap, especially if you're doing this for the entire house. However, it requires significant skill and resources, such as getting the right measurements. In case you hope to rely on pre-made windows, know that they don't always fit rough openings, especially in older homes where settling over time leaves the frames slightly out of square. When you have them customized, you must take the smallest openings into account. If it's still the wrong size or ill-fitted, you're looking at compromised insulation, water damage, and energy inefficiencies (also, dead houseplants as they won't enjoy the draft).
Depending on whether you're installing inserts or full-frame windows, you may have to tear out the trim, which may release lead or asbestos if it's a pre-1980 build. You also have to be extra careful about not damaging the waterproofing membrane and the plaster work. Add working on a ladder and handling heavy glass to the mix, and you have a project that can cause bodily injury.
To put it plainly, a DIY window installation is one project that you'd be better off avoiding; consult professionals instead, particularly if you're working on upper floors or in old buildings. But if you insist on handling it on your own, commit to a single window first. Take multiple measurements, prepare yourself for carpentry, and always have someone available to help you out with the glass.
Customizing the kitchen cabinetry
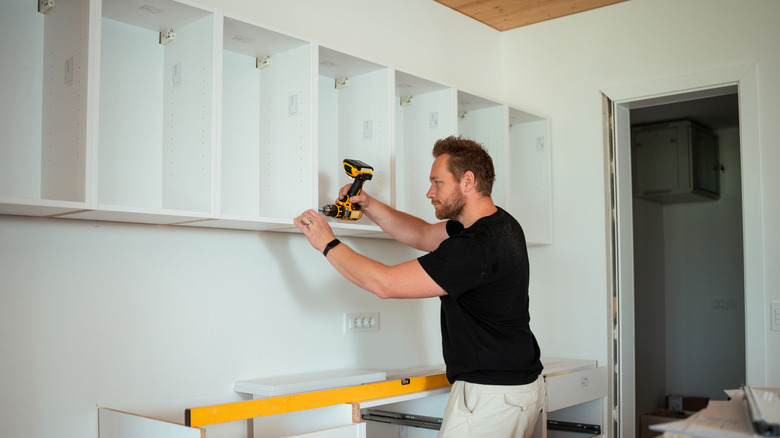
Customizing your kitchen cabinetry isn't only about putting the "slim shaker versus classic shaker" debate to rest. It's equally important to pay heed to measurements, scale, and functionality. Without factoring them into the process, you may end up with drawers that knock into or overlap each other, cabinets too cavernous to reach the back of, or a storage space that's too shallow to house your big pots.
When designing custom cabinetry, take stock of your actual cookware, plates, dishes, and cutting boards. Make sure your tallest pot and your widest serving tray can actually fit inside the drawers or cabinets. If you're working with a contractor, have them play out a 3D render of the final look to avoid issues later. In case that's not possible, at least conduct a "functional dry run" with cardboard mockups.
Replacing exterior doors
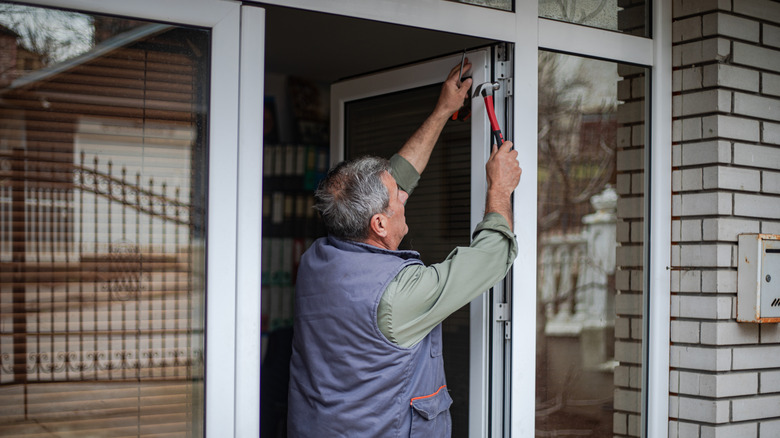
Ideally, swapping out the exterior door and installing a new one in the exact space should be a breeze. Turns out, that's far from the truth. Slabs settle over time, so the opening may not be fully square. So, even if you get a door with the same dimensions, it'll seem misaligned or ill-fitted. Not only does it not bode well for your curb appeal, but you're exposing yourself to problematic situations, like drafts in winter, humidity in the summer, rot after it rains, and pests throughout the year. You can also go wrong with hinge placements, shimming, fastening of screws, and sill prep — all of which may require significant rework just to make the door fit.
When you're renovating your exterior door, hire it out to a licensed contractor since security, functionality, and aesthetics are paramount. They'll also know how to handle situations like hidden rot or mold, which only become discoverable once the door is off. Otherwise, plan this carefully after factoring in your woodworking skills and tools. Getting a pre-hung door, which has the frame attached, can save you lots of labor. Though you'll still have to spend time shimming out uneven surfaces if they aren't level or plumb.
Changing out the wallpaper
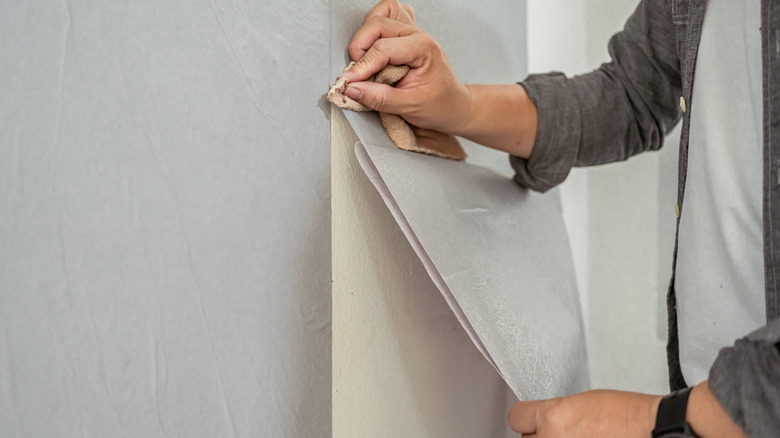
Swapping out your current wallpaper for a trendier one is an easy way to refresh interiors, but there are pitfalls to watch out for. Old paper applied directly to an unprimed drywall can bond "too well". And if you pull too hard, the drywall may come off along with it, and repairing that was not on the menu. If you take a different approach by pasting new wallpaper over the old one can lead to a soggy mess — the moisture in the new paper may rewet the adhesive in the old one, causing it to bubble and requiring you to start over.
To prevent these issues, use a hair dryer or a power steamer to loosen the old adhesive and peel off the wallpaper gradually. Wash, sand down, and prime the wall so you have a nice base for the new roll. Before starting, ensure you move furniture out of the way and cover the ground with a plastic sheet to catch any falling debris. Note that glue dries out quickly, so work in small sections, or you'll lose time playing catch-up and end up with a design that's neither bold nor seamless.
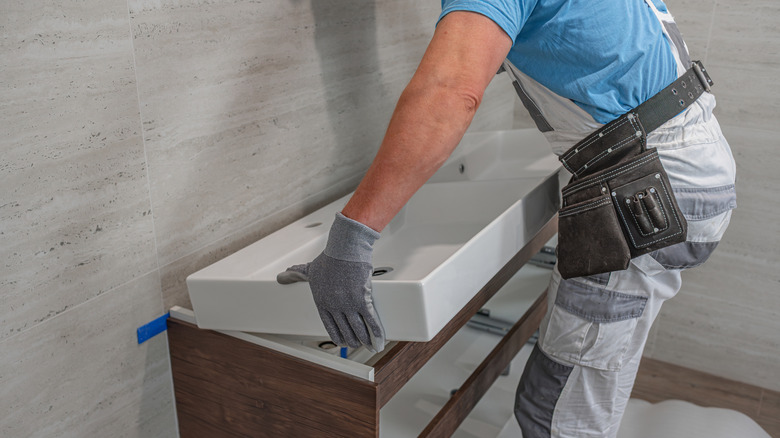
Installing vanities with drawers in the bathroom
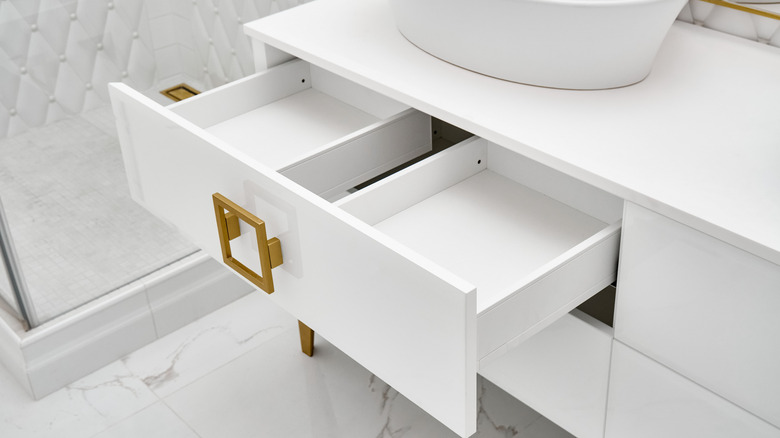
A vanity with built-in drawers is a smart storage solution for a bathroom. But it may turn out to be a poor decision if it conflicts with the existing plumbing. Instances like water pipes or P-traps running directly through where the drawer boxes need to go are fairly common. This leaves homeowners with few options that require extra expense: open up the drywall to move the pipes or cut into the drawers and lose storage to accommodate plumbing.
To avoid making such a decision, map out where your drain and supply lines (as well as electrical outlets) sit before purchasing anything. Alternatively, look for vanities with an open configuration and customize the storage space accordingly. But if you're ready to spend a little extra and don't mind tearing into finished walls, consult with a plumber and see whether it's possible to reroute pipes, and take it from there.
Switching up the lighting
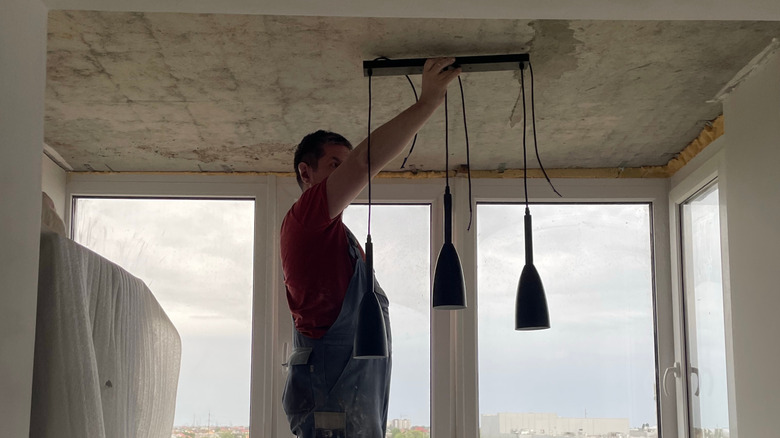
Swapping a basic ceiling fixture for a statement chandelier isn't a simple matter of changing a "light." If the statement piece is heavy enough, you may have to reinforce the ceiling. Similarly, if you're adding recessed lighting across the dining area, you may have to run new circuits. All of these changes are significantly complex, not to mention expensive, once things are locked in and the drywall is all patched up. If you haven't planned for it, your lighting plan may never see the light of day.
So, to avoid complications, draw out a well-thought-out lighting plan before undertaking renovation. Factor in the weight, dimmers, whether you want to control the lights from multiple locations or rooms, and the specific order for switches. As if you aren't feeling overwhelmed already, you'll also need to consider wiring and circuits. Our advice? Just work with a licensed electrician to avoid regrets later.
Finishing the basement
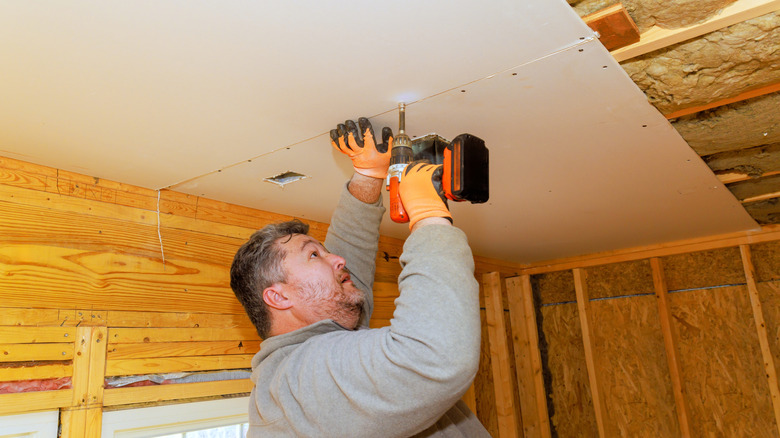
Basement renovations come with a set of challenges that above-ground rooms don't: contending with moisture and hydrostatic pressure. To top that, they usually house utilities, which must remain accessible without interfering with functionality or standing out like an eyesore. If you plan on turning it into a habitable space, you will also need egress windows for emergencies, aside from choosing the wiring, soundproofing, drywall, and flooring. Alas, mistakes can be made at pretty much every step, like skimping on the vapor barrier or choosing the wrong floor material (skip wood). Worse, dealing with moisture damage or remediation can prove really expensive later.
To enjoy the benefits of a finished basement, be real about your skill set and limitations. Research thoroughly, read up on the code, and split the tasks into what you can conveniently DIY and what you can contract out. For instance, hire pros for electrical, egress windows, plumbing, or waterproofing, but finish the drywall on your own to save money.