Turn An Old Vintage Doily And Teacup Into Functional Decor With A Crafty Twist
We may receive a commission on purchases made from links.
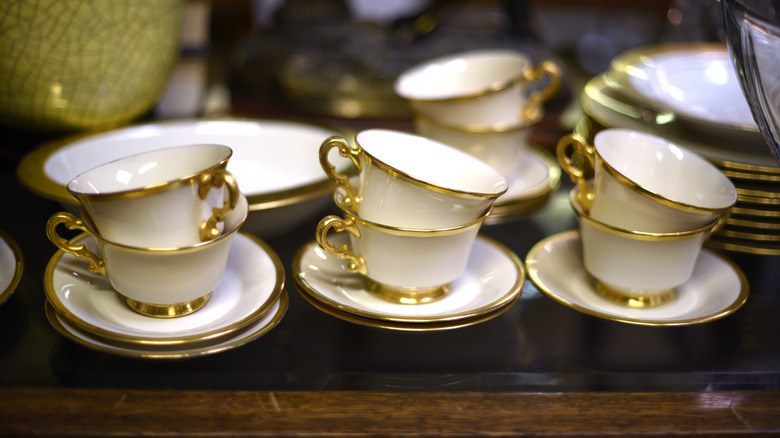
Time, moving house, and life in general have ways of breaking apart sets of things. A whole tea set becomes a couple of teacups and a saucer or two. A drawer full of your nana's handmade doilies somehow get whittled down to just one. And let's not forget those errant sewing needles that now litter the bottom of your sewing drawer. In the hands of the unskilled, those items become, at best, donations to charity, and at worst, a nuisance. However, to the clever crafter, they're the makings of a teacup pin cushion so cute that the Mad Hatter will want to snatch it up for himself.
The cuteness factor for this sewing-and-craft DIY comes from the cup. If you're after the whole Wonderland vibe, a teacup and saucer set is the way to go. However, items like porcelain creamer pitchers, double-handled sugar bowls, and even collectible coffee mugs work for this too. It's even okay if there's a chip on the lip. Features like this add character to the piece. You'll also need a doily that you wouldn't mind cutting apart as well as a piece of scrap fabric and some cotton batting or cotton balls.
And since no crafting project worth its salt is any good without tools, we'll throw in a list of those for you, too, though you won't need many. Have a pair of fabric scissors and an E-outstanding Bone Folder on hand. Or if you're an artist, a palette knife might work for this purpose. You'll also need some Xinyet Fray Check for Fabric to keep the ends of your fabric and the doily from unraveled.
Working with the fabric and the doily
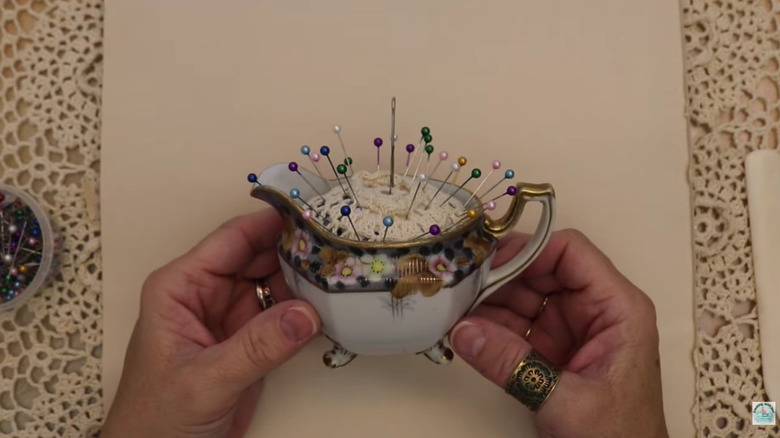
You'll stuff the fabric with the cotton first. Place a lump of cotton about the size of the cup's interior in the middle of your scrap of fabric. Fold the material's edges inward until it covers the wad of cotton. You shouldn't need to sew the material into a closed pouch for this to work. Just make sure that you push the open, un-sewn side of the bundle into the bottom of the cup. The pressure from the interior of the container pushing against the cotton-filled fabric lump will be enough to keep everything intact.
Next, cut out a portion of the doily. It needs to be ample enough to cover the top of the cushion and allow you to tuck some of the doily's borders down into the cup around the pouch. Treat the cut ends of the yarn with the fabric glue before tucking it into the mug. Next, smooth out the puckers around the edges of the fabric and doily using the bone folder. Finally, add your pins and needles to the cushion.
On a related note, if you'd like the cup to feature a removable pin cushion, sew the edges of the fabric together to create a pillow then sew the doily to the fabric. Add assorted buttons to the top. These can be purely decorative. Or use them to organize your pins and needles. For example, all of your needles are placed near the wooden button. The pins cluster next to a vintage jeweled button. Ad infinitum. This system allows you to find the pin or needle you're looking for quickly.
Leveling up the teacup
Although this piece is small, it can become a cute accent piece in a larger decorative motif, like a shabby chic decor aesthetic. Just choose a fabric that matches the decorative style in the space. Also select a doily whose crochet pattern features large holes. This allows the fabric to peek out through the holes in the doily, creating a subtle nod to the larger decorating scheme in the room.
And, consider gluing the teacup's saucer (if there is one) to the bottom of the cup and gluing a couple of button magnets to the top of the saucer (Elmer's Probond Advanced works great). Tap this hack to make a magnetic pin dish to catch your extra pins and needles. The button magnets would also attract and steady metal thimbles if you drop them into the saucer of your repurposed tea cup or coffee mug. This simple crafting hack will keep the thimbles from rolling off the saucer, even if you accidentally bump the cup. It also allows you to keep the thumb protectors close to the project at hand, rather than forcing you to store them in a thrifted vintage sewing box.