Make A Plain Glass Vase Your Own With These Etching Tips
We may receive a commission on purchases made from links.
It's easy to upgrade a plain glass vase with a ribbon or tissue paper, but more permanent options are limited. While you can paint a vase to make chic marbled home decor, getting paint to stick to a nonporous surface can be a challenge, and painted glass will usually peel over time. That's why etching is the best way to create designs on glass. Etching may look similar to paint, but it is actually quite different. Unlike paint, etching will not wear off in the dishwasher because it is permanent. Instead of spreading an adhesive layer on top of the glass, the process of etching involves applying an acidic substance to the glass to create frosted designs.
This project is relatively simple and should only take about an hour. Another one of this project's perks is its affordability, and you should be able to get everything you need for less than $30. First, you'll need a stencil, which you can purchase at Hobby Lobby or Home Depot. You'll also need painter's tape, plastic gloves, goggles, a paint brush, scissors, rubbing alcohol, and a bottle of Armour Etch. While you're working, and even after you finish, it's important to keep the Armour Etch out of the reach of children and pets because it can cause severe burns.
How to etch your glass vase
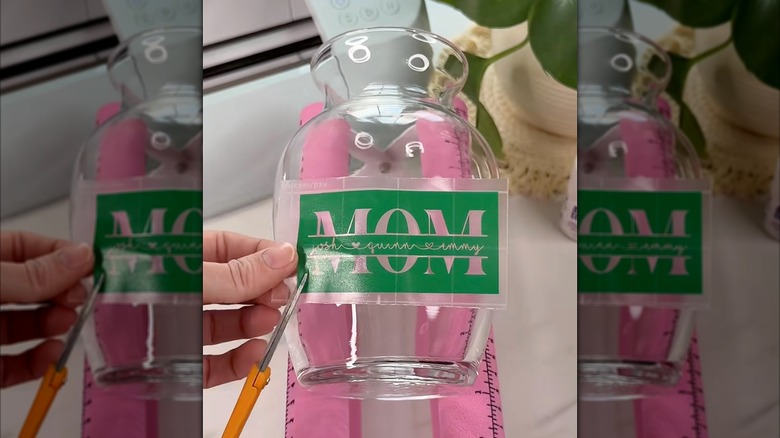
Start by pouring some rubbing alcohol onto a piece of tissue paper and scrubbing the outside of the vase to remove any bits of dust that could interfere with the chemical reaction. Then make sure the outside of your vase is fully dry. When you've selected your stencil design, place it flat on the glass. You may have to cut the edges of the stencil to fit it smoothly to the side of your vase. Some stencils may have their own adhesive, while others may not. If your stencil does not have an adhesive, line its edges with tape and stick it to the vase. Put on your gloves and goggles, and then carefully paint over the stencil with etching cream. After 20 minutes, run the vase under warm water until the cream is gone, and then remove your stencil. Your glazed design, phrase, or logo should show clearly.
If you're tech savvy, you can personalize your stencils using a Cricut Explore 3 Smart Cutting Machine. After designing your own stencil using a website like Creative Fabrica, the cutting machine will produce it. If you liked this project, you can also use Armour Etch or even a rotary tool to "tattoo" a mirror — and the results are stunning. If you're not interested in using strong chemicals or power tools, you can also transform any ordinary vase into trendy decor with electrical tape.