17 Ways You Could Be Repurposing Cookie Cutters Around Your Home
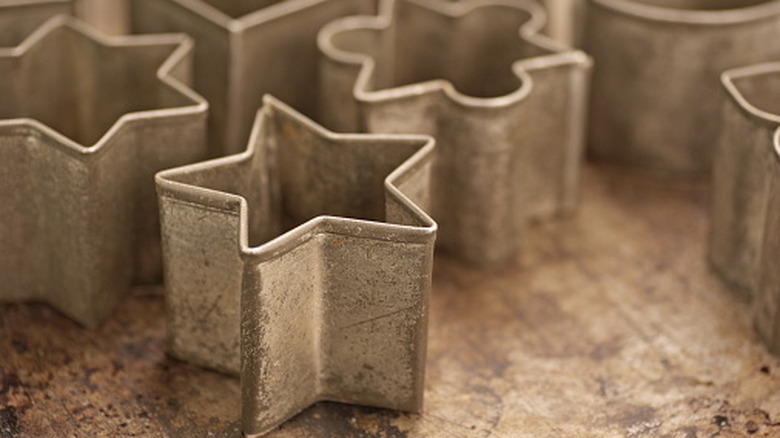
Cut-out cookies are a classic, whether you're decorating cookies for Santa with your kids or cutting out a batch of hearts to gift to your love on Valentine's Day. Cookie cutters make it easy to crank out lots of fun-shaped cookies, but they're also perfect for creative decorations, especially for your kitchen. Whether you're cutting back on your cookie cutter stash or came across some cute cutters at an antique store, consider upcycling them into garlands, ornaments, jar lids, and other creative projects around the house. While cookie cutters are often holiday-themed, they also come in general shapes, so you can create these projects for everyday use, not just seasonal projects.
Cookie cutters might seem pretty specific, but they work for a variety of foods — you can use them to cut sandwiches, shape pancakes, or cut fruit into appealing shapes. But our ideas focus on the non-edible — specifically, the ideas you'll find here help you craft DIY decor for your home. In some cases, the cookie cutters serve as molds or cutters to shape decor items. Other ideas use the cutters themselves as the decoration. While new cookie cutters work just fine, vintage cutters add a rustic, nostalgic look to many of these projects.
Tuck cookie cutters onto a tiered tray for seasonal decor

Wondering how to decorate a two-tiered stand for your kitchen? Cookie cutters make a gorgeous addition among the other decor pieces you choose. Having a theme makes it easier to pick tiered tray pieces that work well together. In this case, the theme could be a specific holiday or baking in general. Larger anchor pieces might include a small rolling pin, a hand-written recipe card, or a whisk. Cookie cutters are small enough to fill in gaps on the trays and can be displayed upright or flat.
Create a themed diorama in a cookie cutter
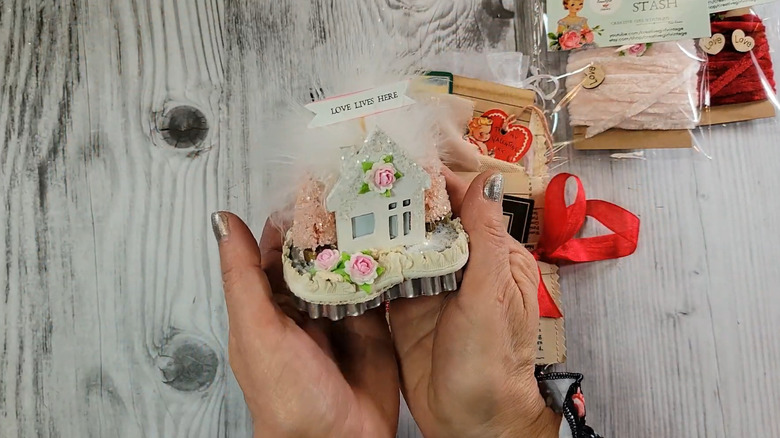
Call it an assemblage, a three-dimensional collage, or a mini diorama — no matter what, this project produces a cute little display that tucks onto a shelf easily. Vintage-style cutters with solid metal tops are ideal to serve as a platform for the decorations. For an open cookie cutter, attach a piece of cardboard cut to the shape to glue decorations to. Then, add themed three-dimensional items to create a tiny themed scene. In an egg-shaped cutter, add a mini bunny, tiny Easter eggs, and artificial grass as the base, for example.
Customize seasonal ornaments
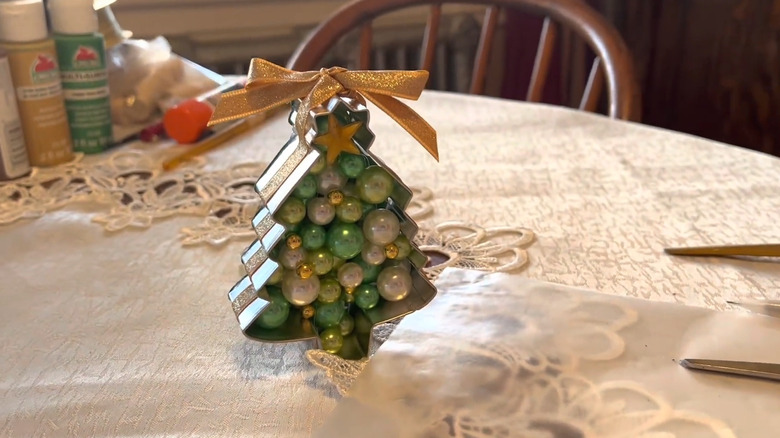
Seasonal cookie cutters are perfectly sized and shaped to create the outline of an ornament with seemingly endless ways to embellish them. Filling the center of the cookie cutter with gemstones, mini ball ornaments, and other embellishments is one colorful option. Or, cut out a seasonal image, and glue it to the back of the cutter so the image shows through the form. Wrapping the cutter in fabric, twine, or ribbon with a glue gun hides the material and allows for customization. Finishing touches may include glitter, beads around the outside, and other craft supplies that fit the theme.
Tie them to ribbon or string to make a garland
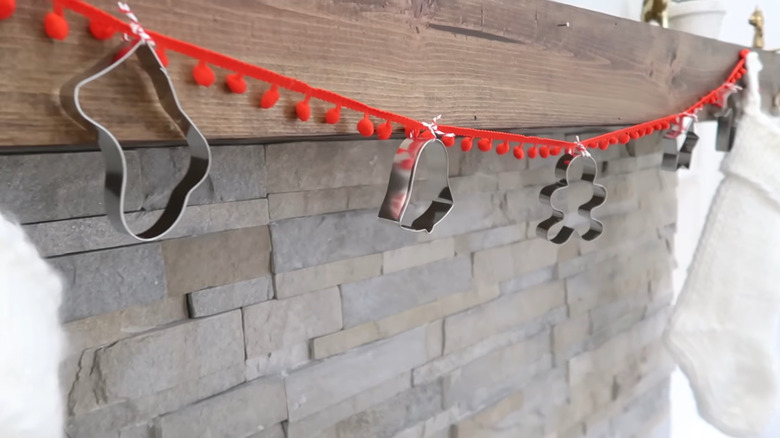
Decorate your mantel or a shelf in the kitchen with a cookie cutter garland. The basics you'll need are a long string or ribbon, cookie cutters, and twine. Tie the cookie cutters onto the base string at regular intervals. You can tie other embellishments on or add bows between the cutters. While this makes sense as a DIY garland idea for Christmas decor, you can easily swap out the ornament shapes and additional decorations to fit any holiday. Or, make a birthday garland with cutters that fit the party theme.
Shape bird seed treats with cookie cutters
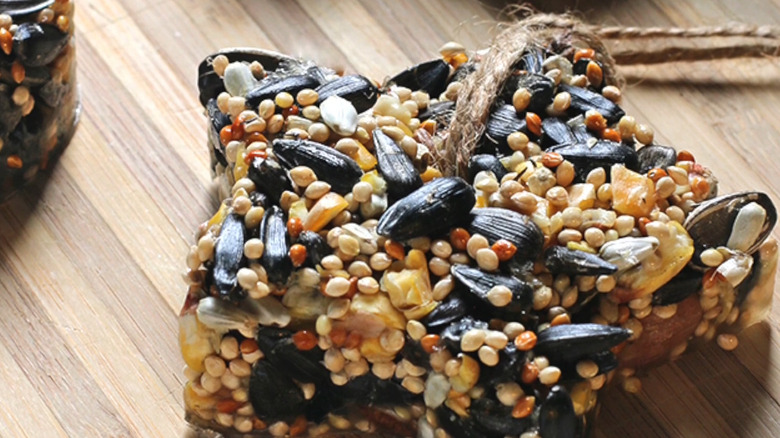
Next is a DIY cookie cutter bird feeder you can make on a budget. The ornaments become the molds for a birdseed mixture, which hardens to hold its shape. A common recipe uses one packet of unflavored gelatin, 2 tablespoons cold water, and ⅓ cup boiling water as the binder. Add 2 cups of birdseed and pack it into the cookie cutter molds. If you make shaped suet with a recipe that includes any type of fat, put it in a suet feeder — this prevents the grease from coating feathers and potentially harming birds.
Top a jar with a cookie cutter handle
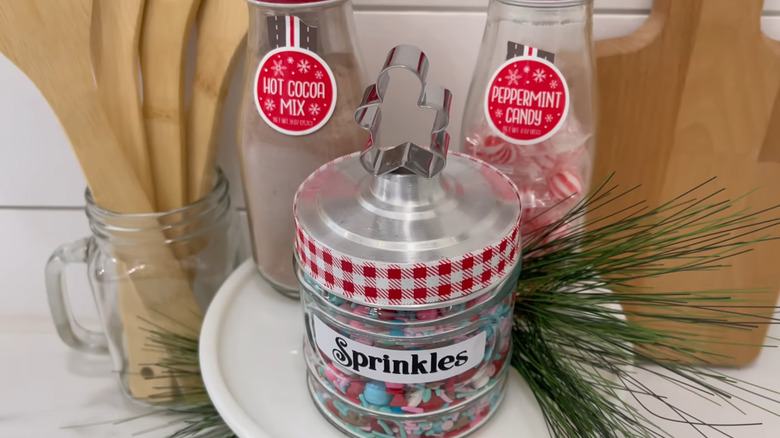
A small cookie cutter makes a cute topper for a jar lid. Select a cookie cutter that fits your decor theme, whether you want a general shape to use year-round or a seasonal shape for the holidays. Then, find a jar with a lid — something flat or with a wide raised center area is ideal. Attach the cookie cutter in an upright position using super glue or E6000 glue. Alternatively, tie a few small cookie cutters onto twine or ribbon, and tie them around the neck of the jar as an accent.
Use them as molds for DIY gel clings
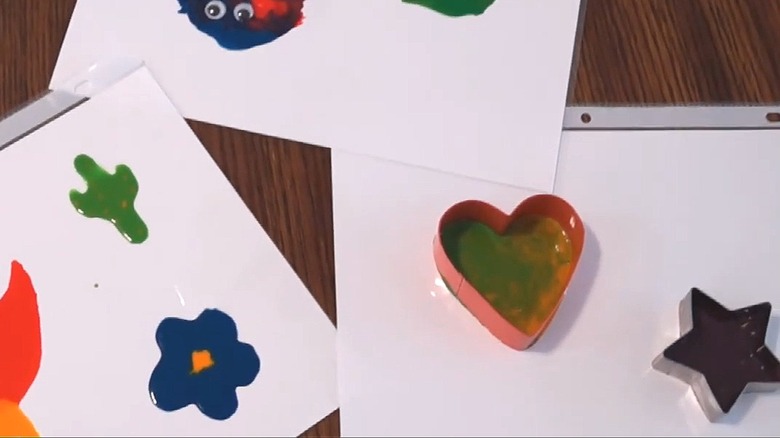
DIY gel clings are a fun craft to make with kids, and old cookie cutters help shape them. To make the gel, mix clear glue, a few drops of dish soap, and food coloring to create the desired hue. Repeat with other colors. Put the cookie cutters on a plastic surface, and slow pour a very thin layer of the tinted glue. You can also paint the colors onto the plastic inside of the cookie cutters. Let them dry completely before peeling them off and putting them on the window.
Shape soaps with cookie cutters
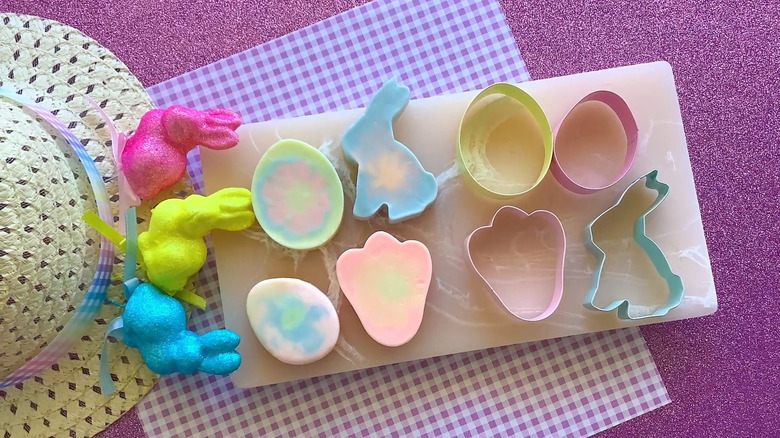
Cookie cutters are the vintage item at the thrift store that makes cute DIY soaps, when you use them as molds. New cookie cutters work just as well, though. One option is to use a pourable soap mixture to fill the cookie cutter — a thin layer of soap on parchment paper first helps hold the cookie cutters in place. Or, melt and pour the soap to form a sheet of the soap. Once the soap sets up, flip it out onto a cutting board, and use the cookie cutters to shape individual bars of soap.
Make shaped candles
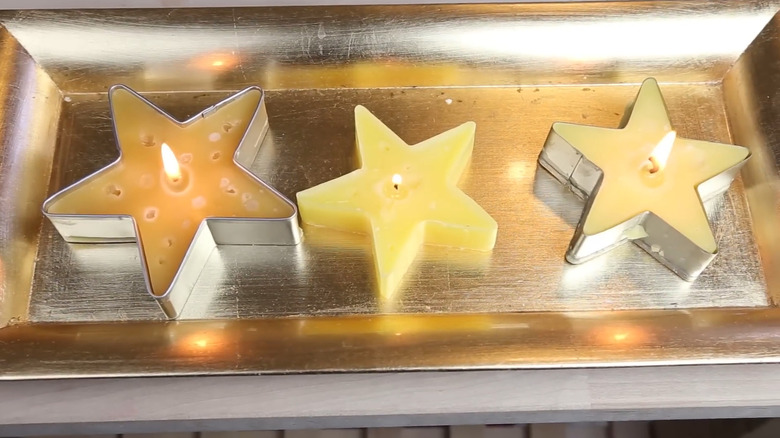
This project is similar to the soap idea, except you're using the cutters as candle molds. Pour a thin layer of melted wax on parchment paper, push the cookie cutter into it, and put the wick in place. Then, simply fill up the cookie cutter mold with melted wax. Grab holiday cookie cutters to take a festive candle DIY to another level — skip the wick but place a taper candle in the middle of the cookie cutter as you fill it with wax, so the shape makes a decorative candle base.
Slide napkins through the center for napkin rings
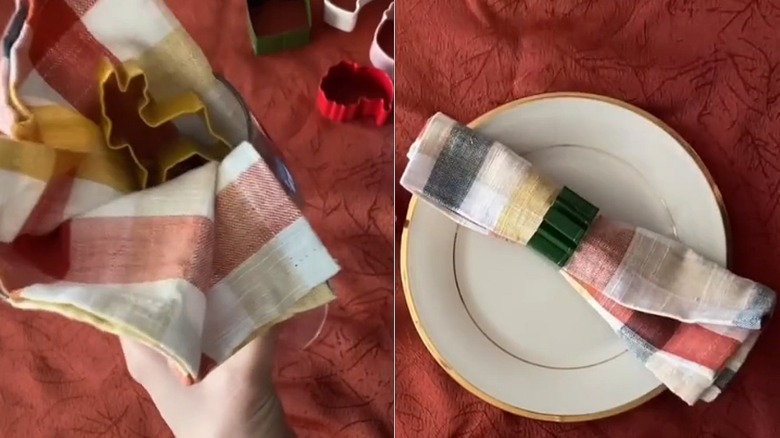
If you're entertaining or just want to dress up your dining table for the seasons, use extra cookie cutters as napkin rings. You'll want cutters that are open in the center without a handle that could get in the way. Then, simply slide a rolled or folded napkin through the center of the cookie cutter. Or, tie ribbon around the napkins with a mini cookie cutter dangling from it. You can also tuck the cookie cutter and napkin into a wine glass. For parties, the cookie cutters can double as favors.
Make a hanging mini candle holder
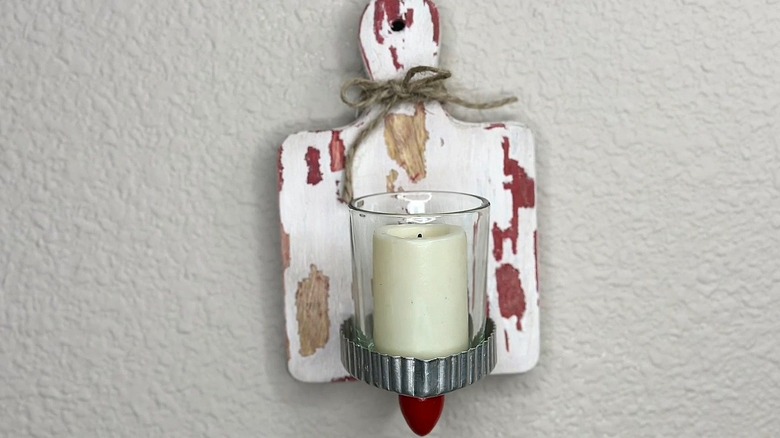
This creative upcycling project uses an old metal cookie cutter with a solid top as the base for a candle holder. Simply screw a sturdy metal cutter onto a mini cutting board or a piece of wood in your preferred shape. You'll want the cookie cutter upside down, so it forms a tray-like platform for a small candle. You can paint or stain the background board to fit your decor. Stick to flameless candles for this display — smaller options are ideal to avoid too much weight on the cookie cutter.
Hang cookie cutters from a seasonal sign
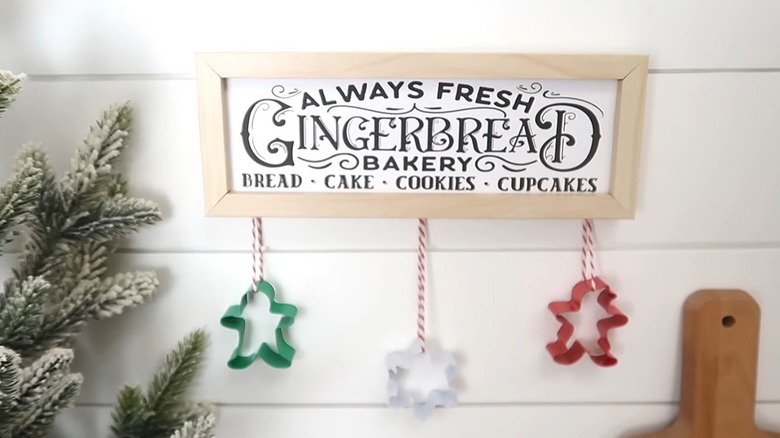
Dress up a decorative sign you already have, or pick up something inexpensive from the Dollar Tree as the foundation for this craft. Cookie cutters become an embellishment for the sign. An easy option is to tie twine around each cookie cutter, and attach it to the back, bottom edge of the frame, so the cutters dangle below it. Or, glue cookie cutters standing up along the top edge of the decorative frame. You can leave the cookie cutters as-is, or decorate them with glitter, ribbon, and other embellishments.
Decorate a wall or door with a cookie cutter wreath
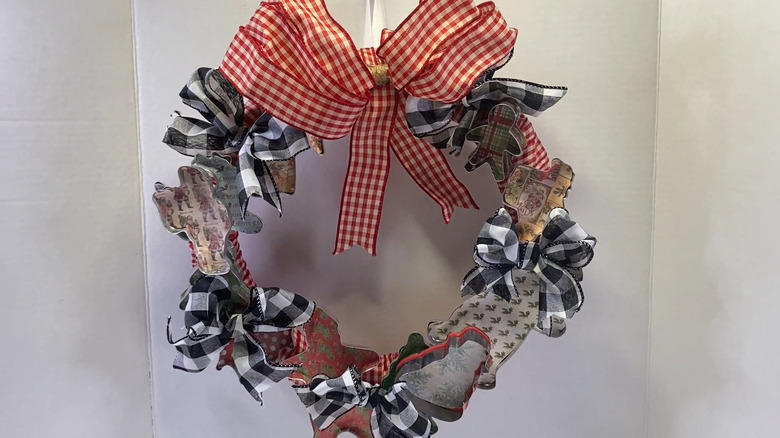
Adorn a wreath form with cookie cutters for a seasonal decoration. You can use any type of wreath form — cover a foam form with ribbon, for example. Or, start with a grapevine or pine wreath. Then, hot glue or tie your ornaments onto the wreath. Another option is to construct the whole wreath out of metal cookie cutters: Place something round in the middle, like an embroidery hoop, and arrange two rows of cutters around the circle, so the sides are touching. Glue the cutters together to form the wreath.
Capture memories with a cookie cutter shadow box
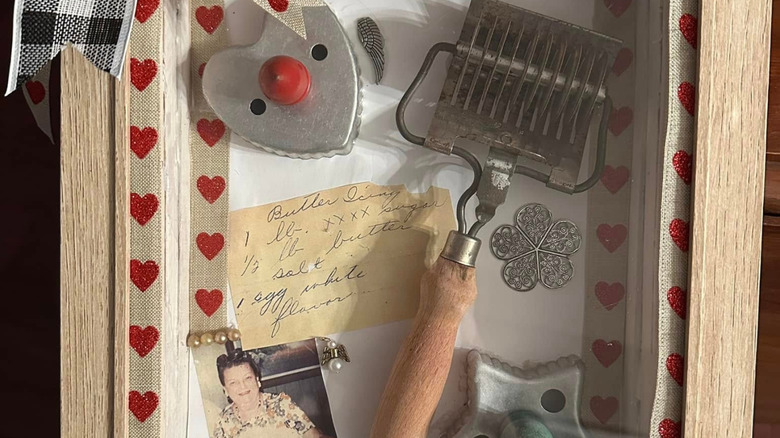
Perhaps the most charming way to reuse old cookie cutters for home decor is in a shadow box, especially if you have older cookie cutters used by a relative. For a simple design, attach rows of cookie cutters you want to display within a shadow box. To personalize it, add photos and hand-written recipes from a loved one whose cookie cutters you're displaying. You can also add other baking tools, labels from old baking ingredients, or general embellishments, like ribbon.
Make clay magnets
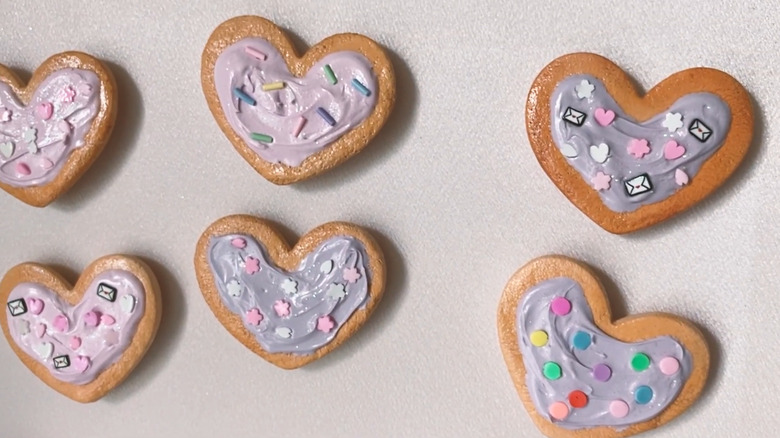
You can craft the cutest kitchen fridge decor with budget-friendly polymer clay and some cookie cutters to make customized magnets. Start by rolling out the clay and using the cookie cutters to shape the magnets. From there, you can paint the cutouts and add decorations — create a frosting effect by mixing paint with silicone and spreading it on the cookies. Then, glue a strong magnet to the back. For variety, cover the back of a cookie cutter with decorative paper, and add a magnet to it to use the cutter as a fridge decoration, too.
Frame a row of cookie cutters in an embroidery hoop
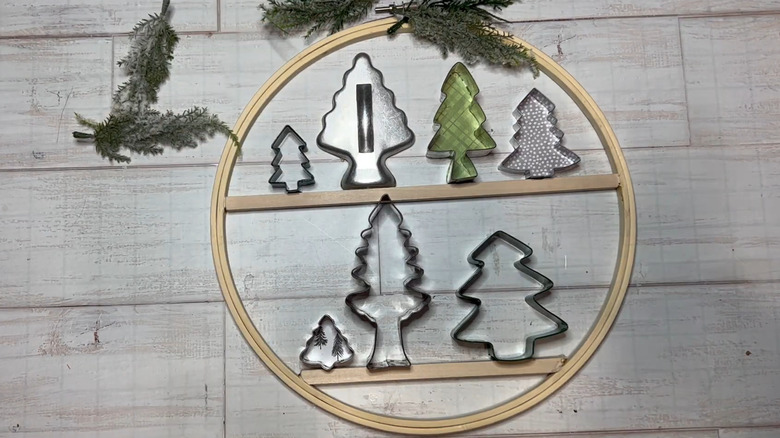
One creative way to repurpose embroidery hoops around your home is to use them as a display for your favorite cookie cutters. You'll want a large embroidery hoop — at least 12 inches in diameter. Then, create mini "shelves" by gluing square dowels horizontally across the hoop. The number of shelves you add depends on how much space is available and the size of the cookie cutters. Glue the cutters to the dowels, and add ribbons, pine boughs, or other embellishments to finish the look.