Keep Your Junk Drawer Looking Neat With A Clever Tip From Martha Stewart
We may receive a commission on purchases made from links.
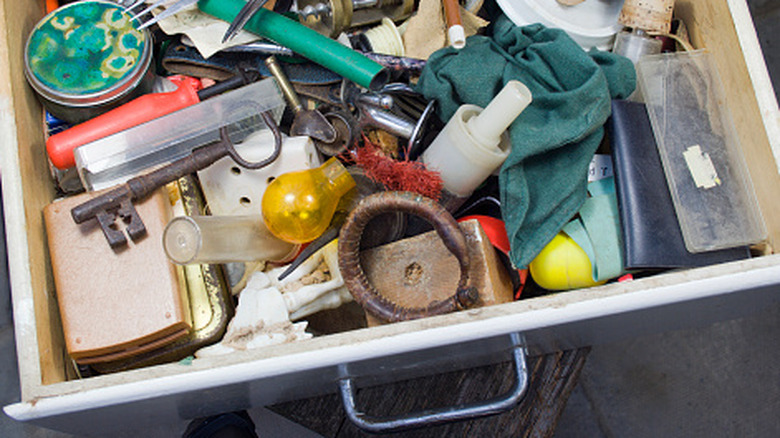
The grab-bag of items you keep in your kitchen junk drawer can be very revealing — it can simultaneously delineate your most-used tools and the sentimentalities you just can't bear to part with. However, if you're storing hefty metal tools like scissors in your junk drawer, lifestyle doyenne Martha Stewart recommends protecting the wooden interior — and creating a nice reflective finish — with sheet metal lining. In a clip from "The Martha Stewart Show" uploaded to YouTube in 2013, Stewart offers a way to extend the drawer's longevity using your own hobby-shop tools and some sheet metal. Then, once everything's removed and the sheet's in place, you can declutter your junk drawer with a simple 30-minute method.
If you've decided to DIY this project, first measure the inside dimensions of your junk drawer using a Flexible Measuring Tape. This helps you maneuver into tight corners better than a standard carpenter's measuring tape. Removing the drawer from the cabinet will make measuring for a snug fit easier, or, if you're in a crafty mood, you could even DIY your own drawers and pull-out shelves for your cabinets to achieve custom measurements. It's important to get the measurements accurate to prevent the sheet from sliding around in the drawer and trapping receipts or loose change beneath it.
Next, head to your local hardware store to pick up the sheet metal. Standard kitchen drawers can range in width from 12 to 36 inches, while most are 24 inches deep, so look for a piece at least this large. For example, Home Depot sells single 36-inch-by-36-inch pieces of M-D Building Products Aluminum Sheet Metal for about $35. You'll also need a pair of metal hand shears, snips, or nibblers, a ruler, and a permanent marker.
Cutting your own sheet metal for a junk drawer liner
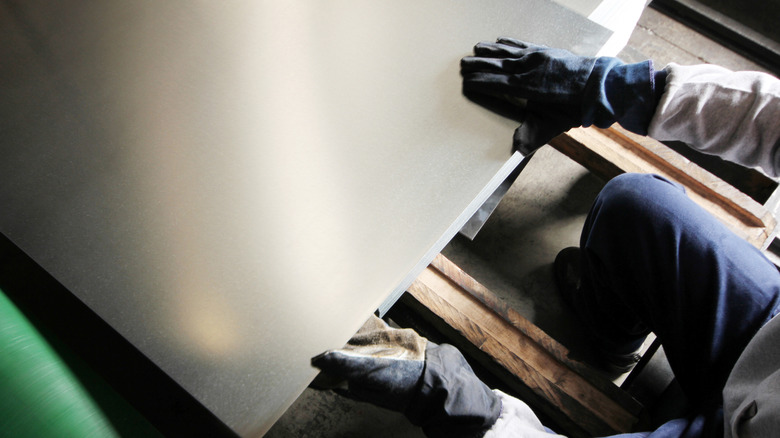
You can study sheet metalworking at a technical college, but Martha Stewart's simple junk drawer liner doesn't require anywhere near that level of expertise. Using the ruler and permanent marker, sketch out your dimensions. Then cut along the lines smoothly with the shears, snips, or nibblers. You can speed up the cutting process using power tools, such as an angle grinder or waterjet cutter. Then, sand the edges to soften rough cuts with closed-coat sandpaper, which is ideal for metalworking.
Regardless of your method, it's important to wear gloves when working with thin, razor-sharp metal. Also, use precautions like goggles and earplugs when using power tools in a smaller home workshop space; keep your extremities and any loose garments away from sharp blades. If you don't feel you have the tools to get the job done, some colleges and universities open their metal shops to members of the public. Otherwise, seek out a local metal fabrication shop to do the job for you.
Though you want the sheet metal liner for your junk drawer to fit snugly, you still want to be able to remove it if you decide to ditch the junk drawer once and for all. To address this issue, snip a small amount off one corner of the metal sheet during cutting. This gives you the option to lift the sheet out of the drawer without compromising the tight fit. Once the metal sheet is in place inside the drawer, Stewart recommends organizing the items in your junk drawer in various-sized removable containers. This 25-pack of Vtopmart Clear Plastic Drawer Organizer Trays is perfect for this and only costs about $18.