Give Your Boring Entryway A Modern Makeover With This DIY Floating Hearth
We may receive a commission on purchases made from links.
A blank entryway wall can make your space feel unfinished, but you don't need a full renovation to make your entryway more functional. One clever DIY making the rounds on TikTok by myeverythinglife shows how to create a sleek-looking floating hearth shelf that instantly adds modern character to a foyer. The project uses a fairly simple wooden frame that mounts to your wall. Then, it's coated with an all-purpose compound like plaster to mimic the look of poured concrete.
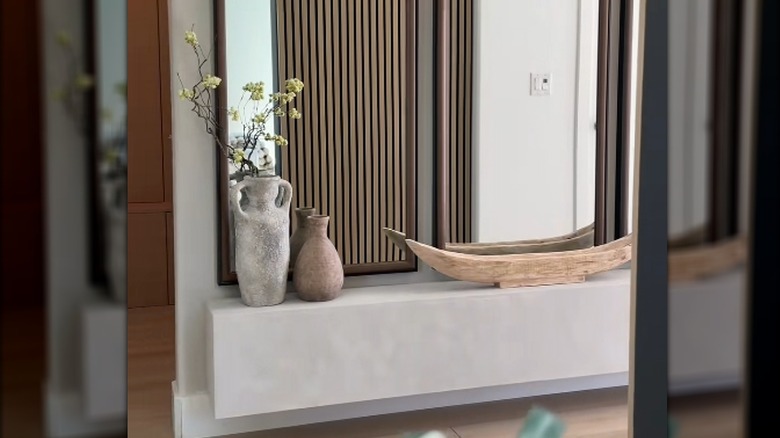
The best part is it's a single, streamlined piece, so it debunks a myth about entryway storage that says more is better. Instead, this DIY transforms your boring entryway into a polished and design-forward statement piece. Customize it by adding decor or use it as place to hold shoes. You might consider adding some built-in storage baskets or LED lighting underneath for a more substantial look.
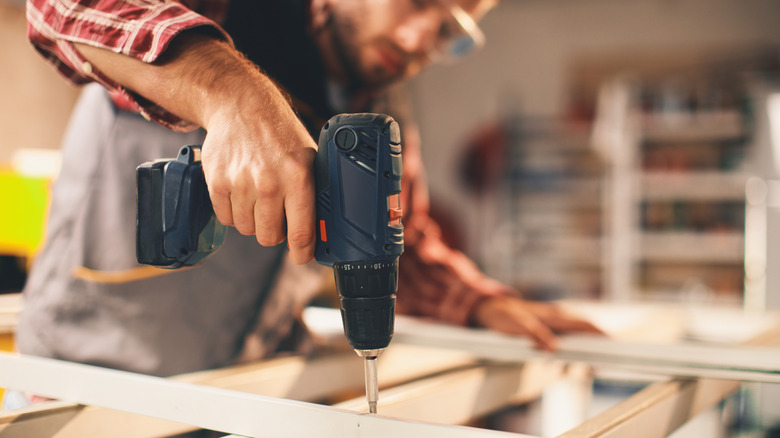
This DIY offers a simple way to make sure your entryway decor is practical and beautiful. There are different ways to construct this project. The original creator made a box-like structure. You can also create a floating shelf-style structure with a frame and box shelf over it. Some plywood or boards about 1-inch thick (depending on the length of your wall space) will make up the shelf body. You should get some 2x4 pieces of wood for the internal frame to provide more support. Pick up joint compound or plaster for your concrete-looking finish — this Akona Pre-Mixed Concrete Patch will work. You'll also need sandpaper, your drill, a miter or circular saw, wood screws, nails, your level, a measuring tape, and a trowel for the plaster application.
Steps to create your entryway floating concrete hearth
You will build the support frame first, then make the shelf box to go over it. Decide how deep you want your shelf to be — 10 to 12 inches deep works well for most entryway walls. It should sit low on the wall like a bench. Mark the locations of the studs on your wall, so you can mount your shelf securely. Cut your 2x4 boards to create a rectangular frame that matches your shelf's dimensions, adding cross supports inside the rectangle to prevent sagging. Screw the short pieces to the long board pieces on the top and bottom. Mount the frame with screws into studs in the wall, ideally adding two screws per shelf. If you want, use 5- to 6-inch supports at either end for extra security.
Now, you can build the shelf box. Using the plywood or 1x boards, assemble a hollow box to fit over the dimensions of your frame, leaving the back side open to slide into the mounted supports. Use wood glue and nails to complete the box, ensuring the edges are tight. Once you've slid the box onto the mount, drive more screws through the frame and into the mount for security. Sand any rough spots. Then you can get to the fun part: plaster.
Trowel a thin layer of plaster over the entire box, let it dry, then add another thin layer. Once it dries, it should have a concrete-like texture. Leave it as is, or paint it a matte gray or dark charcoal color to give it more of a stone-like look. Consider adding a clear matte sealer to protect the surface from scuffs and moisture. Style with your decor and entryway essentials, or add some mirrors above to finish your modern entryway feature, transforming that bland space into a striking focal point.