DIY Martha Stewart's Bunny Place Cards To Create The Perfect Setting For Any Spring Event

We may receive a commission on purchases made from links.
As you gather friends and family this spring, you likely want to create a beautiful table setting for the occasion. One way to add a special touch to your spring table as you decorate the home for Easter or any other spring event is to create customized place cards. Martha Stewart, domestic goddess and icon, has the perfect option: articulated bunny place cards. Stewart once offered these as a downloadable template on her website, and while it is no longer available, the craft is still easy to recreate. Once you've assembled these cute DIY cards, you can add each person's name and decorate them with color, beads, or other embellishments.
This project relies on a bunny craft template, and many options can be found on craft blogs and Pinterest. You only need to search for the terms "moveable paper bunny" or "jointed bunny," and you'll find them to download. If you own a Cricut, this is a fun project for you. For durable place cards, you'll need to print them on sturdy cardstock, such as Uncle Phil's 50 Sheets Cardstock. Stewart used a classic brown paper cardstock, but you could use elegant pastels, such as pinks, blues, and purples, in your version if you want more color. You'll also need a pair of crafting scissors and a handful of brads or paper fasteners. Brads are available at any office supply or craft store, or you can pick up a box of 200 Brads For Paper for less than $10 on Amazon. Optional is pom poms, sequins, markers, or anything else you want to decorate your place cards.
How to make and decorate your DIY spring event bunny place cards
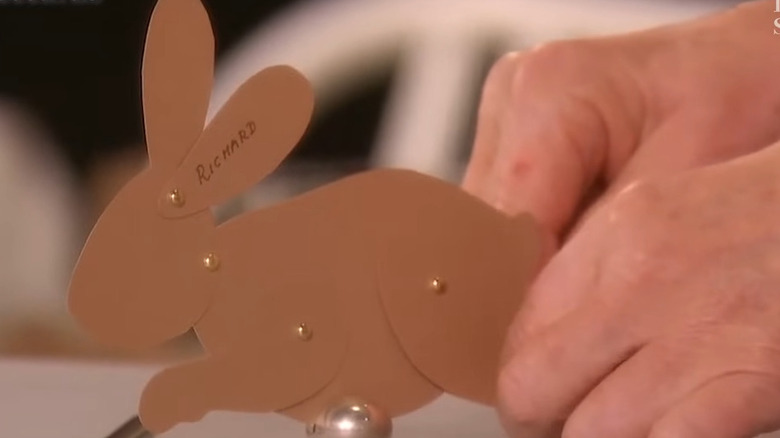
Once you locate your bunny template or draw your own, you'll need to cut out each part of the bunny. When you have all of your pieces of the place card, you'll want to place a dot on each part where it will join with the others. Pierce each dot with a thumbtack, then assemble the bunny by inserting brads into the holes. Attach the ears to the head and body, then add the legs until the bunny is fully assembled and movable. Write the name of each guest on the ears, add to the table with the holder of your choice, and you're done.
If you're feeling particularly whimsical and crafty, you could even use a template and repurpose old spring greeting cards. Seeing the previous elements of bunnies, florals, and other spring accents on the finished card can create a neat effect. Using decorated cardstock, such as thicker pieces meant for scrapbooking, can also give them dimension, as can repurposing paint samples. Adding on a tiny pom pom for a tail, sequins for eyes, or small scraps of ribbon around the neck can make them just as stunning as the beautiful dining table you may set.