17 Creative DIYs To Keep Shoe Clutter Organized At Home
We may receive a commission on purchases made from links.
Piles of shoes by the front door, stacks of shoe boxes in the closet, more footwear under the bed ... if your shoe collection is out of control, it's time to tame the chaos with organizational strategies. Sure, you can buy products designed for shoes, but they're often expensive and don't always work as promised. Besides, where's the fun in using something as it's intended? A little DIY creativity is way more rewarding. Instead, create inexpensive footwear storage solutions that are customized to what you own, whether that's a pricey collection of high-end heels or perfectly broken-in sneakers perfect for every activity.
Many of our DIY shoe storage ideas use inexpensive or upcycled materials, so you're not paying as much for storage as you would for the latest trending kicks, just to bring a little order to your footwear. Many of the options, like tension rod racks, are easy to adjust to fit your available space. Others, like a rolling crate cart, offer flexible storage solutions. If you're a minimalist in the footwear department, one of these DIY storage options might be enough. For families or big-time shoe lovers, crafting multiple racks gives you storage throughout your home, from your entryway and garage to your kids' bedrooms and the primary suite.
Use tension rods for nook shoe storage
Grab two tension rods per shelf to create a simple, no-tools-necessary shoe rack. Position one rod a few inches from the back wall and a second bar farther forward and slightly lower. For high heels, try a single rod, and balance the shoe with the heel behind the rod. This works well in a closet or a nook by your entryway — anywhere with two sturdy surfaces for the ends of the rods. Or, use a tension rod to turn a cabinet into an organized shoe rack in a laundry room or mudroom.
Under-bed rolling shoe drawer
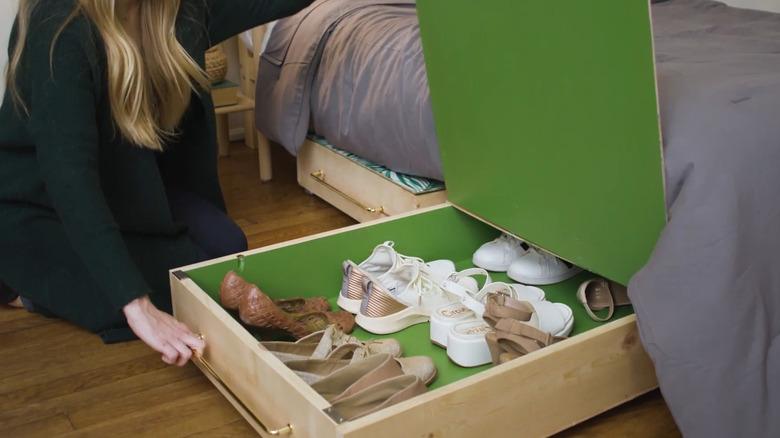
A rolling under-bed shoe drawer is the genius DIY that keeps shoes organized and out of sight. Build a simple wooden box that's large enough to hold several pairs of shoes and short enough to fit under your bed. Or, upcycle an old drawer. Casters screwed to the bottom make the shoe storage portable. Install a drawer pull or handle on the side to make it easier to grab. You can also add wooden dividers inside or attach a piece of painted plywood to the top with hinges for a closed bin.
Dollar Tree DIY for the back of the door
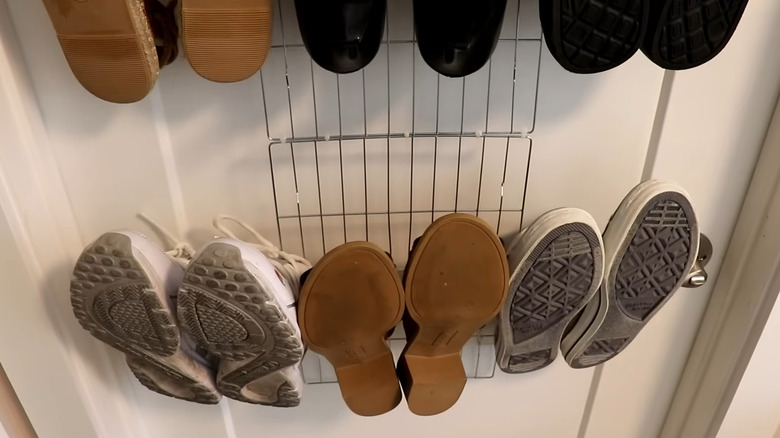
With Cooking Concepts Cooling Racks, Essentials Over-the-Door Hangers, and zip ties, you can create hanging shoe racks for multiple pairs. Zip tie the cooling racks end-to-end to the desired length. Then, bend the hanging hooks on the over-the-door hangers until they break off, and flatten the six main hooks, bending them outward slightly to hold the shoes. Zip tie them to the cooling racks, leaving enough space to accommodate shoes between the hangers. Grab extras for other creative DIYs around your home using a Dollar Tree cooling rack.
Cabinet riser shoe rack
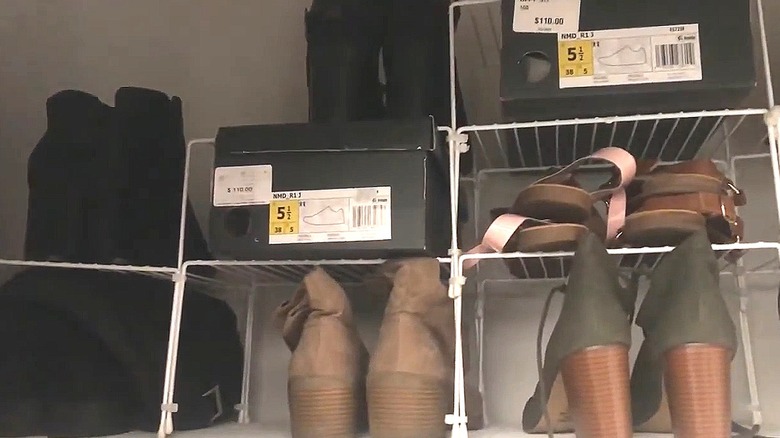
To create a wire shoe rack that's a custom width and height, stock up on Essentials Wire Cabinet Shelves from Dollar Tree. The shelves are an ideal height to store pairs of shoes underneath, with another row of shoes on top. Zip tie the racks side-by-side for a long, low rack. For a second layer of shelving, align more shelves on top of the first row, with the ends of the legs sitting just below the bottom shelf. Zip tie the new row to the legs of the previous row.
Stacked PVC pipe sections
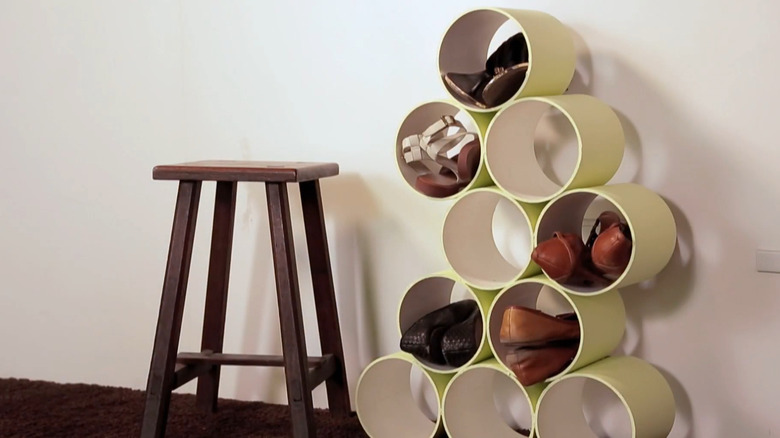
This PVC hack makes the perfect shoe organizer on a budget — and you can configure it however you want. Cut PVC pipes into sections large enough to accommodate a pair of shoes (at least 6 inches in diameter and 10 inches long). To add some color, paint the PVC pipes or cover them with contact paper. Then, play with the layout, creating a wide base to help keep it balanced. Go with simple rows, or create a more organic arrangement. Glue the pipes together with PVC glue or Gorilla Glue.
PVC frame with plank shelves
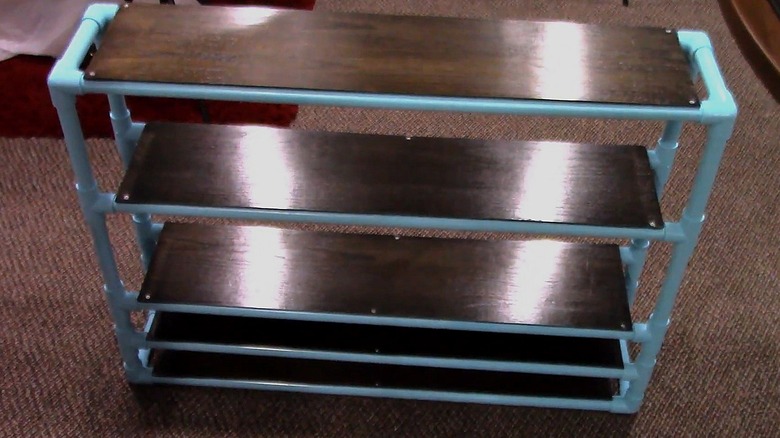
Smaller ½-inch PVC pipes create the frame for this multi-tiered shoe shelf. Cut long pieces based on the desired width (3 feet wide works well) and shorter pieces based on the depth for the top and bottom corners. You'll also need shorter pieces for the upright sides, so you can connect horizontal pieces for the shelf supports. Use TianTianUp Three-Way PVC Fittings for the top and bottom corners and regular T-connectors for other joints to create a frame. Then, cut scrap wood for the shelves, and glue or screw them onto the frame.
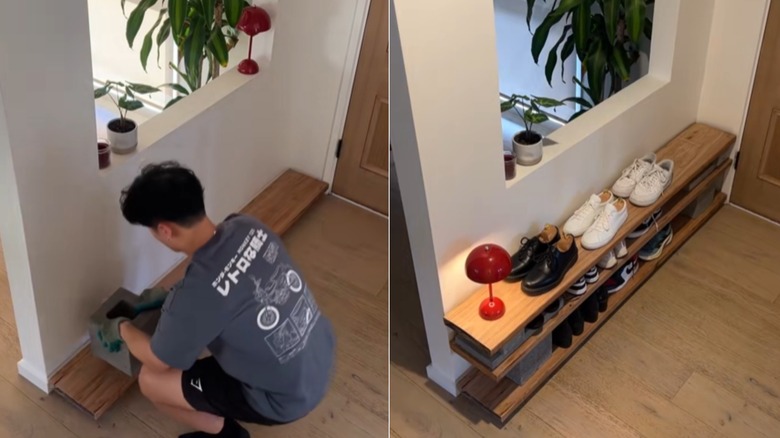
Board and hook garage storage
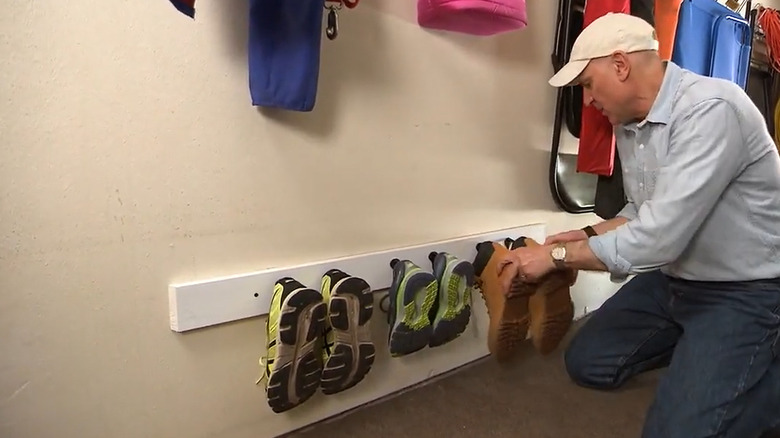
Storing shoes in the garage minimizes how much dirt enters your home, but space is often limited. This DIY solution uses a board and coat hooks to keep the storage streamlined along the wall. Cut the board to the desired length, and screw in two coat hooks per pair of shoes, spacing them a few inches apart. Then, screw the board to the wall a foot or so off the ground. Slip the shoes over the hooks to hang them to dry and for storage. Or, try other sleek and simple garage shoe storage solutions.
Wood crate entryway shelf storage
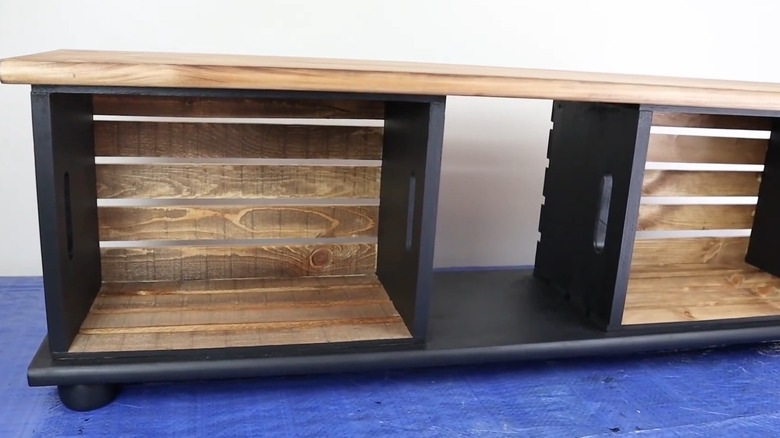
For a decorative entryway storage shelf, turn two sturdy wood crates on their sides, and sandwich them between two 1-inch by 12-inch boards. You can put the crates side by side or leave a space between them for additional storage. Add rounded trim along the board edges to soften them. Screwing furniture legs to the bottom board elevates the piece. You can paint or stain the wood, or do a two-tone effect to fit your space. Use the top for additional storage, or use the piece as a bench if the crates are sturdy enough.
Milk crate cube storage for shoes
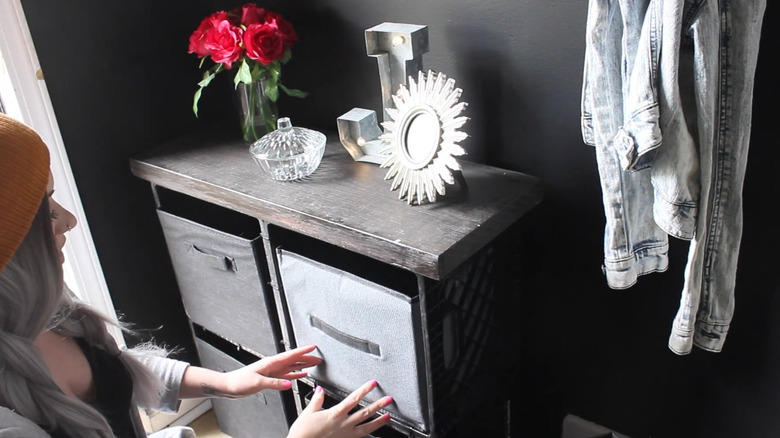
This shoe rack is one of many creative ways to repurpose milk crates in and around your home. Connect four milk crates together in two rows of two crates to create cube storage, using zip ties to secure them well. You can spray paint the crates if desired. Fabric bins or square baskets should fit well into the crates to hide your shoes while keeping them accessible. You can stop there or cut a piece of wood to create a finished shelf top to help disguise the crates.
Cardboard shoe shelf
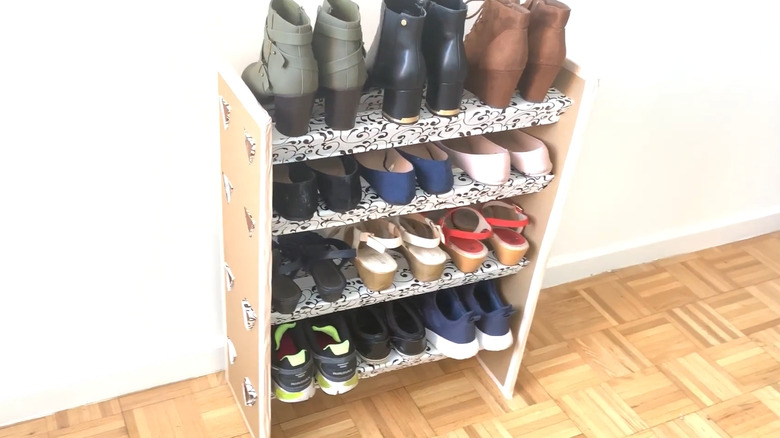
Turning trash into shoe storage is a great way to repurpose leftover cardboard. In this case, you'll create simple shelves, all from cardboard. Glue together two layers of cardboard to create two side supports, roughly 10 inches by 30 inches. For the shelves, the original creator folded cardboard into long rectangles, using two per shelf. Triangular holes cut in the side pieces support the triangular shelf braces. Covering the rack with contact paper adds a pretty look and adds some protection. You can adjust the size and number of shelves to fit your space.
Brick and wood plank shelves
Turn scrap concrete blocks and wood into a simple shoe rack for your entryway. Pavers work well as the supports — you can stack multiple pavers to get the shelf spacing you want. Start with one paver on each end on the floor, topped with a long plank that's stained or painted. Stack more pavers and lay another board across. Keep the project to two or three shelves for stability. You can place your shoes directly onto the shelves or add baskets to make the storage a little more decorative.
Industrial pipe wall rack
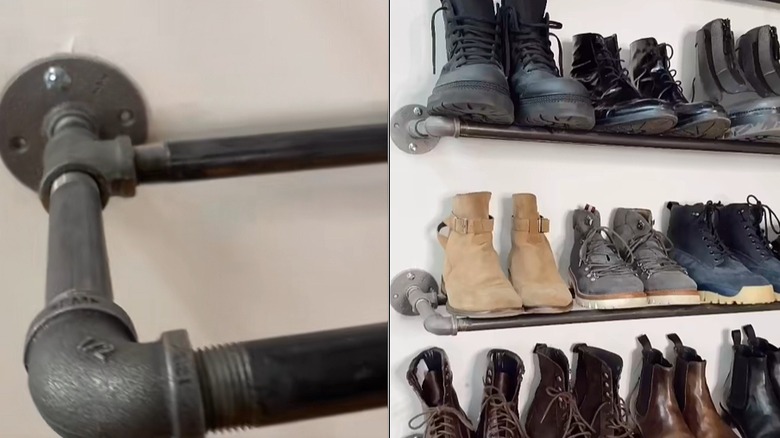
This creative DIY solution for keeping shoe clutter organized and off the floor uses industrial-style metal pipes as the racks. The side assembly for each shelf is a floor flange, T-connector, short pipe, and elbow — you need this setup for each end. Then, two long pipes run horizontally between those two side supports. Anchor the shelf to the wall with the floor flanges. You can install a single shelf just off the floor or multiple shelves all the way up the wall to maximize the vertical space.
Rolling Dollar Tree crate rack

Keep your shoe storage portable with this stacked crate option. The original project uses three wide plastic crates stacked to create the shelves. To make it portable, screw four casters to the corners of a scrap piece of wood slightly larger than the crates. Use screws or adhesive to attach the stack of crates to the board. Another piece of wood adhered to the top creates a finished look. Or, stack three or four C.O.S. Container Baskets from Dollar Tree, and mount them onto the rolling base with a wood piece glued to the top.
Sliding basket shoe trays
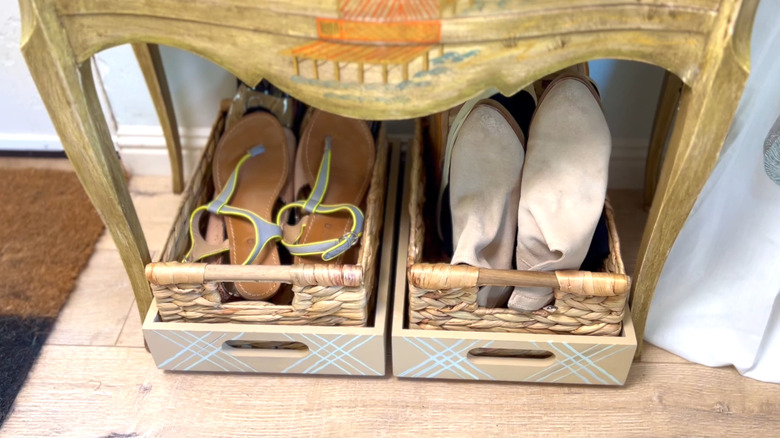
The Petpvilit Pull Out Cabinet Drawer is the secret to this sliding shoe storage. The tray-style drawer sits on slides that attach to the floor or a cabinet with provided adhesive. Paint or stencil designs onto the trays to elevate the storage. You can use the drawers as-is, or add a little texture and style by putting a basket or bin inside the drawer. The sliding aspect lets you tuck the shoes away under a bed or cabinet to keep your walkways clear while getting a better look at the shoes when you pull the drawer out.
Dish rack shoe holder in a bin
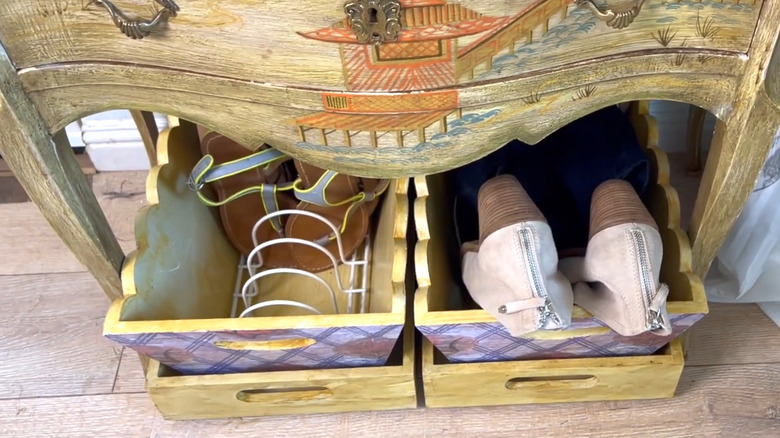
Keep sandals and other thin shoes upright by adding an inexpensive dish rack inside a basket, wooden bin, or fabric bin. The Essentials White Wire Dish Drying Rack from Dollar Tree is a good option. Ideally, you can find a bin that's just slightly larger than the drying rack, so it fits snugly inside without sliding. Glue dots on the bottom of the rack or non-slip drawer liner on the bottom of the bin can keep the rack from shifting. Slip pairs of shoes side-by-side into the slots to keep them organized.
Suction cup hook shoe holders
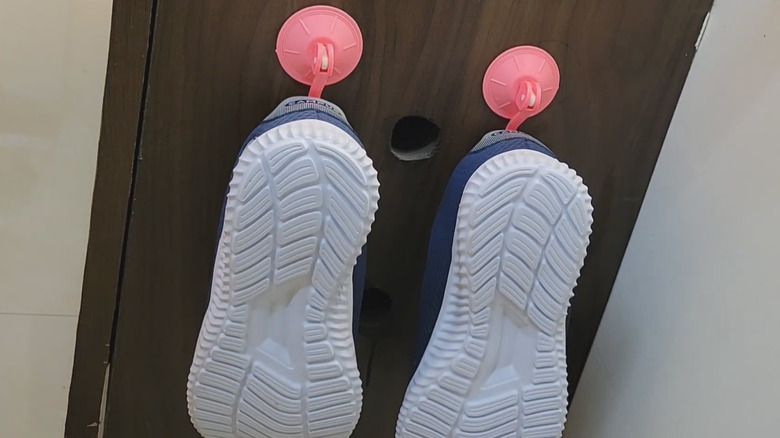
Suction cup hooks let you place shoe storage anywhere the suction cups will stick. You'll need two hooks per pair of shoes, one per shoe. Regular plastic hooks work, or upgrade to a more stylish look with options like these Bntuk Suction Cup Hooks — they're made of stainless steel with a sleek finish to look like a permanent hook, even though they come off easily. A variation is to spread the hooks apart and place a sturdy wooden dowel between them. Hang shoes onto the dowel with S-hooks.
Narrow cardboard box for upright storage
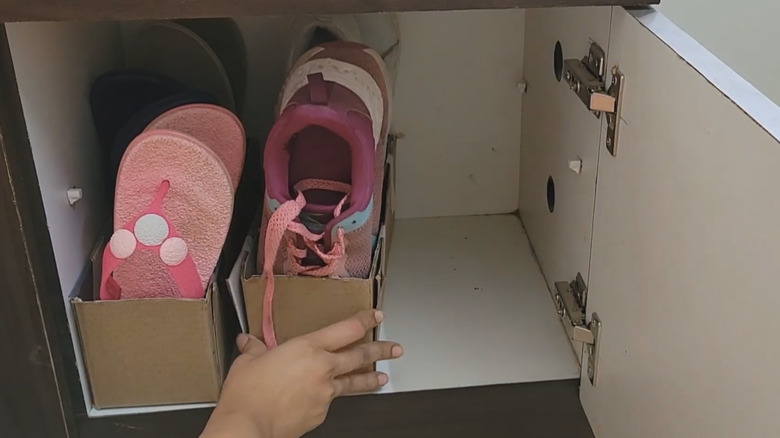
This shoe storage solution might not be pretty, but it is affordable since it uses cardboard to create narrow holders. If you can find slim boxes about the width of your shoes, cut down the sides so they're about 6 inches tall. Otherwise, cut cardboard to the dimensions you need, and tape together custom boxes that keep your shoes upright. Contact paper on the outside gives the boxes an upgrade. Slide the boxes of shoes in a cabinet, on a shelf in your closet, or under your bed, if there's enough clearance.