Don't Toss An Empty Pringles Can: Turn It Into An Upcycled Vase
Once you pop, you can't stop — or so says the '90s Pringles slogan. While the fun of eating these tubular-packaged potato chips will come to an end, spare the pipe-like container from the trash by upcycling it into attractive home décor. There are many DIYs involving food packaging. You can, for example, turn an old tuna can into the cutest planter for succulents, among other unique decorative items. The same goes for Pringles canisters. In fact, by attaching some cardboard cut-outs to a single can and wrapping it in twine, you can transform it into a woven vase that looks like it came straight from the shelves of somewhere high-end like Williams Sonoma or Bed Bath & Beyond.
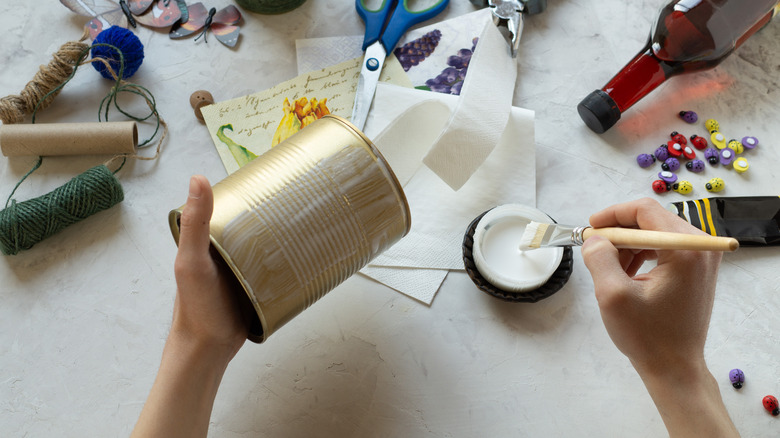
This DIY project involves more than just popping the plastic lid off a Pringles can and sticking flowers into it. To repurpose this household item into a beautiful flower vase that looks store-bought, you'll need some cardboard, a pair of scissors, a hot glue gun and glue sticks, and a roll of jute twine. If you want to customize your Pringles can-turned-vase, pick up some pizazz-adding embellishments from your local craft store or online. These Tassel Toppers Peel-and-Stick Flat-Back Delphiniums make great add-ons if you want a floral-themed accessory. Alternatively, you can add a little sparkle to the vase with some stick-on Rindion Gold Butterfly Decorations.
How to turn an empty Pringles can into a pretty vase
First, decide on the shape of your vase. If you want to create a bowl vase, cut a semicircle out of a scrap piece of cardboard. For a more traditional bouquet- or urn-style vase, taper one end of the semicircle to a long point. Once you're happy with the shape and size of this first piece, you can use it as a template for the rest of the pieces you'll need, ensuring they're all consistent. You'll need a lot of these cardboard pieces — enough to encase the entire Pringles can. Hot glue the flat side of the cardboard pieces vertically to the Pringles can, making sure the ribs are tightly grouped. Allow the glue to dry and cure, which can take up to 10 minutes.
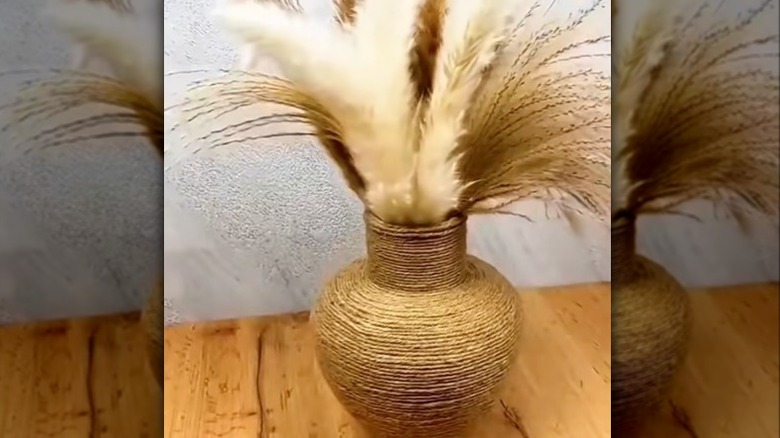
Tightly wrap twine around the modified Pringles can, starting at the mouth and working your way down over the cardboard piece, which gives the vase its shape, to the base. Continue coiling the twine over the rim until the entire base of the can is covered. Secure the ends of the twine in place with a dot of hot glue. You can also apply dots of hot glue around the vase as you coil if the twine isn't staying in place. Now is the time to add your stick-on embellishments to personalize your vase. If natural-toned décor pieces aren't your cup of tea, swap out jute twine for Nuanchu Colored Macrame Cord. Not a fan of rounded vases? Experiment with triangles or trapeziums to create a geometric vase — any shape with one straight side will work.