Turn Old Jar Lids Into Cutesy Trinket Holders With An Easy DIY
We may receive a commission on purchases made from links.
You toss your ear buds on the counter as you head into the kitchen for coffee, but then can't find them an hour later amongst the clutter of backpacks, dishes, and mail that piled up throughout the morning. Or maybe it's the earrings you took off last night, the ring you swore to put right back on, or the car keys you know were just right there. If any of that sounds familiar, don't throw out old mason jar lids, or any type of jar lids for that matter. This DIY is one of the best ideas for keeping small items organized without hogging space. Plus, it adds a bit of unique decor to the room. We're going to turn an old jar lid into a trinket holder.
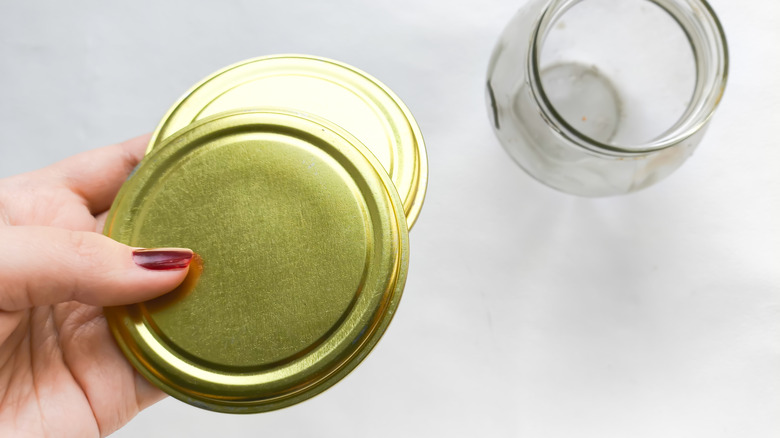
Upcycling old jar lids like this will keep them from becoming junk that just gets added to the landfill. Instead, you can repurpose them into a ring dish while you're doing dishes, a place for your ear buds after a long run, or a jewelry holder on your nightstand. They work to keep crayons from rolling off the table for the kiddos or corral all those small crafting supplies on your workstation. You can use any type of jar lid, like a jelly or condiment jar, or even a mason jar. If you'll be using a mason jar lid, you'll also need a hot glue gun or another type of crafting glue. Other supplies include paint and paint brushes. Optional supplies include self-adhesive cabinet paper, felt fabric, and scissors.
How to turn old jar lids into unique trinket holders
There are a lot of different glass jar types you can upcycle, but today we're using their left over lids to create the perfect safe space to quickly drop your trinkets and keep them from getting lost in the shuffle. If you are using a traditional metal mason jar lid that has two parts (the ring and the flat plate), begin by applying glue around the inside lip of the ring. Then, place the plate into the ring and press them together to secure it as the glue dries. This will allow the lid to function as one solid piece. No matter what type of top you're using, make sure to wipe it clean with a moist cloth and then dry it with another clean cloth before painting it.
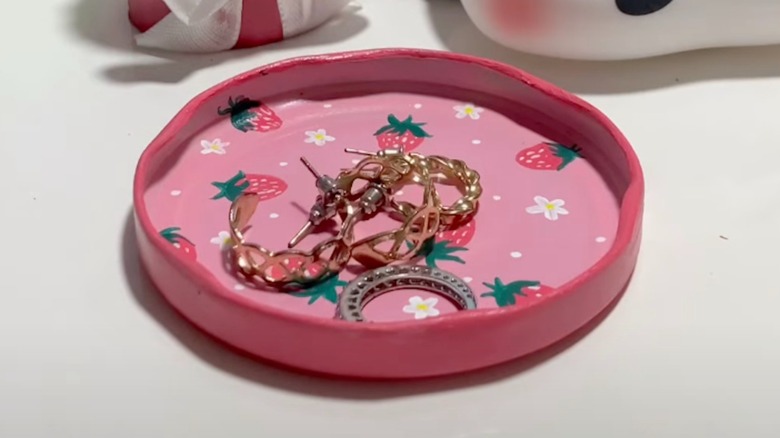
You can paint the entire lid any color you want, using several layers if needed to prevent any words or logos from showing through. Just allow each layer to dry before applying the next. Paint the top, bottom, and sides for a unified look. Optionally, you can cut a circle of soft felt fabric to line the inside of the lid, attaching it with glue. This will protect any delicate trinkets you plan to store in it. If not using felt to line the inside, you can paint any designs you want in that space, like polka dots, flowers, or stripes. To finish, cut a small circle of self-adhesive cabinet paper and attach it to the back of the lid. This will keep it from sliding around the counter or surface you sit it on.