12 Tips To Set Your Tomato Plants Up For Success With A Low-Maintenance Garden
You cannot beat homegrown tomatoes in terms of flavor and the satisfaction from taking them from tiny seed to beautiful, ripe, juicy fruit. They're not the easiest plant to grow, and they have a somewhat-justified reputation for being needy and high-maintenance. But tomatoes don't have to be excessively demanding if you get your setup right from the get-go. Practices like preparing the soil properly, choosing the right location, and setting up a watering system can make your whole growing season go more smoothly.
Even though I'm a master gardener and permaculture specialist, I still like to make life easier for myself. No one likes working harder than they have to, and nobody wants a life controlled by their garden's demands. I personally like to make all my plants as self-sufficient as possible. I've even been known to take a little vacation or two during the growing season without coming home to chaos and split or fallen tomatoes. Growing tomatoes in a low-maintenance way is absolutely possible with a few simple tomato-growing tips.
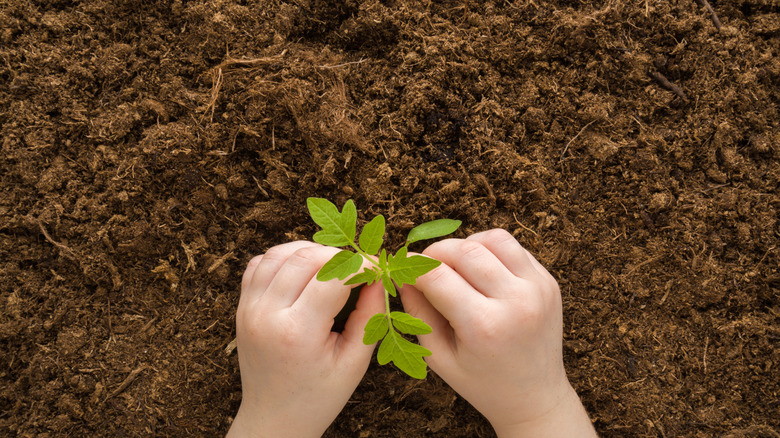
Don't skip hardening off
When I was an impatient teen, I thought hardening off was the biggest waste of time known to humankind. I mean, carrying trays of seedlings outside and back indoors every day for two weeks? To a novice (or a stroppy teen), it feels like busywork and nonsense. I quickly learned just how essential this process is, and now I make my own stroppy teens do it. Seedlings grown under cover have been spoiled, grown and nurtured gently in the perfect environment, and never exposed to adverse conditions. So if you take these coddled little plants and dump them straight outside in the ground, you'll cause transplant shock. Most will stall at least temporarily, and many will die. It's a real shock to their system. Hardening off is the process of acclimating them over 10 to 14 days, getting them used to life in the real world.
Most advice centers around getting your plants outside, which is valid, but not really the first step. I like to mimic a gentle breeze. So when the seedlings are big enough to handle, get in the habit of running your fingers lightly across the foliage every day, moving the young plants like a gentle wind. You can also set up a little fan and direct it at the plants, turning it on for half an hour every day. This early activity gets plant tissues used to adapting to a breeze and helps build stronger, more resilient plants that are less likely to fall or snap later in the year.
When they're big enough to go outside, each day, set them in a sheltered spot with dappled sunlight. Increase the time outside and their exposure to sun and wind slowly, starting for just an hour, and gradually increasing until they happily spend all day and night outside. Only then should you plant them in their final location.
Get the soil right before anything else
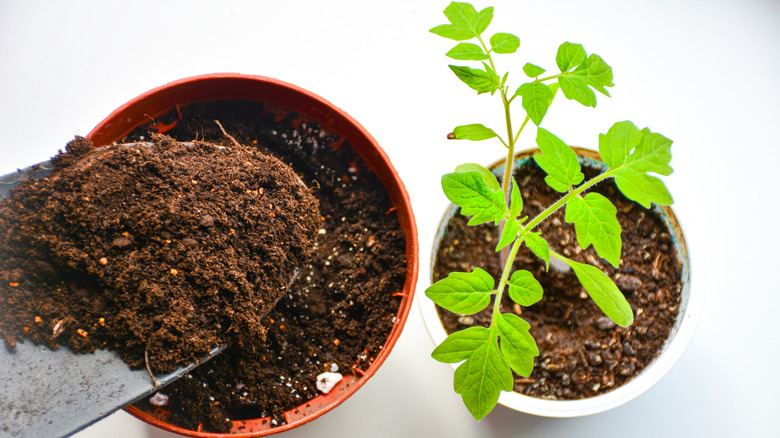
I'm a soil geek. Largely because I'm a permaculture specialist, I talk about soil health a lot — for good reason. Whatever you're planting, the soil determines the success. You can do everything else right, but if the soil isn't good for whatever you're planting, those plants will need a lot of attention, constant feeding and maintenance, and they just won't reach their potential. For tomatoes or anything else to be low-maintenance, you need to put work into the soil before you plant. Compacted, thin, or otherwise poor soil means tomatoes won't flourish. If you keep your soil as healthy as possible, the tomatoes you plant in it won't need much, if any, feeding later in the season, and they'll handle stress and drought better.
Adding lots of rich organic matter in late fall and letting it break down over winter is the best way to enrich your soil and fix a multitude of problems, helping with structure, drainage, and airflow. But even if you didn't manage that, you can still make improvements. Even though my soil is healthy and full of life, when I plant tomatoes, I dig the hole deep and add a thick layer of grass clippings, powdered eggshells, and kitchen scraps, topped with a generous amount of well-rotted (never fresh) manure, then beautiful, rich compost. Then I pop the plant in. Over time, all of that organic material breaks down and releases nutrients slowly, and as the tomato grows and develops long, strong roots, it can push down into this richness. The structure of the soil also remains light and crumbly, so it retains moisture without becoming claggy and allows plenty of airflow and soil organism activity. You're essentially adding your own slow-release fertilizer when you plant.
Choose the right location
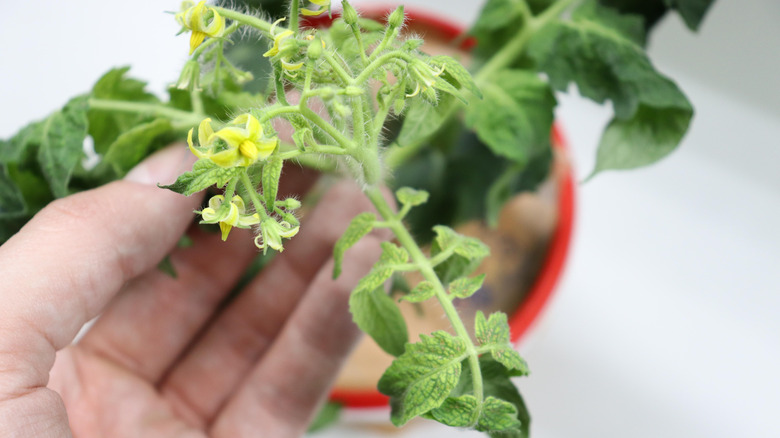
Tomatoes like lots of sun and not too much wind, so choosing the best spot to plant tomatoes is super-important. While soil is the foundation of your plants' health, where you plant also impacts success. Tomatoes need six to eight hours of direct sun daily as a minimum. And then there's exposure. Tomatoes are a little delicate, especially when their stems are heavy with ripening fruit. They do not like strong winds and will end up snapping or dropping fruits or stalling with constant exposure. And you'll end up spending half your time trying to tie wayward tomato branches to stakes and rushing out to check for fallen fruits and snapped branches after every modest blow.
I always aim for warm, semi-sheltered spots for my tomatoes or at least somewhere that gets plenty of sun, where I can also rig up some kind of wind break. You obviously have to take crop rotation into consideration, but in an ideal world, in temperate climates, I'd plant against a south-facing wall as the bricks hold the heat and keep the tomatoes a few degrees warmer even overnight, which helps with size and yield and helps extend the season. A south-facing wall also shelters them from the wind while still allowing adequate sun for most of the day, as the sun moves east to west. Near a fence is also a good spot. Although the fence doesn't have the same radiant heat ability, it does limit the potential for wind damage. Planting against a structure also lets you put anchors in the structure, then connect them with wire or twine to create a support system for the tomatoes. Use common sense, though. In hot climates, wind breaks are important, but planting near a heat-retaining structure isn't a good idea.
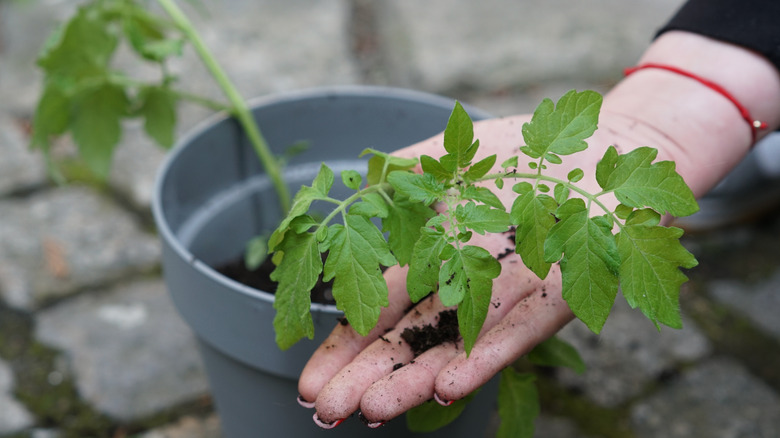
Choose disease-resistant and compact varieties
There are an insane number of tomato varieties to try. Smaller and disease-resistant tomato varieties need less attention than large, sprawling, indeterminate ones. Now, I love beefsteak tomatoes. And I do grow them, but only in the greenhouse, and I do it knowing how much maintenance they need. But for truly low-maintenance tomatoes, go for smaller fruits and varieties with a compact growth habit. "Sophie's Choice," "Taxi," or "Little Napoli" are all great choices.
I grow a lot of different tomatoes, including indeterminate heirloom varieties, because I'm part of several breeding programs that aim to preserve old, rare fruit and vegetable cultivars. But for low maintenance, I'd choose cherry and grape tomatoes. I find these are easier to care for and less needy. I particularly like "Galina," which is an early yellow cherry that grows long vines and produces a huge amount of fruit. Give it support, and you'll get a ridiculous amount of fruit with minimal effort. For a reliable and interesting bush or determinate slicing tomato, give "Purple Reign" a try. The plants stay relatively compact, and the fruits are beautiful, firm, and tasty. And if space is really tight, try a micro tomato like "Orange Hat," which reaches just 9 inches tall but still produces lots of fruit relative to the plant size.
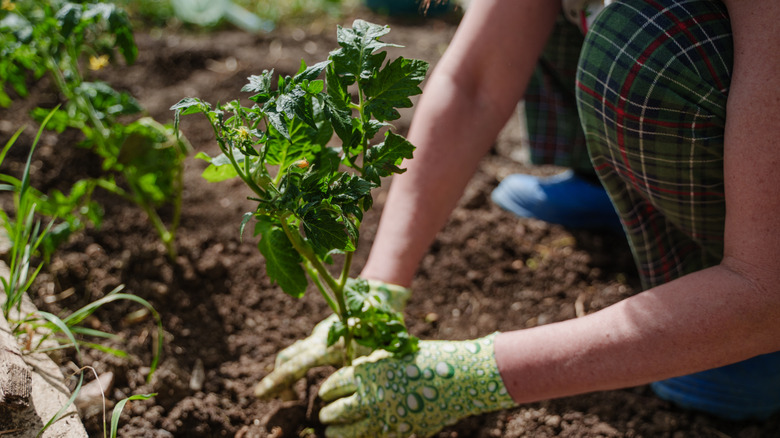
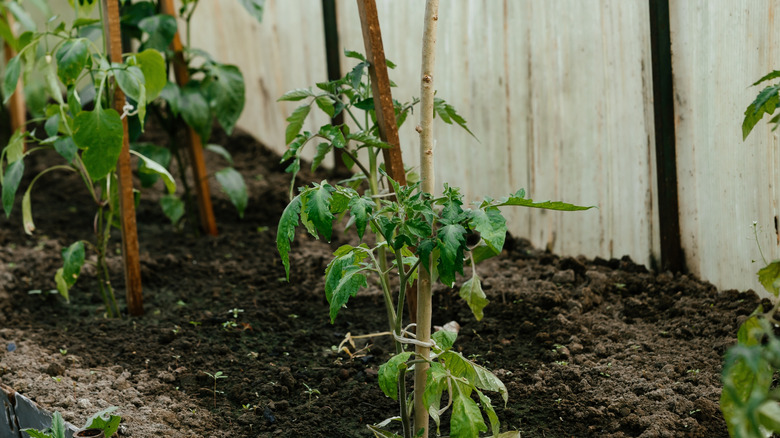
Plant deeply for strong roots
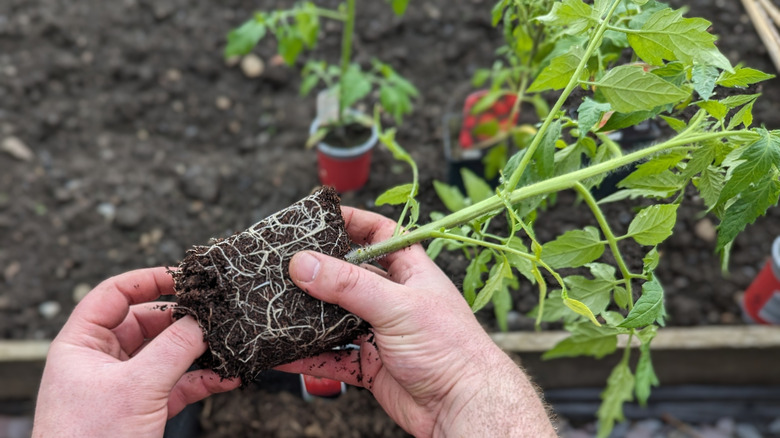
Unlike most plants, with tomatoes and peppers, burying more of the stem gets you better results. These plants have the amazing ability to put out roots along their stems wherever the stem touches soil. Their proper name is adventitious roots. Sometimes, you'll see the precursors to these roots on above-ground stems in times of stress or drought, in the form of knobby, bumpy sections of mature stem. That's the tomato plant's parenchyma cells dividing just below the epidermal layer, just in case the plant needs to throw off some extra roots.
You can take advantage of this super-interesting adaptation by planting the young plants deeply or even sideways, so that as much of the stem is buried as possible, even if that means removing a few of the lower leaves. I've tried a mix of sideways and depth planting, and both work well. Which method I choose really depends on how much space I've got and the type of tomato I'm growing. Either way, this lets the plant produce a much more elaborate root system. A bigger, deeper, more complex root system lets the plant anchor better in the soil and access more nutrients and water. This means they need less intervention from you and will behave much more like their tougher, more prolific wild forbears.
Set up slow-feed watering from the start
Tomatoes are notorious for being super-fussy and needy when it comes to watering. Stressed plants, shriveled fruit, blossom end rot, split fruit, and more are all associated with improper watering. Yes, blossom end rot is to do with calcium uptake and movement, but inconsistent watering plays a significant role there, too. Aside from making sure your soil is in excellent health and planting deeply for a better root system, you can also make watering less labor-intensive and more consistent. The best, most effective option, in my opinion, is to get a system in place before you plant your tomatoes.
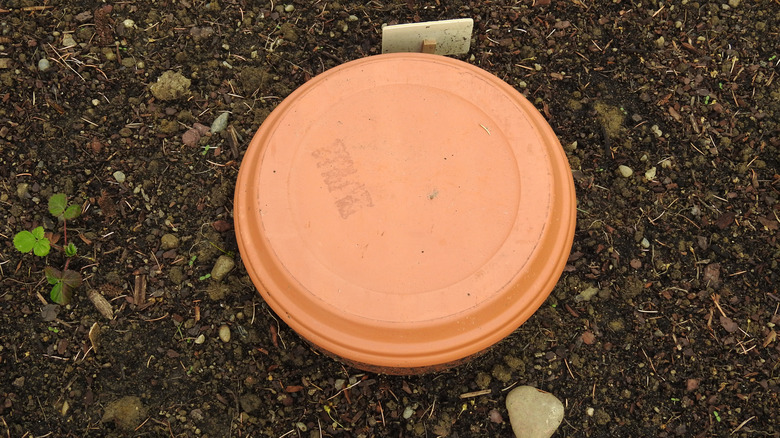
A super-simple, ancient solution is to just use ollas. These are unglazed terra-cotta pots with lids. You bury them to the neck, fill them with water, and put the lid on. Water slowly seeps out into the surrounding area as the soil dries. It's a brilliant solution that prevents splashing and the disease risk of soil-borne pathogens and overhead watering issues. And it's effective and low-maintenance, as you only need to refill the pots every week or so, depending on the temperature and rainfall. You can also make your own budget-friendly version from an old, unglazed terra-cotta plant pot. You'll need to plug the drainage hole in the base, bury it to the rim, and fill it with water. You must also put a saucer or other sturdy covering over it to prevent wildlife from falling in and drowning. You can also make a slow feeder by cutting the base off a big soda bottle, punching holes in the lid (or using a threaded watering spike), burying the bottle, adding water, and covering it. Obviously, water won't seep through like it does with terra-cotta, but it will still slowly seep out of the bottom.
Install irrigation and a timer for more automation
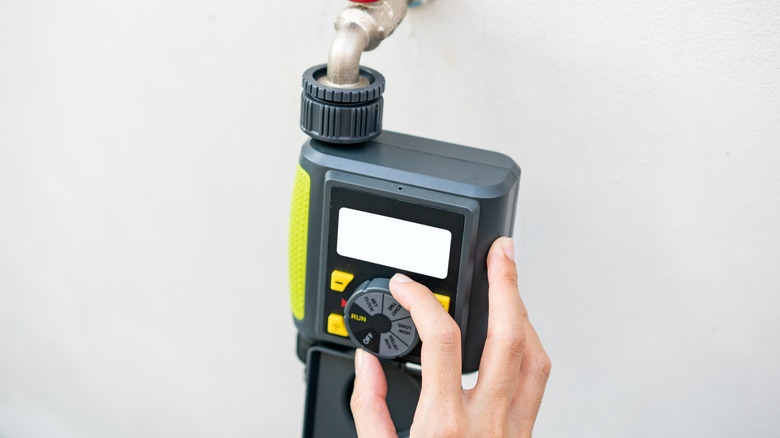
If you want to be even more hands-off with your watering, then you can set up an irrigation system with a timer. There are lots of low-maintenance watering options. Specifically for tomatoes, I'd recommend drip lines or a soaker hose buried under a thick layer of mulch, connected to a smart timer. The primary reason being that tomatoes are so incredibly prone to all manner of diseases, ranging from downy mildew to blight. And many of these pathogens are either passed from the soil to the plant when water splashes up, or they will proliferate in wet, humid conditions that come with overhead watering.
A regular timer will work in a pinch, but remember that it won't know when there's been heavy rain and will turn itself on for the specified duration regardless of the weather. That's why a smart timer is a better option. Wi-Fi-enabled ones that receive weather reports can skip watering if the conditions don't require it. If you have rain barrels set up, you can also connect this setup to a rain barrel tap. If the pressure is too low, then add a rain barrel pump to the system.
Mulch thickly as soon as the soil has warmed
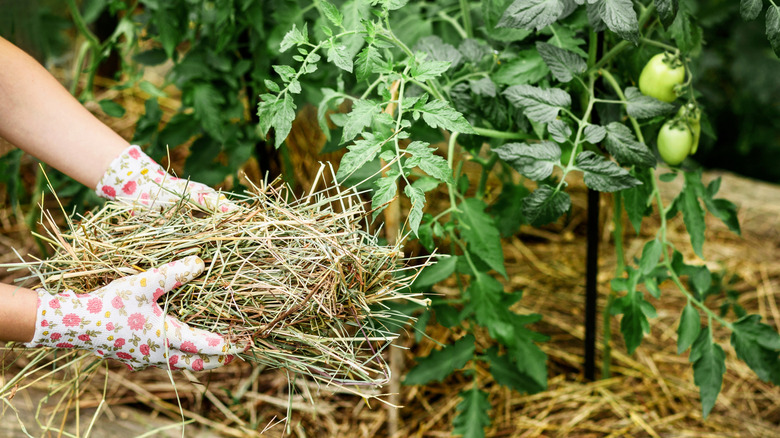
Mulch is hugely important in my garden, and not just for tomatoes. A good layer of high-quality mulch is such an easy, affordable way of making your tomatoes more low-maintenance. Mulch has a lot of benefits, including stopping surface evaporation, keeping soil temperature and moisture levels consistent, blocking weeds, and adding organic matter and nutrients slowly over the season. The other often-overlooked benefit of mulch is reducing the risk of soil-borne diseases splashing up onto the lower leaves and infecting your tomato plants.
By the time you're planting your tomatoes outside, the soil should be started to warm up. So lay your irrigation system and then mulch around the tomato plants. I use well-rotted manure or compost, with a layer of straw over the top. Just make sure you leave a gap of a couple of inches between the stem and the mulch so you don't trap moisture and invite rot. There are other mulch options, but for tomatoes, this setup works well for me. The straw is light and airy and provides a bit of a buffer if any vines get heavy and the fruit touches the floor.
Stake or cage plants before they need it
Even some bush or determinate varieties will need added support. And it's far better to add it before you plant, or at least soon after, before the roots get a chance to spread. Pushing cages or stakes into the ground after your plants are well-established can damage the root network, which you don't want. Plus, if you get support in early, you can tie your plants to it and control and train their growth right from the start.
I have a series of homemade trellises for my tomatoes that I anchor between pairs of posts. But you can also use tomato cages or bamboo stakes to support your tomato plants. I tend to settle my plants in place and set up the trellises at the same time, then I don't have to worry about going back to it later. As your tomato starts to grow, gently tie branches to the nearest available support. Use soft, flexible ties that don't constantly rub and abrade the delicate skin of tomato plants. This minimizes the effort you need to exert later in the season. Trying to lift and support an already-collapsed tomato plant that's heavy with fruit is difficult, but they'll end up rotting on the vine unless you can get it off the ground.
Prune just enough to maintain airflow
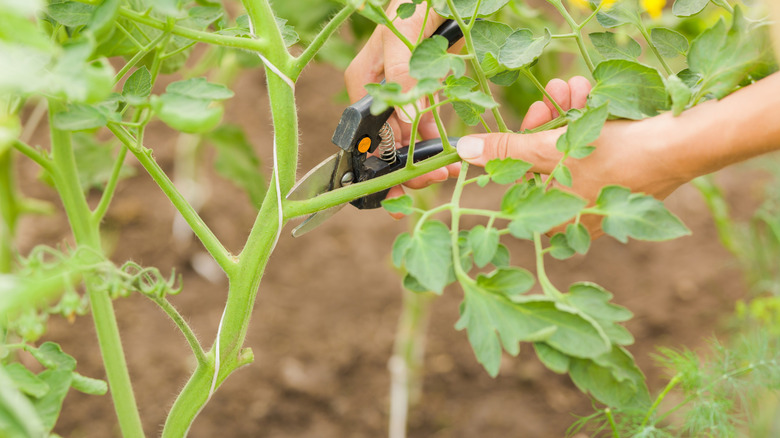
Tomatoes don't need constant or heavy pruning. But in most cases, to keep the plants healthy and productive, you do need to do some carefully targeted tomato pruning at the right time. Basically, you need to nip out the extra foliage that doesn't need to be there. Firstly, this helps the plant put its energy into fruit production instead of extra foliage. Secondly, it keeps the plant open so plenty of air can circulate, which cuts down on humidity and makes conditions less favorable for fungal diseases that so love tomatoes.
Remove the lowest leaves. Anything too close to the soil should definitely be removed as early as possible. Those lower leaves are magnets for soil-borne pathogens. So get rid of them. Then, whenever you spot them, nip out the suckers, or side shoots. They grow at the juncture of a stem and a branch. They are pointless and just suck energy from the plant. If you leave them, they can also create too much foliage that inhibits airflow. I'd also recommend nipping out the growing tip on the central stem once the plant has reached a decent size and has started to set fruit. Getting rid of the growing tip keeps the plant more compact and diverts energy to fruit production.
Use companion and groundcover plants to shade the soil surface

Because I'm a permaculture specialist, companion planting is something I could talk about all day, every day. It's amazingly helpful in the garden, particularly for tomatoes. The right companion plants can help reduce pests and diseases and can even enhance flavor. Companion planting with tomatoes can boost overall plant health, vigor, and yield.
Basil is one of the best options. It's an aromatic herb that releases volatile organic compounds that invigorate the tomato plant's own defenses against wounds and pests. Additionally, the scent of basil helps deter common tomato pests, including aphids, whiteflies, and thrips. Anecdotally, many growers plant basil alongside their tomatoes because they believe it intensifies and improves their flavor. Marigolds and purple cone flowers are both smart choices because they attract predatory insects like ladybugs and lacewings. Lavender, sage, and garlic also make excellent companion planting choices because they repel a wide variety of pests.
Add temporary shade during heatwaves
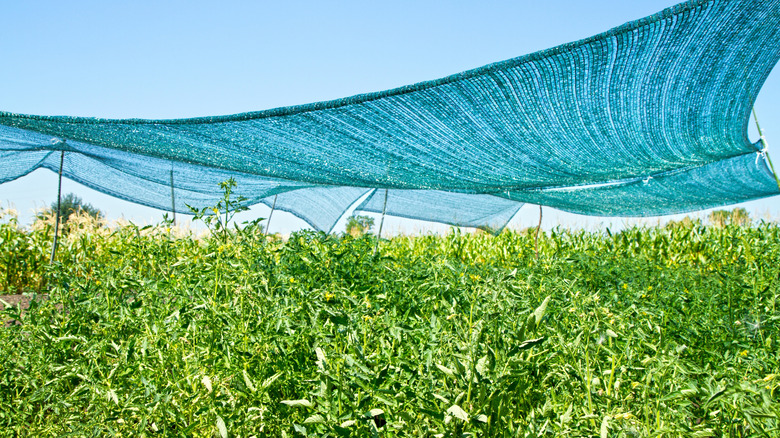
Tomatoes do like plenty of sun. However, too much heat and sun can cause scorch. Plus, too much heat stalls fruit set and can actually cause the plant to drop flowers or fruit. When temperatures rise above 95 degrees Fahrenheit, the plants are in danger and, of course, water demand will also increase as the plant tries to compensate for the water it lost through its leaves.
The simplest solution is to rig up a shade cloth. For a low-maintenance option, set a couple of anchors above the tomato plants, in a wall or tall posts. Then, set two smaller posts in front of the plants with anchors. Whenever the heat is too much, just tie the corners of the shade cloth to each anchor, and you have instant shade for your tomatoes. You might want to leave the cloth rolled up but attach two of the anchors during the hottest part of the year, so it's even faster to set up when you need it.