How To Turn Scrap Items In Your Home Into An Upcycled Bird Feeder
We may receive a commission on purchases made from links.
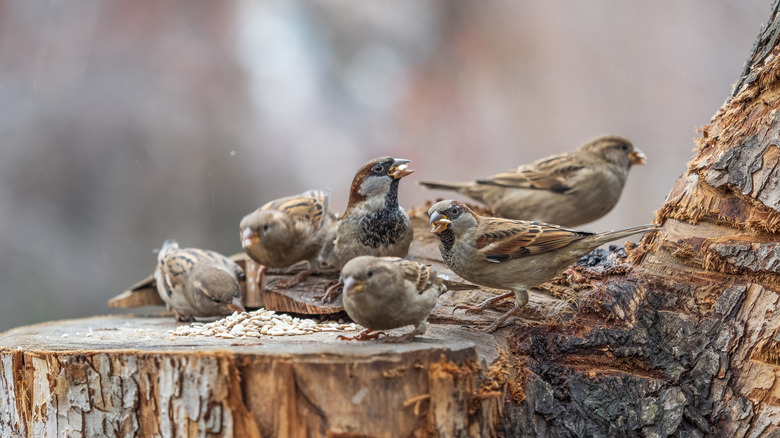
Something seemingly innocuous can quickly turn a peaceful hobby like bird feeding into an expensive annoyance. You set the dinner table for your feathered friends, but squirrels come to the party, too. The result? Bird feeders gnawed off their stands and birdseed strewn across your lawn or garden beds. One way to avoid this issue, protect your peace of mind, and ensure your feathered friends eat their fill is to use a heavy-duty bird feeder. They don't come cheap, however. Fortunately, you can make a robust, budget-friendly DIY feeder that will keep birds flocking to your yard year-round using scrap items — think tin cans, wood, and corrugated metal. Unlike plastic feeders that squirrels can destroy, this upcycled bird feeder is made of metal and will, hopefully, last longer.
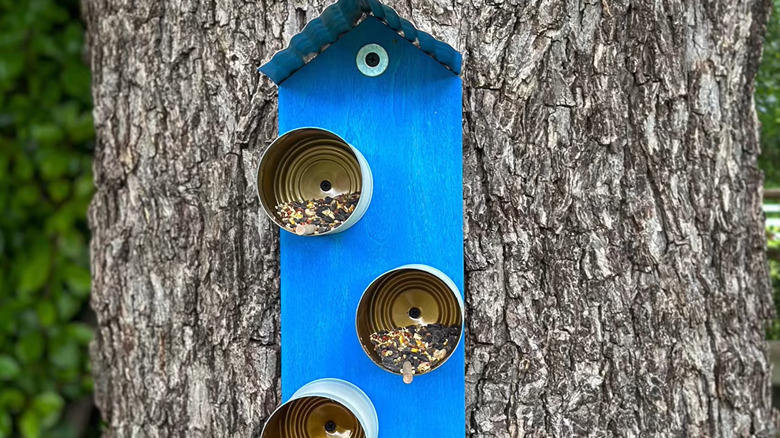
To get started, you need four large, clean tin cans. Some household items you can repurpose for this creative bird feeder include coffee tins or soup and vegetable cans. You will also need a wooden board for the back — leftover from, say, that old fence you recently replaced. Something measuring about 5½ inches by 19½ inches is good. Cut a 7-inch by 5½-inch piece of corrugated iron from a leftover sheet you already have or a new Evergreen Corrugated Iron Sheet. Get a 200-pack of Mart Cobra Wooden Dowels, some non-toxic weatherproof paint, and a tube of E6000 or a similar adhesive. The tools that you'll require include a hand saw, an electric drill and drill bits, a screwdriver, and a We R Memory Keepers Crop-A-Dile Power Punch.
How to build a bird feeder from scrap wood and tin cans

With these ordinary materials and tools, you're ready to create a strong vertical bird feeder with amazing features, like staggered can feeding cups and perches, for a sizable bird buffet. First, saw the top of the wooden plank into a point similar to that of a classic birdhouse. Set it to one side on your worktable. Don a pair of thick gloves, hammer the cut edges flat, and then sand or file them to avoid injury. Paint both the cans — your birdseed cups — and the board the same color, then use a long drill bit to screw the closed end of each can to the board in a staggered fashion.
Next, make a cute little bird feeder roof by bending the metal sheet in half to create a pointed roof line. It should match that of the feeder's backboard. Use the hole punch tool or drill to create a few holes along one edge of the sheet and screw the roof to the wooden board. With that, the basic structure of your DIY bird feeder is complete. Finally, you need to give your winged friends some perches to sit on while they feast. Apply some E6000 or whatever glue you're using to one end of each of the four dowels. Cover about half the length of each dowel. Quickly stick them into the bottom of the cans, pushing them right to the back. Let the glue dry and cure (at least 24 hours) before mounting your bird feeder outdoors.
Hanging your DIY bird feeder and making any final touches
It's time to mount your DIY bird feeder made with household objects you already had — ideally somewhere challenging for squirrels and other pesky small mammals to reach. You'll need a ruler or measuring tape, a carpenter's pencil, some screws, and hanging hardware. A Blulu Galvanized Steel Bird House Mounting Bracket is weatherproof, secure, and makes it easy to remove the feeder for cleaning.
Measure out and mark where you want your bird feeder to hang, be it a tree trunk or wooden patio cover post. Then screw the hardware to the back of your robust DIY bird feeder and your mounting spot. Slot the feeder into place and fill each can partway with Cool Birds No Mess Wild Birdseed or a similar high-quality feed.
Feel free to customize the feeder as the need arises or to suit your taste. The birdseed should be relatively protected from the rain by the roof, but to stop spillage, glue a wooden craft stick cut to size across the cans, creating a lip. Play with the arrangement of the cans on the board, perhaps using more and placing them side-by-side. If you prefer a rustic aesthetic, wind twine around the cans instead of — or after — painting them. You could also add simple embellishments, such as a daisy frame crafted from plastic or metal, to the mouth of the cans.