12 Steps To Take To Keep Your Keurig Clean And Free Of Mold
We may receive a commission on purchases made from links.
Who doesn't love the convenience of a Keurig? Pop in a pod with your favorite coffee flavor or drink type, and it instantly brews your beverage for you. But there are hidden downsides to Keurigs, including the expense and the environmental impact of all those pods. Grabbing reusable containers, like these Noalto Stainless Steel K-Cups, helps minimize the waste, gives you more control over your coffee choices, and saves money. But there are still other potential issues, including the risk of mold growth in your machine.
Coffee machines have the right conditions for mold: Moisture, warmth, and darkness. In fact, coffee reservoirs were one of the top five germiest spots in the home, according to a 2011 study conducted by NSF. Coffee oils, leftover grounds, and minerals all support mold growth in your Keurig. You're not stuck sipping mold spores along with your java, though. Regular cleaning and occasional deep cleaning help reduce the risk of mold, mildew, and other bacteria growing in your single-serve coffee maker. Always perform the following cleaning and mold-prevention steps on a cool Keurig that has been unplugged.
Inspect regularly for signs of mold in all areas
How often do you really inspect your Keurig? Sure, you'll notice if the drip tray is full or there's a big splash of coffee on the front. But really looking at it, especially inside, where it's dark and damp, probably isn't something you cram in during your morning rush. Taking the time to look for signs of mold helps you catch the problem before the spores multiply. Early interventions can keep your morning dose of caffeine tasting good without contaminants that might leave you queasy.
Check the internal parts, including the water tank, pod compartment, and inside of the drip tray, for visible signs of mold. The water in the reservoir might look cloudy if there's any sort of contamination. Plastic surfaces could have a ring of slime, slick or filmy areas, usual specks, or fuzzy patches that appear black, white, or green. Sniff the machine to see if you notice a musty, moldy scent, and note if coffee starts to taste bad, even when you use your normal brewing methods.
Clean the removable machine parts
Convenience is Keurig's appeal, so you probably don't want to spend much time cleaning the appliance. But that's what it takes to keep the machine mold-free. You might not want to hear it, but you should be washing the removable parts multiple times a week. That regular cleaning helps remove the coffee oils, grounds, and other gunk in the machine that can feed mold spores. Plus, keeping the machine clean helps your coffee taste better.
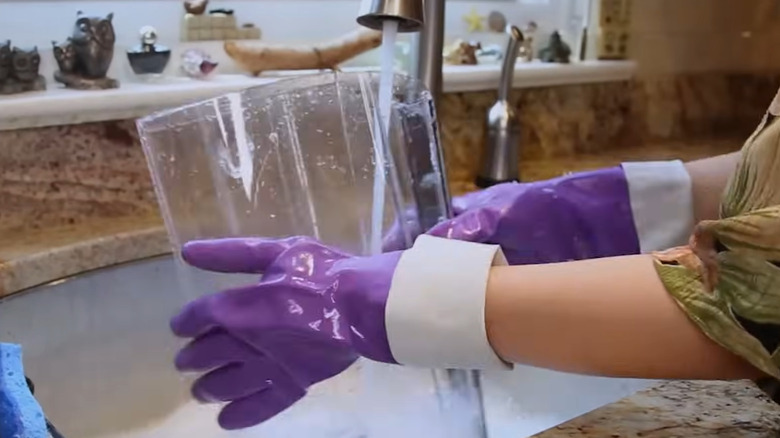
Knowing how often you should clean your Keurig is important for minimizing mold growth. Keurig recommends daily cleaning for external components, including removable drip trays and the outside of the machine. If you don't have time or a full clean every day, at least rinse the drip tray, since it's most likely to get dirty after each use. Then, pull out the removable parts at least every two to three days to give them a good wash and reduce mold growth. You can use a bottle brush or a toothbrush to clean crevices on various parts. Make sure everything is fully dry before putting it back on the machine.
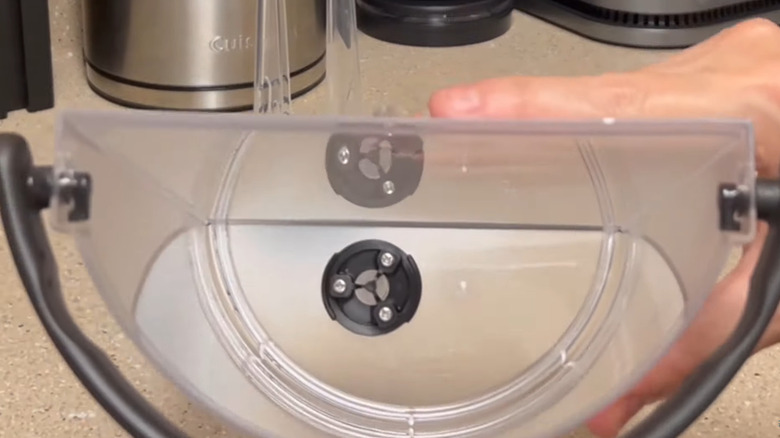
Scrub the pod compartment
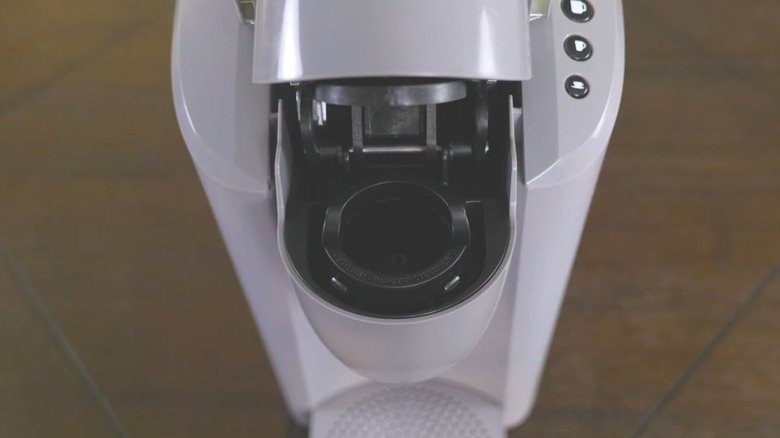
The entire pod compartment doesn't pop off the Keurig like the drip tray and other components (although you can remove the holder portion on some models), but you don't want to ignore it when you're trying to prevent mold. This part of the machine sees the most action, especially if you're a major coffee drinker or have a large family using the Keurig. It's also where little bits of coffee grounds and oils build up, and it's not always easy to spot the residue. Since it's enclosed, the area often stays warm and humid, which mold loves.
If the K-cup holder comes off from your model, remove it for cleaning once a week. To pop it out, grab the edge from inside the compartment while pushing up from the bottom. The funnel portion pops off the holder for easier cleaning. You can wash the removable part in soapy water. Then, wipe out the compartment with a soft cloth, being careful not to poke yourself on the needles that open the K-cups. You can use a little soap on the cloth if needed, but make sure to rinse it well.
Dig out gunk from the pod needle
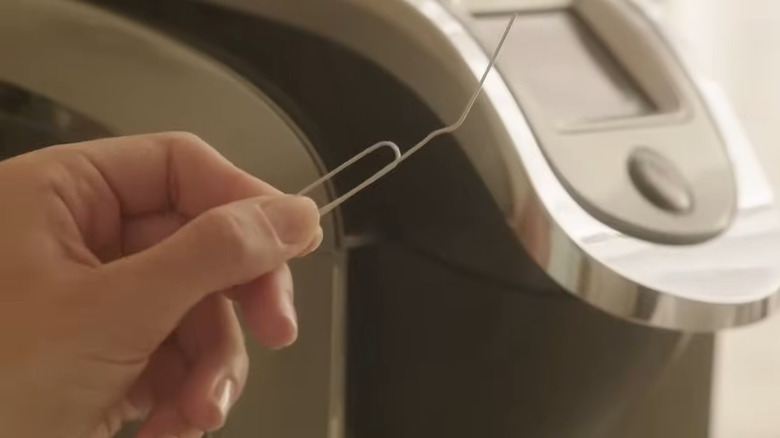
While you're cleaning the chamber, it's also a good idea to clean the needles that puncture the plastic cups. They can clog, which not only affects the flow of the brewed coffee but also leaves behind particles for mold spores to feed on. Most Keurig models have two needles: One at the top and one at the bottom. If your Keurig is clogged, you'll definitely want to clean this overlooked spot. It could help get the machine flowing again.
A common way to clean the needles is to use a straightened paper clip. To access the exit needle, remove the funnel from the pod compartment. You'll see a little tube — insert the straight part of your paper clip inside to release any buildup. To find the entrance needle, look on the upper portion of the pod chamber — the part that lifts. You should see two holes there where you can insert the paper clip again to remove buildup. It's a good idea to run a few cups worth of water through the brewer after cleaning and reassembling everything in case there are any loose particles in the needles.
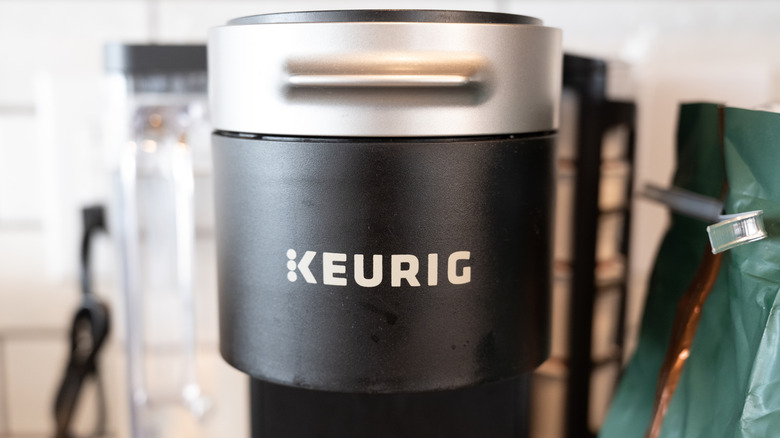
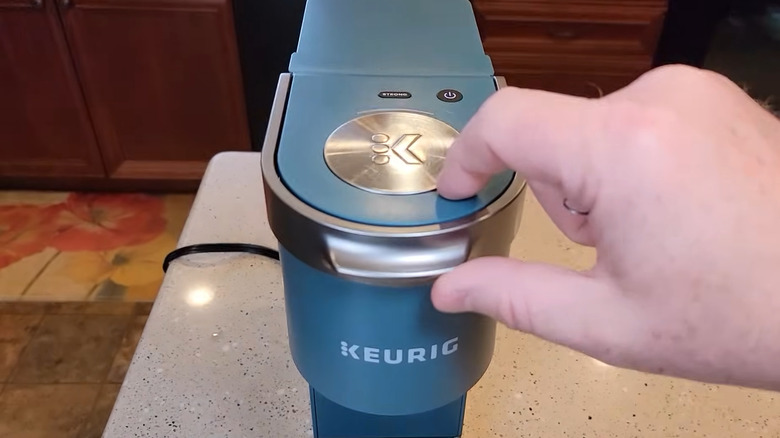
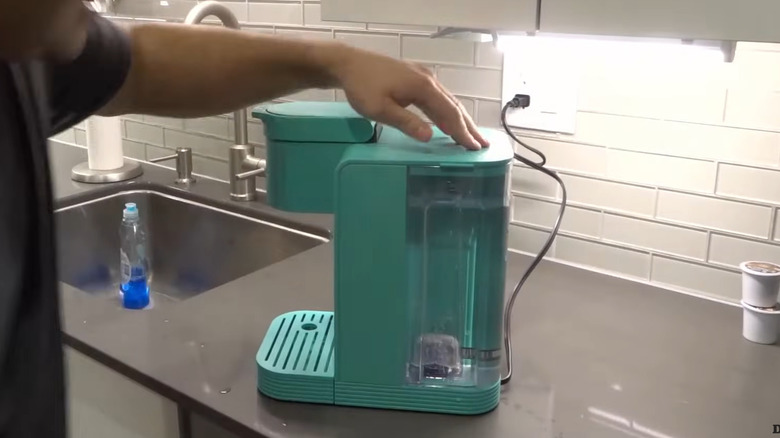
Wipe the exterior of the machine
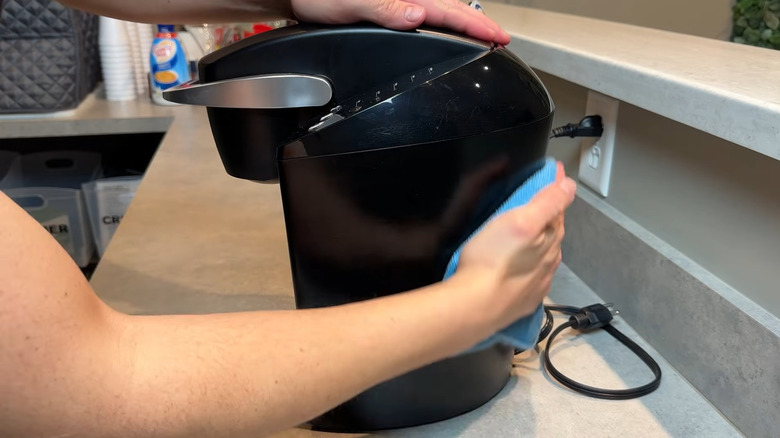
The outside of your Keurig might not seem a likely place for mold. After all, it's usually not dark in your kitchen. However, the outside can still accrue coffee oils, coffee splashes, and stray grounds that could feed mold spores. And if you keep your Keurig in a dim corner or inside an appliance garage, it could spend a lot of time in the dark.
Wiping down the outside of the Keurig every day helps remove gunk before it has a chance to build up. A damp cloth or sponge works well for this purpose. Wipe all visible surfaces, including the controls and handle. Using a clean towel to dry the machine after washing eliminates unnecessary moisture. You can also use antibacterial wipes to clean the outside of the Keurig. This can be particularly helpful during cold and flu season or for machines used by several people.
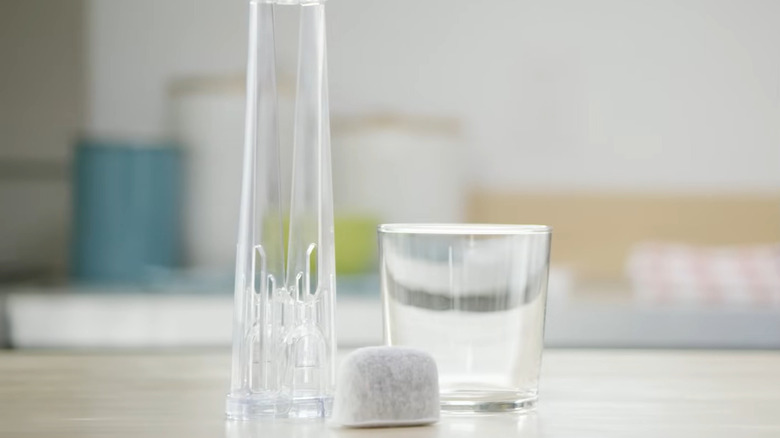
Wash reusable K-Cups in warm, soapy water
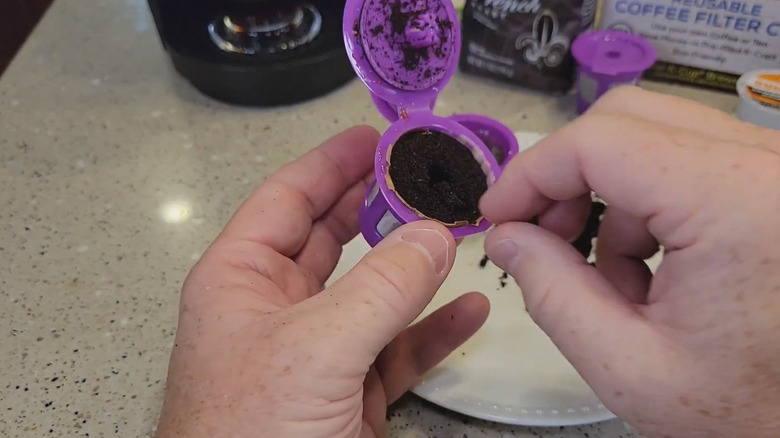
Pouring your choice of ground coffee into a reusable K-Cup significantly reduces plastic waste, and you're not locked into only the coffee brands packaged in the little cups. But those little mesh, plastic, or stainless steel cups create another hiding spot for mold and bacteria, especially if you just reload them every day without really washing them. Using them properly and cleaning them regularly helps keep the reusable cups free from mold.
Most importantly, always remove the reusable cup as soon as it cools down enough to handle — the cup compartment is warm and dark, which could cause mold growth if you leave the ground-filled cup there indefinitely. Dump and remove all remnants of the grounds every day. Then, rinse it out well. One word of caution, be sure you know how to clean reusable Keurig cups without damaging your garbage disposal and clogging your drains. Finally, at least once a week, do a deep clean of your reusable K-Cups using soap and warm water, rinsing well to avoid soapy bubbles in your coffee. Let the cups dry completely before putting them away.
Descale the machine
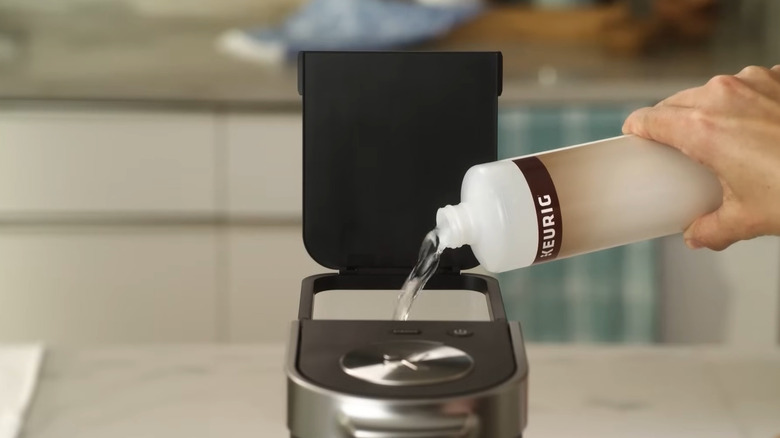
If you use hardwater to fill your Keurig, this can leave behind mineral deposits that could eventually damage the brewer or interfere with its performance. The scale buildup also creates a rough surface inside the machine where biofilm, bacteria, and other microorganisms can settle and grow. Additionally, scale holds onto moisture, which promotes a mold-growing environment. Regular descaling removes the roughness that helps microorganisms cling to your machine.
Descale your machine at least once every three months, or every six to eight weeks if your Keurig gets used more than eight times per day. It's also a good idea to descale before your Keurig sits unused for a month or longer. You might also increase the frequency if you have hard water. Check your model for specific descaling procedures, since they can vary by model. In general, you'll remove the water filter, fill the tank with the descaling solution, run all of the solution through the machine, and wait at least 30 minutes. Then, rinse the machine with one or more tanks of water. Keurig sells a special descaling solution, but many Keurig owners use DIY descaling solutions, including vinegar.
Replace the filter
Not every Keurig brewer has a filter, but if yours does, it's important to change it regularly. This helps remove impurities, including the minerals that cause scale buildup inside the machine. If you wait too long to change the filter, it won't be effective and could increase the scale and subsequent mold. All types of water filters can become moldy over time, as contaminants in the filter feed mold spores. You'll want to change the filter around the same time you descale — typically every three months.
Figuring out how to replace your Keurig water filter isn't difficult. However, there are classic, tall-handle, and short-handle water filters, so make sure you buy the right type of replacement for your model. You'll start by soaking the new filter in water for about five minutes, followed by a 60-second rinse under the faucet. The filter holder has two parts, including a holder where you press the new cartridge into place. Before inserting the new filter, clean the holder components. Then, put the cover on it and lock it into the empty water tank.
Use filtered water in the machine
Using unfiltered tap water can shorten your Keurig's lifespan because it increases scale buildup in the machine, which provides a breeding ground for mold. Plus, you might notice an improvement in the taste of your brewed beverages when you switch to filtered water.
Don't skip all the way to distilled water, though. Some Keurig models don't work well with distilled water — it keeps the sensors from working correctly. And, some coffee drinkers dislike the slightly flat taste that can come with distilled water. Instead, use the water from your refrigerator if it runs through a filter. You can also use water that runs through a filtering pitcher, faucet-mounted filter, or under-sink filter. Also, keep in mind that not all bottled water is ideal for a Keurig — avoid mineral and spring water to keep the mineral content low.
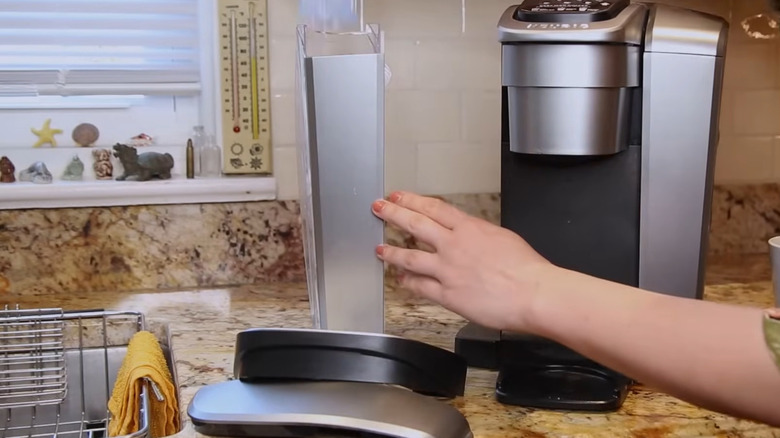
Empty the water reservoir when it won't be used

Preventing mold is one reason you may not want to leave water in your Keurig reservoir overnight or for extended periods. At a minimum, leaving the tank even partially full can let the water turn stale, which affects the flavor of your brewed drinks. Even worse, the standing, stagnant water can cause bacterial growth and lead to mold within the reservoir. Warm water can exacerbate mold growth and scale buildup, too.
The easy solution is to empty the Keurig water tank if you don't plan to use it for a day or two. It's a good idea to rinse the tank and let it air dry after emptying it. If you use the machine every day but don't use a full tank within a few days, empty the water, rinse the container, and fill it with fresh water. Putting less water in it if you never seem to empty the tank in a few days could better match your usage habits.
Let the tank air dry when it's empty
When your water tank is empty, making sure it's dry is essential for preventing mold growth. Say you empty the tank because you won't use it for a few days, and you close the lid while there's still moisture inside. The tank can't dry fully, and the inside is warm and damp — just what mold needs to grow.
An empty tank should air dry fully before being put back on the machine — drying it with towels could leave lint behind. That's true whether you're doing a weekly cleaning of the tank or you're emptying it because you won't use the machine for a while. When you put the reservoir back on the machine, leave the lid off to prevent any moisture buildup inside. If it's going to be a week or longer before you use the Keurig, keep the tank off the brewer until you're ready to use it again.
Do a deep clean if you spot mold
Since Keurigs are one of the sneaky kitchen appliances most likely to develop mold, it's important to act fast if you spot moldy growth. And since you might not see all of the mold that's in the machine, it's important to do as much as you can to clear it all out. You might not see mold that's in the dark, tiny crevices or water lines inside the machine, for example.
Even if you see just a tiny spot of mold, immediately stop using the Keurig and give it a deep clean. Remove all the parts that you can and clean them thoroughly in warm, soapy water. You'll also want to descale the Keurig machine. After you descale, run several cycles of clean water through the machine to rinse it well. Ensure all the removable parts and internal components are fully dry before reassembling the machine. Keep a close eye on your Keurig going forward to make sure the mold doesn't grow again.