14 Ways To Make Your Driveway Look New Again

We may receive a commission on purchases made from links.
When you return home from work in the evening, how do you feel about arriving? Are you relieved, and a little proud, to be the one who gets to pull your car into your beautiful, well-kempt driveway? Or does the sight of your parking space fill you with dread every time it comes into view? If the latter sounds familiar, then you're not alone. Given the fact that they're subjected to literal tons of pressure every time we park our cars, our driveways are prone to significant wear and tear. They're also heavily exposed to the weather, and in certain climates, once cracks begin to form, they can quickly begin to worsen. Even if they don't crack, driveways can still become greasy, oily, afflicted with mold and algae, and, depending on the style, covered in weeds.
For all of the above reasons, frequent maintenance is key to keeping the end-of-day driveway dread at bay. Even if you've allowed things to get out of hand and are now faced with a seemingly insurmountable task to get it looking new again, don't worry. From weeding and gently pressure washing, to refilling the gaps between your blocks with masonry sand, as you'll see below, restoring even the most dreadful driveway is easier than you might think.
Pressure washing and de-greasing your asphalt can lift stains
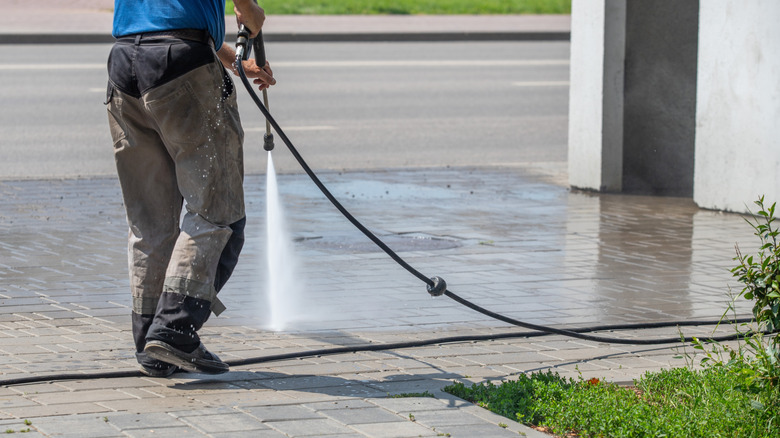
Oil, fuel, and all kinds of other grime from the outside world can easily find its way onto your driveway, and if not kept on top of, can easily embed itself into the asphalt. Over time, this can degrade the looks of your driveway and leave you counting down the days until the nights draw in so you don't have to look at it whenever you get home. Sound familiar? If so, then one of the easiest ways to fix it is to bust out your pressure washer.
Before you tackle your driveway with a blast of water, it could be worth pre-treating your driveway's surface with some dedicated asphalt cleaning fluid, like this cleaner and degreaser from Oil Eater. This should help to break down the chemical bond between the grime and your driveway, making it infinitely easier to spray away. And, try not to fall foul of common pressure washer mistakes, like choosing the wrong nozzle or spraying too close to the surface of your driveway. Asphalt is hardy, but if you hold the sprayer too close, you could easily damage it, especially if you happen to spray any minor cracks.
Apply cold pour crack filler to small asphalt driveway cracks
Just like other driveway surfaces, asphalt can occasionally develop linear cracks. When it does, even minor cracks in a driveway can quickly develop into a much bigger problem. Once water is allowed to seep underneath the surface, it can wreak havoc in all sorts of ways. In the winter, its continuous freezing and thawing can wreck the structure of your surface. Even in warmer climates, it can erode the soil beneath the asphalt, which can eventually lead to "alligator cracks." And if this happens, there's not much you can do but remove and reinstall the driveway.
The solution? Keep a hawk eye on your driveway, and fix cracks as soon as they appear. For those half an inch wide or less, it's fairly straightforward. You'll need some cold pour crack filler, which you can apply with a caulk gun and simply "shoot" into the crack. Just be sure to follow your chosen product's guidelines on site preparation and cure times to ensure a solid fix before using the area again.
Unfortunately, if your cracks are bigger than this, then it may be best to hire a contractor. There are certain jobs that are best left to professionals to fix, and among those are repairing major cracks in your driveway. Cold-pour filler may struggle to completely fill deeper cracks, and those that are wider usually require specialist equipment to ensure a robust, long-lasting result.
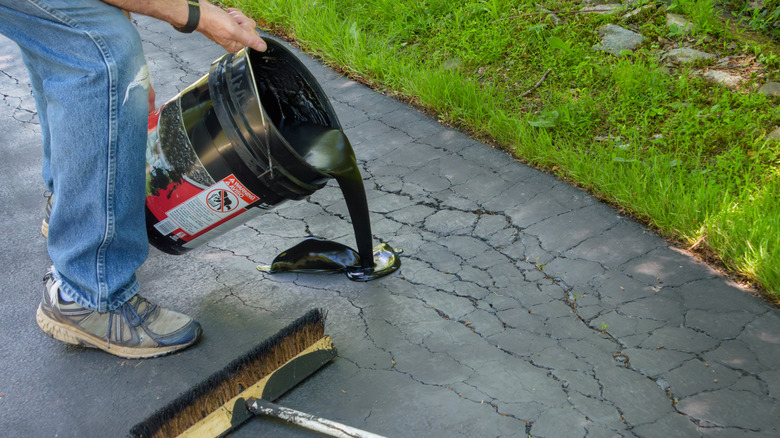
Regularly reseal asphalt driveways with asphalt emulsion

Ever wondered whether you should re-seal your asphalt driveway? The answer is yes, and for good reason. It's the most reliable way to protect the actual surface of your driveway from the elements. Over time, even the best-sealed driveway can fade and become brittle with exposure to sunlight and UV rays. By re-sealing it with asphalt emulsion once every few years — like when it was first installed — you effectively lay a sacrificial layer that "takes the hit" from the sun. It also helps to keep out water, while giving your driveway the jet-black look of a newly-laid surface.
As for how to do it, you'll first need to clean your driveway and fill any cracks. Give any fillers time to cure, and consider waiting for a few rainless days to ensure your driveway is bone dry to avoid sealing in moisture. Once you're ready, use a long-handled squeegee or brush, and work the emulsion over the entire surface. Work it into all the edges and corners, then allow it to dry per the manufacturer's instructions.
Cut and fill potholes in gravel driveways to re-level the surface
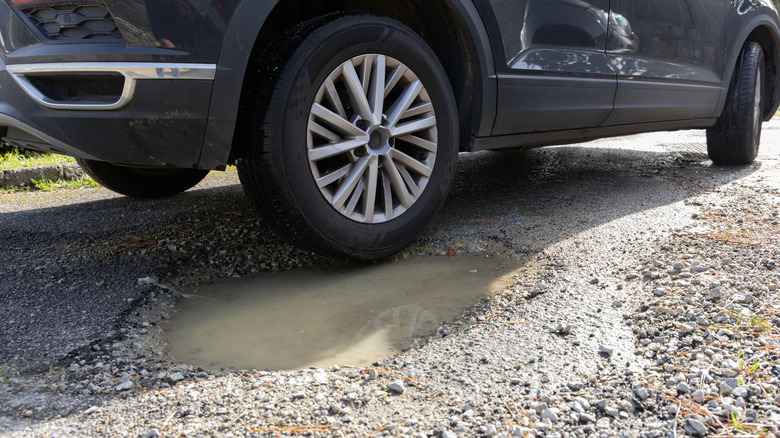
When they're first laid, gravel driveways look absolutely gorgeous. Especially under the bright summer sun, there's something undeniably decorative about a perfectly level surface covered in clean gravel. Unfortunately, just like any other driveway surface, this is unlikely to last forever — not without at least a little maintenance from time to time. One of the most important pointers for maintaining a gravel driveway is to keep on top of potholes. If you don't, they're only likely to get worse, and when they do, the risk of damage to your vehicles only continues to increase. They can also seriously worry your ankles, especially during the winter when arriving home from work in the dark.
If you're struggling with potholes, then don't be tempted just to scoop some gravel over the top and call it a day. Do that, and the potholes will return as quickly as they disappeared. Instead, you need to dig the hole out and actually extend it. This will break up the compacted gravel that's causing water to pool. You then need to compact new layers of gravel into the base of it, building them up slowly and compacting them into place to ensure that the new gravel bonds with the foundation. Start with a coarse sub-base stone, compact it thoroughly with a hand tamp, then top it up with stones to match the rest of your driveway.
Refresh the surface and fix bald spots with a fresh layer of gravel
In addition to potholes, gravel driveways are prone to ugly thin patches. Often known as "bald" patches, these tend to appear wherever the soil or sub-base is allowed to show, and it can happen for various reasons. The wheels of your car can easily displace the gravel. It can also happen in areas where people frequently walk.
Fortunately, fixing bald spots is easy: just apply a fresh layer of gravel. This will help you to hide the base layer and give your driveway a crisp, uniform appearance. Start by raking the existing gravel to ensure it's level. When that's done, spread a new layer of matching gravel over the top, until the bare patches are hidden. Depending on how much gravel you applied, you may need to re-compact the surface of your driveway. Do this with a roller or a hand tamp (depending on how big your driveway is). This will help to ensure the new stones interlock with those underneath, making them less likely to move once you restart using the driveway.
Install stabilizer grids to fix and prevent future gravel migration

Issues such as potholes and bald spots are both results (of varying degrees) of the same issue, and that's gravel migration. This happens naturally on driveways with gravel, especially loose gravel. And it makes sense. Delivery drivers constantly run up and down the driveway with your tri-weekly order from Amazon; family members and pets run excitedly to and from the car; cars spin away faster than they probably should during the morning dash. All of this eventually causes the gravel to migrate away from where you intended when you first laid the drive.
One way to mitigate against gravel's annoying tendency to travel is to lay stabilizer grids. Now, we should say that there are both pros and cons to using gravel grids. An obvious pro is that these plastic, honeycomb-shaped grids are designed to help hold gravel in place, which is just what you want on areas like the driveway. Unfortunately, they can also be fairly labor intensive to install. They're not impossible, though. To use one, you'll need to prepare the area by clearing the area of gravel, and digging down to the soil sub-surface. This should be weeded, leveled, and compacted, and then fitted with a geomembrane roll, to prevent the gravel from sinking into the dirt beneath. Once that's done, lay your grids down, then top up with gravel until it just covers the grid.
Treat resin-bound driveways for biological growth
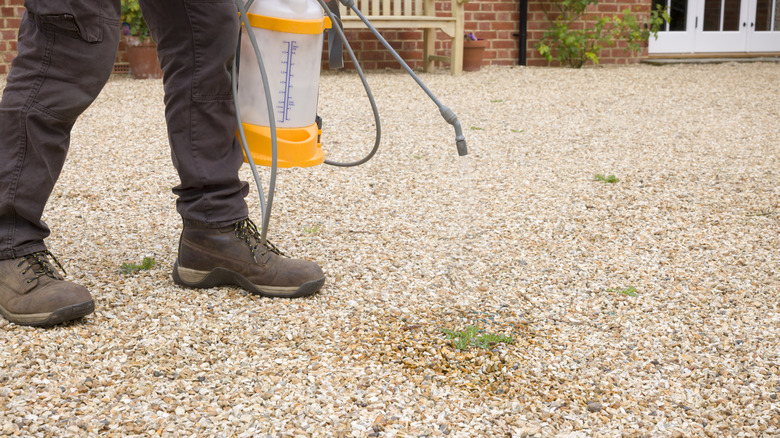
Resin-bound driveways are growing in popularity across North America, namely for the minimal maintenance they require and the premium aesthetic they deliver. However, they're not a total "set and forget" solution. They can still be prone to build-ups of green and black biological growth (like mold and algae), especially when laid in shady spots. In turn, these can make the bonded surface dangerously slippery, not to mention unsightly to look at. Fortunately, it's quite easy to remedy this common problem.
The trick is to use a resin-safe biocide, one that'll kill the growth — root and stem — without harming the binders that make the resin so strong. The best advice we can offer is to consult your driveway fitter upon installation and check which cleaning products they recommend. Once you have those, follow the manufacturer instructions to a T. Generally speaking, you should apply a thin, diluted coat of your chosen biocide using a sprayer. Let it sit for as long as the instructions say, then rinse the surface down with a garden hose. Avoid using harsh chemicals like bleach, as these can discolor the surface and actually damage the resin over time.
Patch small resin driveway cracks as soon as you find them
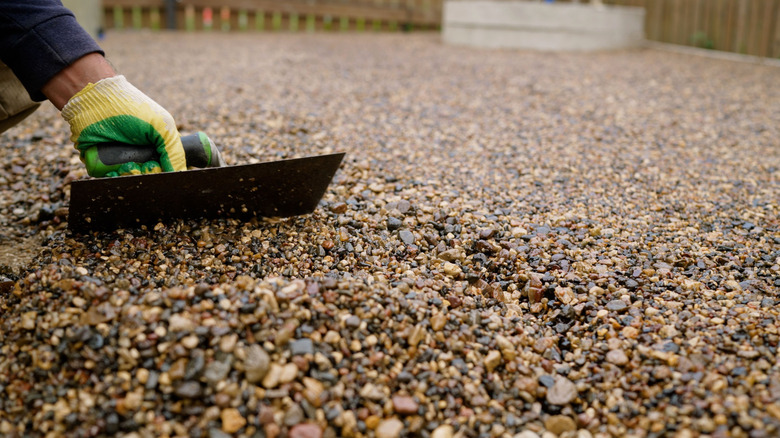
Just like asphalt, resin driveways are prone to producing small holes or "pop outs," which can occur for a variety of reasons, from ground movement to use by overly-heavy vehicles. Patching them simply replaces the missing stones and resin, and fortunately, it's quite straightforward to do. It's also very important, and can make a significant difference to the lifespan of your driveway. If you fail to do it, these tiny, inoffensive holes can start to gather debris and, like in asphalt driveways, allow water to spill beneath the surface. When these things happen, more serious faults can start to form, and before long, you can be left with a repair job that only a contractor can fix.
To avoid this, make a point of checking your driveway's surface regularly. If you identify any minor holes, then take note and make a point of addressing them quickly. To do this, first trim away the edges of the damaged area until you're left with a clean edge. Mix a small batch of matching aggregate and resin, then trowel it into and over the hole until flush. Allow it to cure fully (per the resin mixture manufacturer's instructions), before using the driveway again.
Recoat your resin driveway from time to time to protect it from sunlight
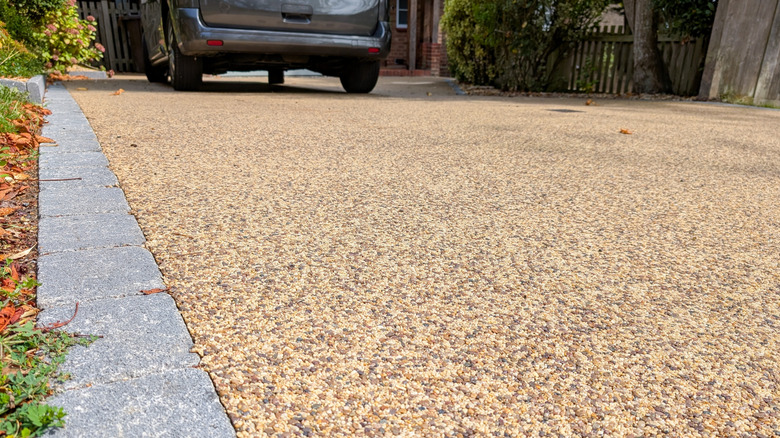
As we've mentioned, resin-bound aggregate is one of the most low maintenance and weed-resistant driveway solutions for modern homes. But as we've already seen, it's not completely maintenance-free. In shade-dappled areas, it occasionally needs cleaning to remove mold and algae, and it can also suffer from cracks which need filling quickly in order to prevent substantial damage. It also needs resealing from time to time. Over time, exposure to sunlight and UV can cause these driveways to lose their gloss. And while most are sealed at the time of installation, this original coat can eventually wear off, especially in areas where you've had to clean or make repairs.
Fortunately, re-sealing your resin is well worth doing. Firstly, it replenishes that UV-resistant top layer, which protects the resin beneath (as well as your investment) from untimely damage by sunlight. Secondly, it restores the original luster to the color of your driveway and the aggregate underneath. Finally, depending on the type of sealant you use, it can also make the driveway safer to walk on in wet weather by adding anti-slip protection. To apply it, first clean and thoroughly dry the surface, ensuring that any cracks have been identified and fixed. Apply a thin, even coat of polyurethane sealant over the top, working it into all of the edges and corners of your driveway with a long-handled brush or squeegee, then allow it to dry.
Re-sand paver joints to fix wobbles and suppress weeds
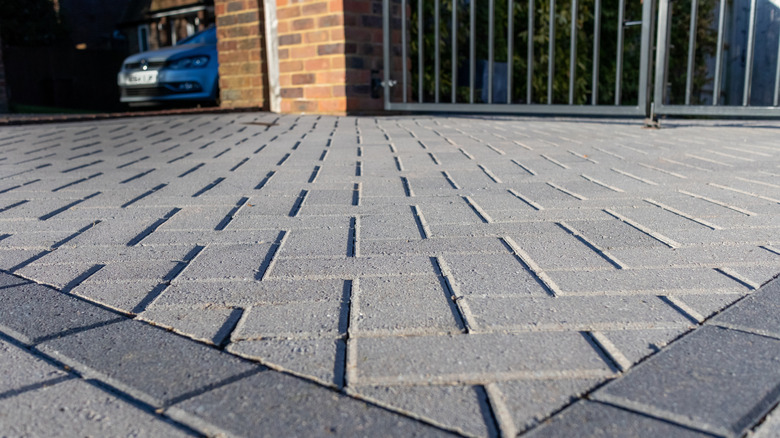
One of the most important considerations when installing a paver driveway is that it needs a strong, stable, freely-draining base. Even then, the sand between the pavers can start to become displaced. Weeds can push it upwards, and constant use by heavy cars can eventually work it loose. When that happens, the stones can start to wobble. Fortunately, while it certainly needs addressing quickly, you don't necessarily need to hire a contractor to do it.
The best thing to do, before the displacement becomes severe, is to refill the joints between the pavers by applying a fresh batch of kiln-dried sand. Doing so achieves two things. Firstly, it'll help to suppress weeds, which will surely sound attractive to anybody who resents the idea of spending hours bent over with a weed hook. Secondly, and more importantly, fresh sand will help to maintain a rigid, but flexible surface across your driveway.
Start by pressure washing the surface and allowing it to dry. Next, pour your sand over the blocks, sweeping it over and into the cracks until they're full. With that done, make a point to frequently maintain your pavers. Apply weedkiller now and then to keep on top of any particularly determined growers, and make sure you clean up any spillages as and when they occur. You can also use a sealant over your freshly spread sand, which will harden and lock it in place.
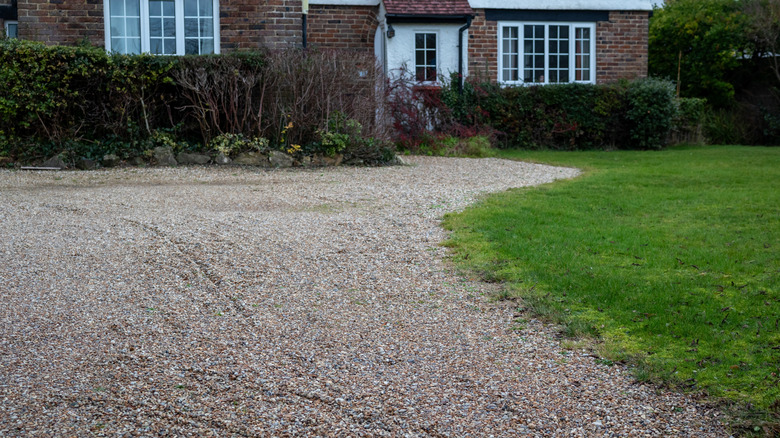
Add edging to the borders around your gravel driveway for a neat, professional finish
If the grass or flowers around your driveway regularly spill over the edges, they can quickly lend the front of your house an unkempt, "sloppy" appearance. This is especially true in the winter, when those flowers die back to ugly, brown stems. This is why edging around your driveway is so important.
The key is to dig edging strips around your driveway, then install a rigid, plant-proof barrier. This serves two purposes. The first is that it prevents gravel from spilling out of your drive and into the grass and borders surrounding it. The second is that it keeps grass and flowers from spilling into your drive. To do it, dig a narrow trench around the perimeter, insert some edging blocks or strips, then backfill with soil or gravel to keep them in place. You can use various materials to do this, including stone, bricks, wood, and even metal. The key is to "define" the edge and add a barrier to prevent encroachment from either side.
Whatever your driveway is made from, keep it clean
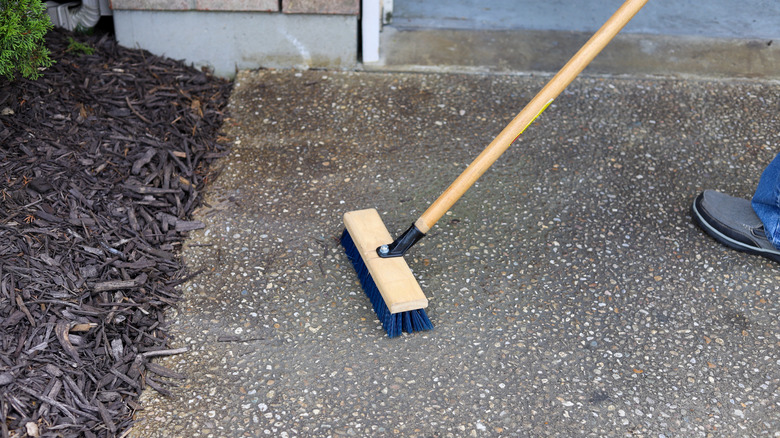
It's important to keep your driveway clean, and not just so that you can bear the thought of seeing it during the daytime. By keeping it free of dirt, dust, and debris that may rot on the surface and stain it, you can maintain its beautiful new-look for longer. Secondly, by paying your driveway more frequent attention, you're much more likely to spot faults and cracks more quickly. As we've discovered already, the faster you can address these kinds of issues, the less likely they are to lead to larger long-term problems.
So, arm yourself with a pressure washer and get cleaning! Precisely how to clean your driveway depends on the kind of surface you're working with. For example, the best method for cleaning a gravel driveway is to weed it first and rake or sweep it clear of debris before cleaning it gently with a pressure washer. You'll need to be similarly gentle with the pressure washer on asphalt, resin-bound, and paver surfaces.
Improve drainage to prevent pooling
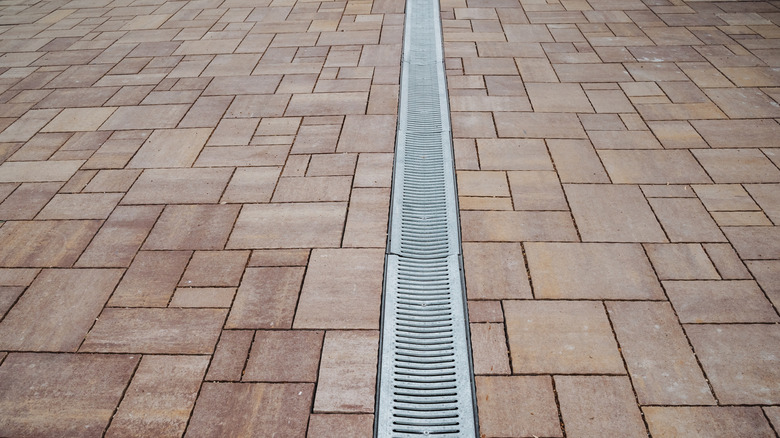
Water pooling on your driveway is a sure sign that something's not quite right. It's also sure to shorten its lifetime if not addressed quickly. Professional installations are unlikely to suffer from pooling (although it's not completely unheard of), so if you've yet to install a driveway, it's recommended you consult a pro. But if you're already suffering from pooling on an existing driveway, then you'll need to take action to improve the drainage.
As for how you do it, it depends on the type of driveway you have and where the pooling is. If it's appearing in the center of a resin-bound driveway, then short of removing the entire surface and re-installing it with drainage in situ, there may not be much else that you can do. But if you're working with, say, gravel — or you've yet to install a driveway surface — then you could install a French drain. This works by digging a channel from where the water is pooling and towards a suitable drain site. The channel needs to angle downwards to naturally send the water away, and it should be deep enough that you can sink a perforated pipe into it. Once the trench is dug and the pipe installed, simply top it up with your choice of gravel.