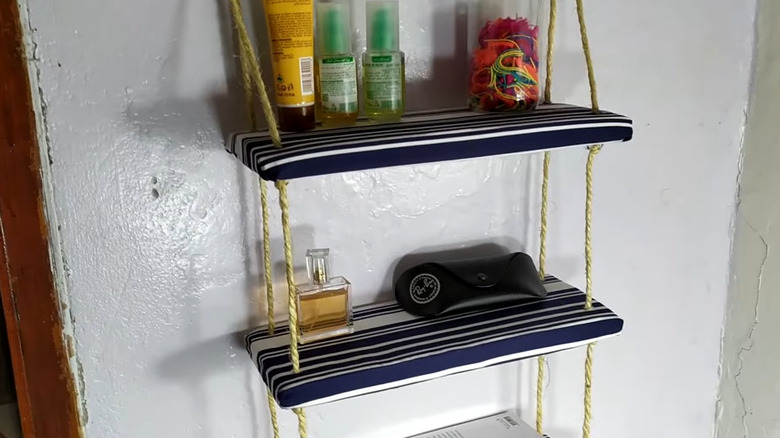
Turn Your Old Cardboard And String Into Clever Hanging Storage For Your Bathroom
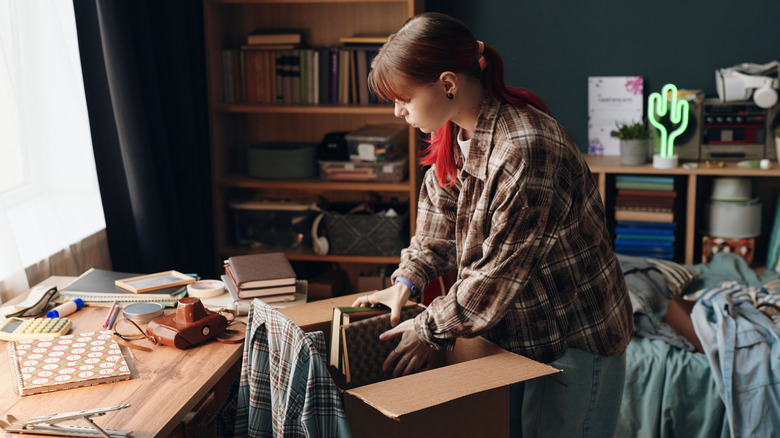
Even the best-designed homes sometimes feel like they are lacking in storage solutions, especially if you're looking to embrace the maximalist style and fill your space with fun and colorful trinkets. Without enough shelves and space to display everything properly, things tend to look cluttered and messy. Fortunately, it's easy enough to make your own shelves. Depending on what you have in the house, you can create some pretty charming designs without having to spend much. For example, if you need a few shelves to hold small items in your bathroom, making a hanging shelf out of supplies you already have lying around, like spare cardboard and rope, can give you something that is both attractive and practical.
For this DIY, you need some rope, fabric, cardboard, hot glue, an awl or other hole-punching device, and some scissors. There is a lot of flexibility with this design, so you can make it as large or as small as you want. You can even create multiple shelves to hang all over the house to hold the clutter you have in every room. That said, these are great for holding small items, so an ideal place to use it would be the bathroom (think perfume bottles, toilet paper, etc.) Or you can even help clear the clutter by installing an entryway shelf to hold your catchall items, such as keys, change, and mail.
Creating your tiered hanging shelves from cardboard
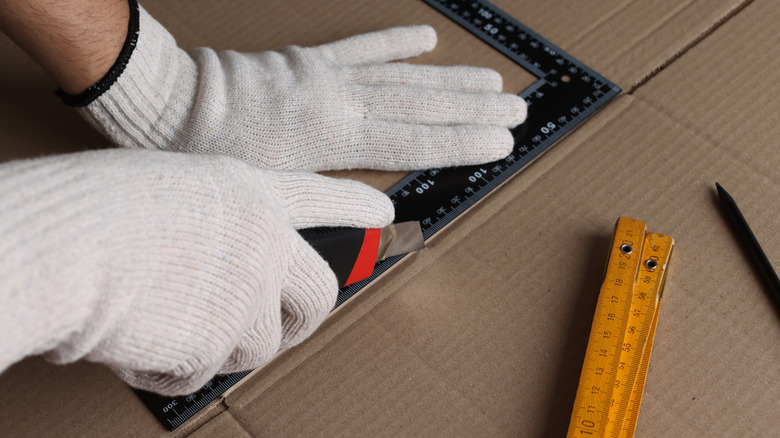
You can make your hanging shelves as large or as small as you want. Simply cut enough cardboard to suit your needs and fit all of your items. And don't worry about having any leftovers at the end of this project. If you still have a mountain of boxes you are trying to repurpose, there are plenty of cardboard DIYs to add style to any room in your home.
To start, determine how big you want your shelves, and then cut a few out of cardboard. Next, using an awl or another tool, poke holes through the material. You want them near the four corners, at least a ½ inch away from the edges on either side. Next, you want to take your fabric and wrap it around your cardboard to make it look a little nicer. You can use the hot glue to keep it in place. Another option besides fabric is to use wallpaper or shelf liners to wrap your shelves. Make sure you pierce the hole through whatever covering you are using as well.
Then, when you have all the shelves you want done, the next step is to string it together. You'll start on your bottom shelf. Fish the rope through the first hole and tie a knot underneath. Repeat with the three other holes. Continue this process with the rest of the shelves, knotting under each hole.
Making sure this shelf design works for you
One of the most challenging parts of this DIY is getting the shelves themselves even. You may have to tie the knots and try hanging it to see if it is level. Thankfully, if it isn't, all you need to do is untie your knots underneath each shelf and readjust until you get it where you want it. Once you are happy with the look, gather up all of the rope at the top and tie it so you have someplace to hang the shelf from. Or, you can knot the two strings of each side together, and then use a rod or individual hooks.
While this DIY is incredibly charming, it's not able to handle a lot of weight as-is. It's fine for a towel or lightweight trinkets, but this isn't going to support bulky items without bending. Adding more layers of cardboard can help, though. To make it sturdier, all you have to do is cut extra shelf pieces and then combine two or three of them together. The additional layers will add more support and make for a sturdier shelf.
You can also look at the quality of your cardboard to determine how many layers you need. For example, if you use thicker pieces like the kind you would use to DIY an ottoman on a budget using cardboard boxes, one or two layers might be enough. However, thinner material may need three or four.