The Genius DIY Project That Combines Your Desk And Closet Into One Built-In Feature
Redesigning your spaces so they actually work for the way you live is at the heart of intentional design. It's about creating spaces in your home that are functional, purposeful, and comfortable for your life as you're living it today. As your life changes, your needs shift, which is why many homeowners look for extra space for a child's study area or a home office. Whether you live in a small home or you're simply looking to make the most of every square foot, a closet can be reinvented with a genius DIY that combines your desk and closet into a single built-in feature.
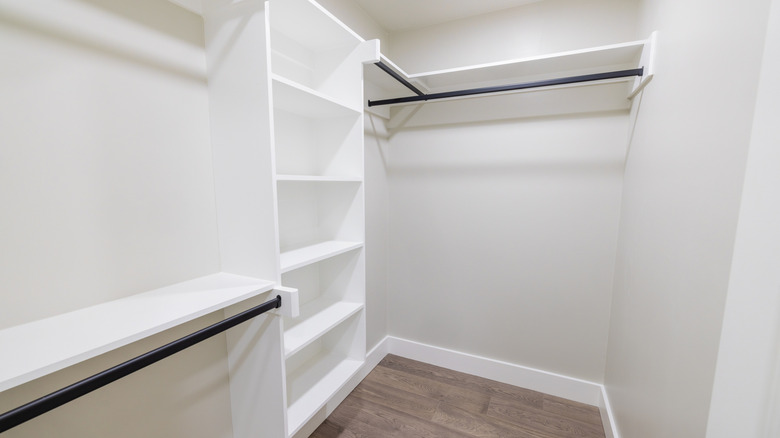
Most closet-office combinations, also known as cloffices, don't go any further than a desk and a floating shelf. To make the most of your space, the right built-in design integrates your workspace and clothes storage area so you don't have to give up anything — even hanger space. The beauty of a built-in cloffice design is that you can eliminate bulky dressers and armoires while still having a place for hanging clothes, a desk, or even a vanity. However, even though a built-in cloffice for your home is a great DIY project, it does require some woodworking know-how. That said, you can match the scale of your build to your skill level, even if that means simply painting the wall, adding a few shelves, and installing a desk and chair.
Plan a built-in office desk and clothes closet combo
The first step in planning a built-in desk and closet combination is to measure your space and see what you're working with. Many closet walls are non-structural, but a well-designed cloffice may require removing some existing framing to make room for your new built-in. When building a cloffice, use built-in closet planning and design resources. For example, standard reach-in closets are 24 inches deep, so you need to have a cabinet at least that deep if you want to hang clothes. You can include everything from drawers, cabinets, and floating shelves in your design, in any combination that fits your lifestyle and needs.
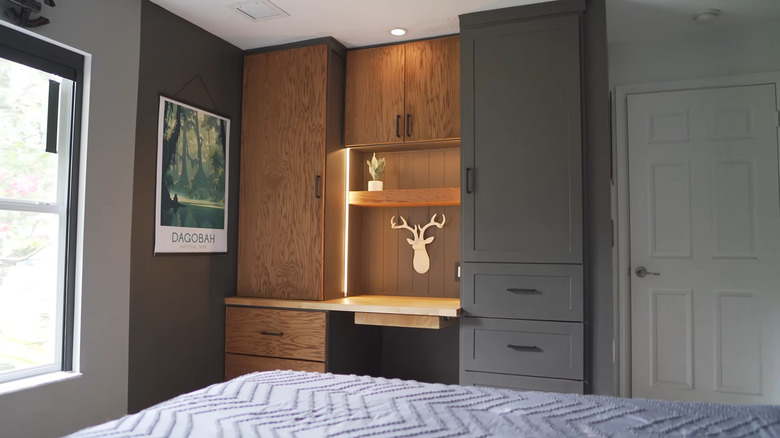
When it comes to finishes, whether you choose stained wood, laminate, or painted surfaces is a matter of preference and style. The planning and design phase of your DIY is the time to make decisions about cabinet hardware, drawer slides, pull types, and lighting choices. Relocating electrical switches and outlets may also be required, so whether that's something you can do yourself or have to call an electrician for, be sure to include that in your budget. And, be sure to get permits if those are required in your area. Outside of that, your biggest expenses will likely be lumber, including materials like sheet plywood and MDF. When choosing countertop materials for your workspace, you'll have many options.
Discover key steps and budget tips for building a cloffice in your home
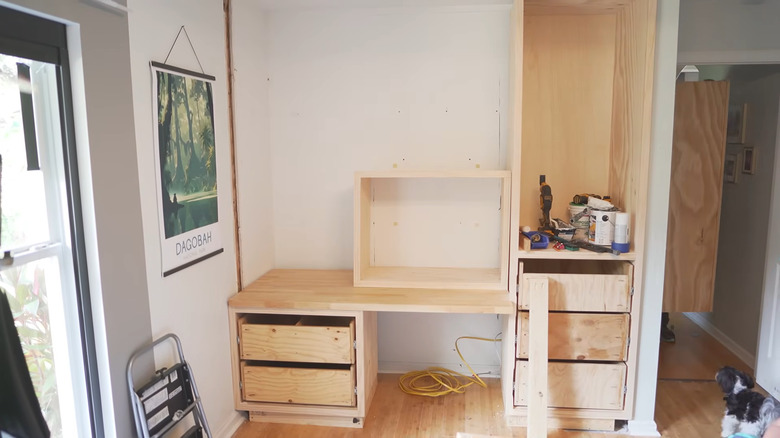
Whether you're going all-in on a full build or keeping it simple by removing closet doors, painting the back wall, and adding some shelves, once you have your home office decor ideas firmly in place, it's time for demolition. Use the right tools and safety gear, shut off utilities, and work slowly to avoid unintended damage. After you clean up the mess, you're ready for the structure of your built-in, which is usually plywood cabinets. With intermediate skills and the right tools for the job, you can build face frames and Shaker-style doors that look like a custom installation.
For a budget-friendly build, choose softwood plywood over hardwood alternatives, and plan your cuts to minimize waste. For door faces, ½-inch MDF sheets are easy to work with and paint, making them a good option for cabinet doors and drawer fronts. If you don't already have one, this is a great project to justify getting a router, which is one of the Ryobi tools every DIYer should have. Rope LED lighting is another way to add polish to your project without spending a lot of extra money. Details like soft-close hinges and drawer glides add a professional finish without significantly increasing cost.