Turn Empty Toothpaste Boxes Into Countertop Storage That Looks So Chic
We may receive a commission on purchases made from links.
Typically, the process of opening a new toothpaste is fairly straight forward: open the cardboard box, take the toothpaste tube out, and toss the box in the garbage or recycling. But with a little bit of creativity, you can reuse that box and turn it into surprisingly chic countertop storage. It's a fun cardboard DIY that's a great way to add style and decor to your home, without breaking the bank.
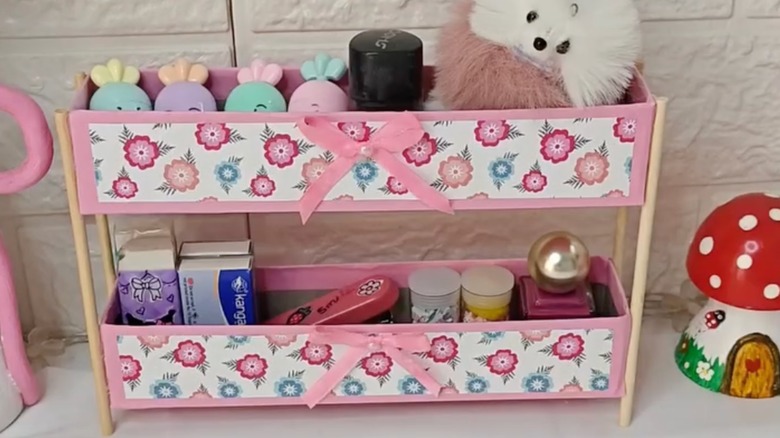
The idea for this DIY, which comes from Instagram creator @craft_and_activities1, is to take two toothpaste boxes, cover them with decorative paper, and use wooden sticks and hot glue to stack them. These can go on the counter to store anything from pens to Q tips, or to organize nail polish bottles. To do this project, you'll need two equal-size toothpaste boxes, scissors, colored paper, hot glue, and four wooden rods for crafts like these Hopelf 6-Inch Wooden Dowel Rods.
This DIY isn't meant as a seriously spacious storage for cluttered countertops, because it's tiny and not that sturdy. Plus, cardboard isn't water resistant, so humidity will eventually damage it. It's made of small and delicate parts, so excessive use and heavy materials might break it further. Instead, it's a fun and cute craft project that you can do with very few supplies and use for lightweight objects.
How to DIY a cute organizer with toothpaste boxes
This craft requires that you open your toothpaste box a bit differently than you typically would. For the purpose of the DIY, cut off the entire side of the box, rather than opening it by the end as usual. For this, you can use small scissors, a box cutter, or a kid-safe cardboard cutting tool. You should end up with one of the long side rectangles completely gone, and the remaining three long sides and two short edges intact. Once that's done, cover your new container in decorative paper. For this, you'll need two squares for both ends of the container, and one long rectangle that can cover all three long sides in one go. Secure this paper in place with glue, folding the edges into the box.
Then, use the hot glue gun and secure all four wooden rods on all corners of the paper-covered cardboard boxes. The goal is for the boxes to be stacked on top of each other, with about 1 or 2 inches of space in between for items to sit on the lower "shelf."
There are tons of ways to customize this DIY, like using different size wooden rods to create taller or shorter stacked organizers, or creating more than just two shelves. You can also swap the decorative paper with paint instead, especially if you'd like to free-hand some decorative designs like bows, stars, or flowers. Another option is to decorate with decoupage using paper napkins and Mod Podge. It's a project you can do with kids, too, to help them learn basic DIY skills like cutting cardboard and using a hot glue gun (though kids should be at least around 10 years old before using hot glue guns on their own).