Turn Cans Into A Kitchen Storage Solution For Clutter-Free Counters
It's not really your fault that the kitchen in your rented house didn't come with drawers. So now your countertop has become one of your storage spots with crocks and little canisters holding your cutlery and different utensils. But deep down, you know you don't like having stuff always occupying your counters because, eventually, more items land and stay there, making your space feel cluttered. Not anymore — there's a surprisingly simple hack that can keep your kitchen counters clutter-free: Simply use old tin cans and leverage vertical space.
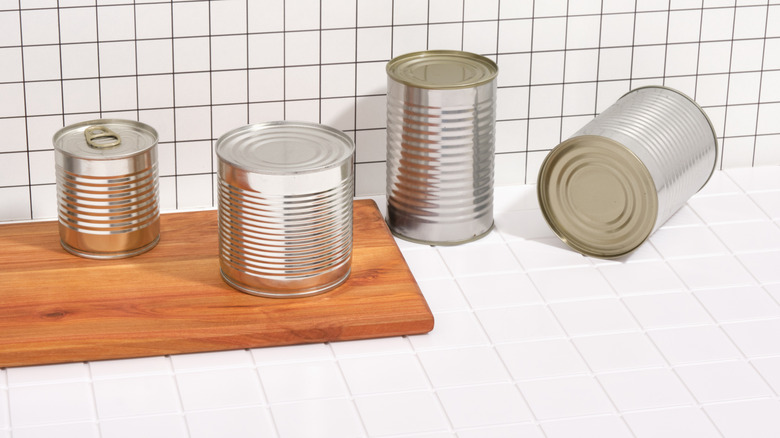
This tin upcycle is so easy, it'll organize your kitchen drawers in a flash. You'll just wrap the cans in jute twine, add two holds near the top rim, thread a rope handle through the holes, and hang them via wall hooks. We also love that it keeps utensils handy so you can quickly grab what you need while cooking. Moreso, there's no pressure to get a specific size of tin can to recycle; in fact, tins of different heights will enable you to make a home for various sizes of cutlery. So, if you're ready to move your cutlery off the counter and onto the wall, start by gathering a few empty metal cans. Make sure they have a smooth cut edge to avoid injury, or use a metal file to smooth out any sharp edges. Get a roll of sisal or jute twine, a hot glue gun with glue sticks, and some hanging hooks. You'll also need a drill with a drill bit and a pair of scissors.
Sort your kitchen clutter with a DIY tin can storage solution
First, give the cans a good clean, removing all labels or any sticky residue. Dry them thoroughly to ensure the glue will adhere well to the sides. A clean and dry can will also keep your cutlery odor- and rust-free. After that, apply a line of hot glue near the bottom edge of the can and attach the end of the rope there. Hold the rope in place for a bit until it grips. Continue to wrap the rope around the can in close rows, adding hot glue in small sections as you go. Keep an even and tight wrapping for a polished finish. You could also use some scraps of fabric you have, simply hot-gluing the fabric around the sides of the can.
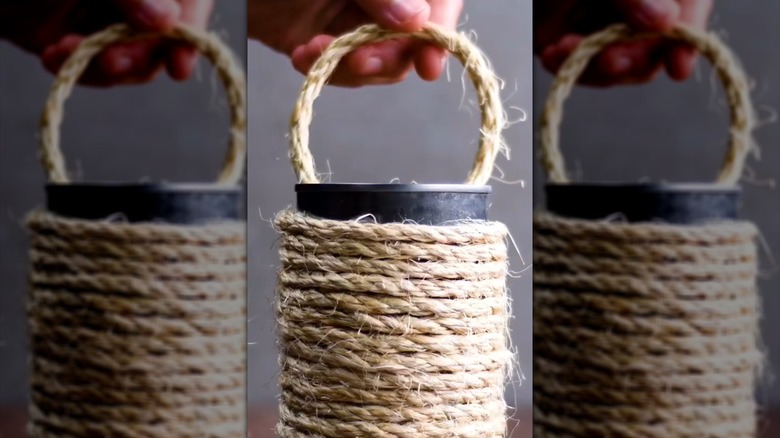
Leave about half an inch of an unwrapped section at the top of the can to create a catchy contrast between the metal finish of the can and the rope's texture. You will also drill two hanging holes on this narrow section, lining them up about 1 or 2 inches apart. Now finish this DIY project by pushing a rope through one hole and out the other to create a loop. Tie the twine rope ends to secure it in place and form a simple looped handle.
Mount your DIY kitchen storage solution and spruce it up
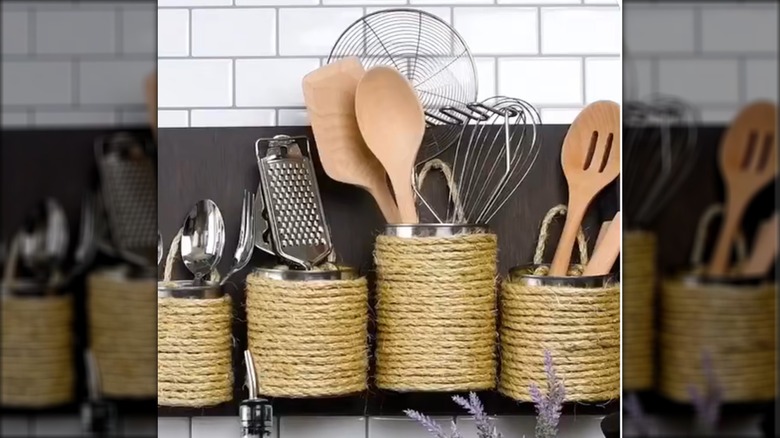
You want to first identify the best spot in your kitchen to mount these DIY cutlery storage cans. The wall or backsplash above your countertop is a great choice as it's close to your workspace. Or utilize the bare side of kitchen cabinets to maximize storage even further. Simply affix a few adhesive hooks on the chosen surface and hang up the tin cans individually. Alternatively, get a wide wooden board, attach it to your backsplash using heavy-duty adhesive strips, or screw it in place, and then hammer in a few nails or drill screws at an angle to serve as the hooks.
The DIY can storage you've created is complete as-is and ready for holding your cutlery. However, if you look at these twine-wrapped tins as blank canvases, there's a lot you can do to jazz them up. For example, simply taking a black ribbon and wrapping it across the middle section of the tin on top of the twine will add a little oomph to your setup. Another idea is to stick little decorative flowers on the front surface of the cans to create an eye-catching focal point. Alternatively, swap out the flowers with decorative gems like silver pearls to create a more glamorous look. You can also tie up short pieces of twine rope into little bows and glue them on the front of each can. Basically, let your creativity shine through to create a design that fits your taste.