Turn Old Wine Corks Into The Cutest DIY Mushroom Garland
We may receive a commission on purchases made from links.
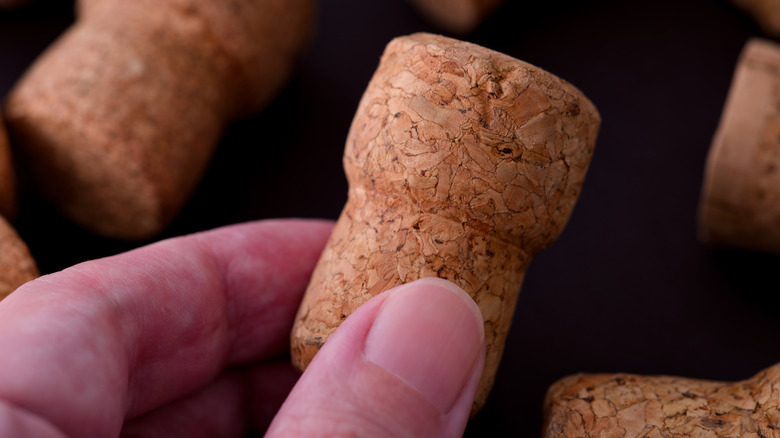
If, after dinner parties or wine nights, you've found yourself holding onto a handful of wine corks "just in case," this DIY is exactly the kind of project you've been waiting for. While there are so many ways to repurpose old wine corks around the house, turning them into a whimsical mushroom garland might just be one of the cutest yet. Inspired by TikTok user @atcharlotteshouse, this adorable craft feels straight out of a woodland fairytale. Blending a rustic charm with a playful, storybook aesthetic, it would make itself right at home in cottagecore spaces, farmhouse style interiors, or cozy cabins. But even without those, there's so much you can do with this mushroom garland. Think a whimsical nursery accent, a unique spring or summer garland, woodsy decor, or a nature-inspired holiday setup.
Best of all, it's a totally approachable craft that transforms simple materials into something truly magical. No big DIY skills, fancy tools, or hard-to-find supplies required. All you need are old wine corks, paint, a paintbrush, a hot glue gun, velvet ribbon, two pieces of garland, florist wire, white sequins, velvet bows, and 2-inch styrofoam half-spheres, similar to Crafjie Half Round Foam Balls. With a little creativity and an afternoon of crafting, you'll have a homemade garland that looks plucked from an enchanted forest. Plus, it's entirely customizable. Switch up garland texture or color, ribbon style and fabric, and mushroom color.
How to make a mushroom garland using wine corks
The first step is to paint your hemispherical styrofoam balls, which will become the mushroom caps. Go red like @atcharlotteshouse for a classic toadstool look, or use any color of your choosing. Don't be afraid to branch out — muted neutrals, pastels, or even rich jewel tones can completely change the vibe. Next, paint your wine corks in a soft taupe or beige to mimic natural stems. Set the painted pieces aside and allow them to dry completely before moving on. Once dry, decorate the caps by using pins to secure the sequins across the surface for that spotted mushroom effect. You can also swap in pins, like Decora's pearl pins, for a slightly more elegant finish, or take a page out of @atcharlotteshouse's playbook and use both. After decorating, hot glue each cap to a cork, holding it in place briefly so it sets securely.
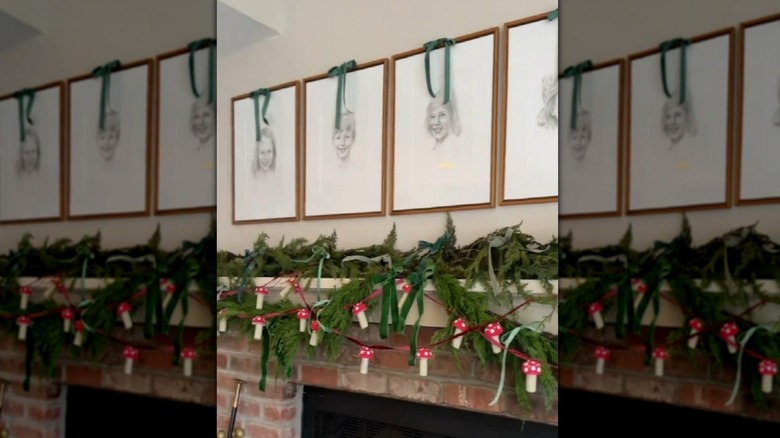
To assemble, begin by adding a dab of hot glue to the top of each mushroom and attaching it to a ribbon. Immediately reinforce it by pushing a pin through the ribbon into the cork. Space the mushrooms evenly along the ribbon, creating two strands roughly the same length as your garland. Then, connect your garland pieces together at the center and near the ends with florist wire, allowing one strand to drape slightly lower. Attach the mushroom ribbons by criss-crossing them along the garland using more florist wire. Finish off by adding velvet bows throughout for more detail. Display your mushroom garland proudly on a mantel, over a doorway, or on a banister. And if you're ready to take up another homemade project, pair it with a DIY mushroom candle holder or a DIY mushroom house jar.