The Adorable Cardboard Idea That Keeps TV Remotes Organized And Tidy
We may receive a commission on purchases made from links.
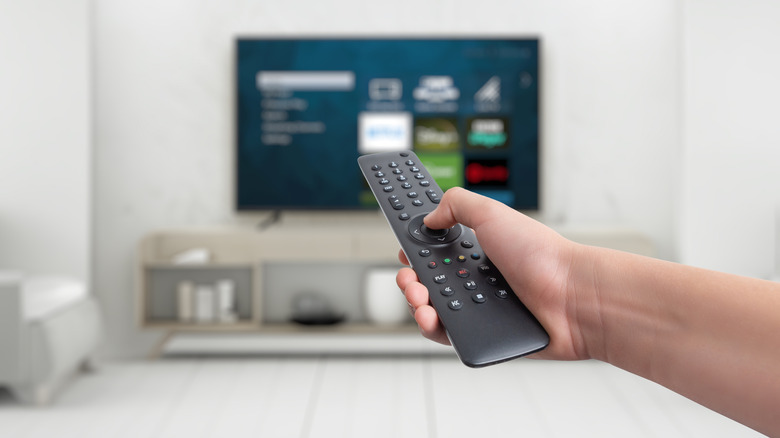
If you've grown tired of overturning your couch every other day to find the missing remote, why not DIY an organizer? It's possible to never lose your TV remotes again with this simple idea that turns cardboard scrap into a three-in-one remote organizer. As long as you place the remote in this caddy, your coffee table stays clutter-free and your remotes remain within arm's reach.
What makes this cardboard organizer appealing is its low cost and slanted design, which makes it easy to grab your remotes. The creation process, as shown by DIYer @dipsosisaccouter1981 on TikTok, is also not too complex. You'll simply take raw cardboard, cut out side panels of long trapezoid-like shapes, then glue on the inner divider cardboard rectangles of different heights to create a stepped look. Then give it a proper finish using paint.
Besides cardboard, you'll need a ruler, pencil, scissors, a utility knife, a hot glue gun, and glue sticks. For the paint job, you'll need paintbrushes and acrylic paint in your preferred color. Then, set aside white glue and tissue paper (for texturizing), a toothpick, and clear gloss varnish.
Step by step process of making your DIY cardboard TV remote organizer
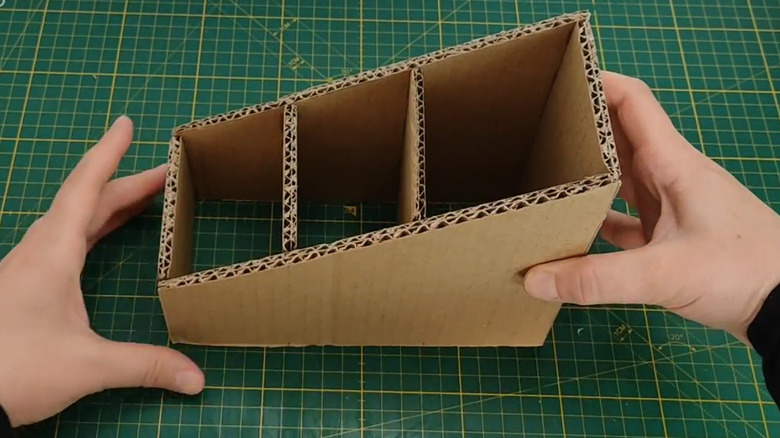
To begin, you want to do a bit of precise measuring and cutting to prepare the cardboard pieces. First, measure four small rectangular pieces to form the internal divider walls and seal the front and back of the caddy. They all should have a uniform width of 3 inches, and heights of 6, 4.7, 3.5, and 2.4 inches. Next, cut out two large slanted side panels (trapezoid-shaped) that will give the organizer its shape. They should be 7.5 inches long, while the short side should be 2.4 inches high. The angled edge should have a height of 6 inches. Lastly, cut out the base piece. At 8.3 by 4.3 inches, it will be slightly larger than the upper structure to create a defined border for the organizer.
Assemble the pieces one by one by gluing the edges and holding them in place to ensure proper bonding. Make sure they're well aligned so the finished organizer has a high-quality professional look with clean joints. You should now have a step-like caddy with three little compartments for holding your clickers.
Adding visual interest to your DIY cardboard TV remote organizer
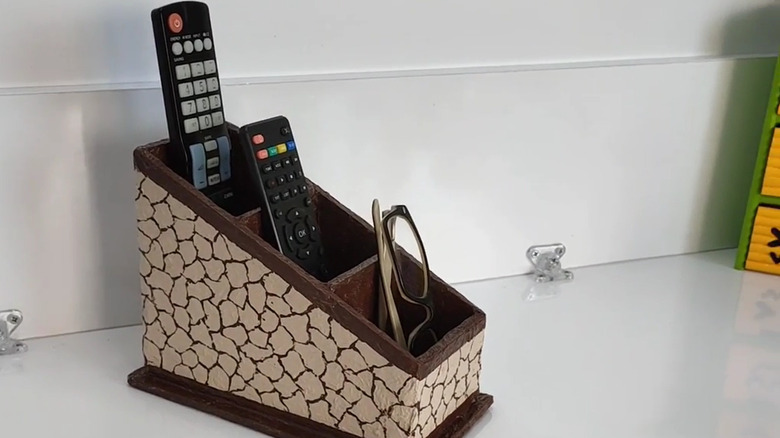
At this point, your organizer is practically ready for use, but a few final touches are all you need to make it stand out. Try painting. You can easily copy the cracked design made by the TikToker using brown and cream colors. The creator also textured the surface using diluted glue and layered tissue paper before applying paint. Alternatively, paint your own unique designs like floral patterns or simple motifs. But, if free-hand painting isn't your strength, don't worry, simply use stencils like this Felixcraft Geometric Stencils for Painting on Amazon. Remember to choose a paint color that complements your living room decor.
Besides painting, you can also use decorative paper. For example, this can be one of the clever ways to use your leftover wallpaper in the home. Instead of placing the holder on a table, consider mounting it on a wall for easier access. All you'll need is to attach a simple hanging hardware on the side of the organizer and an adhesive hook on the wall where you'll hang it. With that, you can now keep your remotes neat and organized with this DIY cardboard organizer.