Turn Scrap Wood Into A Versatile Garage Workbench With Extra Storage

There are two things that DIYers and home woodworking enthusiasts can never have enough of: work surfaces and tool storage. If you want a quick and easy solution, it's not too difficult to add a custom workbench to your garage with a wood pallet DIY. However, if you want something more versatile that adds extra storage and uses up some of that scrap wood you have lying around, things can get a little more time-consuming. That said, there's no need for complicated joinery. Everything can be glued and screwed together to create this workbench with storage.
In an ideal world, you'll have a table saw and a miter saw, both of which are among the top tools worth investing in to start woodworking at home. If you don't, then a circular saw will do, although you'll need to be careful when cutting to maintain accuracy. Having a metal straight edge that you can clamp on as a guide will be a big help with sheet materials. You'll also need a cordless drill/driver, a sander (although sandpaper wrapped around a scrap block works), and some heavy-duty locking casters.
If you own a thickness planer and some long F-clamps (also called bar clamps), you can maximize the amount of scrap you use up. We'll look at how to do that in a moment. However, as these are tools that many beginner woodworkers won't own, we'll also look at alternatives.
Building the frame for the garage workbench
To some extent, the overall size of your workbench will depend on the scrap you have, although it's relatively affordable to supplement it with store-bought lumber and plywood. Spend some time sketching a plan so you have dimensions to work from. When thinking about the height, which is important for working comfort, don't forget to include the size of the casters.
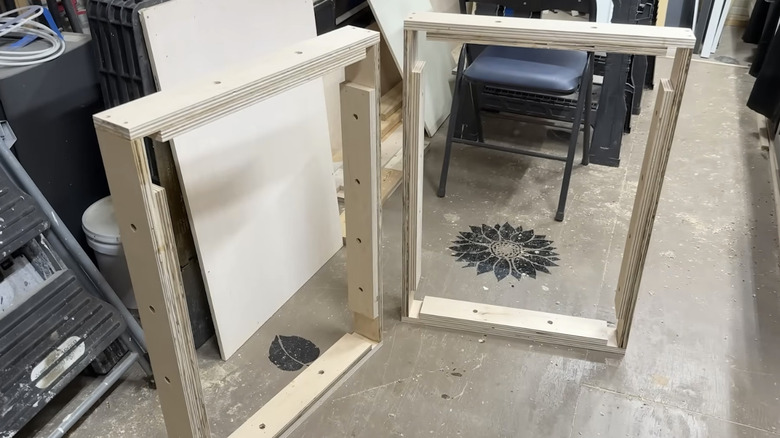
A hobby woodworker who goes by DIY Tiff on YouTube built a pair of workbenches that illustrate most of the key techniques. If you have 2x4s or similar solid wood, the top and bottom frames could be made with simple butt joints, glued and screwed together. Drill pilot holes to prevent splitting. Alternatively, rabbet or lap joints can be cut with a table saw or miter saw and are stronger. Use whichever type you are comfortable with. In the video, DIY Tiff achieves the same effect just as well by gluing lengths of plywood together.
Unfortunately, she didn't have long enough pieces for the uprights and went through a very laborious process to create them. Two pieces of wood with another screwed to them as a cross-brace might not look as neat, but would produce the same result in far less time. During the process, she used a thickness planer often. There's no doubt this tool can improve the finished appearance, but as you're building your workbench from scrap, it isn't entirely necessary. It is worth sanding edges to remove any splinters.
Creating the top, and adding finishing touches
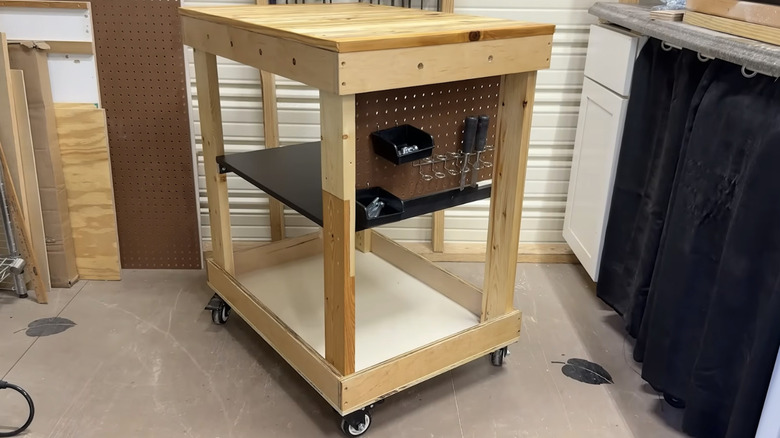
Screw together the top and bottom frames and the uprights, then cut a piece of plywood or OSB for the bottom. Screw it in place and add the casters. You can also cut crossrails running from front to back, screwed to the uprights. These support shelves that can be cut from the same sheet material as the bottom.
The top could be made the same way as the bottom from a single sheet. You also could fit a piece of plywood first, then screw another layer of MDF over that as a "sacrificial" surface. When it gets too dinged up, simply replace it. DIY Tiff wanted something more substantial, so she cut and planed scrap strips to the same thickness, glued and clamped them all together, then planed them smooth. It produced a unique surface, but it was painstaking, and she had difficulty attaching it. The easiest attachment method is with metal L-brackets fitted underneath. Use screws that are short enough not to go all the way through.
Finish the whole thing with a couple of coats of water-based polyurethane varnish to protect it, and finally, cut a piece of pegboard and screw it to the back to provide hanging space for tools. There are lots of smart ways to use leftover scrap wood in your garage. Not only will this workbench project be tremendously satisfying, it will give you invaluable extra space whenever and wherever you need it.