Turn An Old Plastic Bottle Into Stunning Wind Spinner Decor For Your Garden
Plastic waste is a major global concern. To put this into perspective, EPA data from 2018 suggests that more than 14.5 million tons of plastic were generated in the containers and packaging category alone. The total quantity crossed the 27 million threshold. Fast forward to 2026, non-profit organizations and news publications speculate that billions of bottles are being used and trashed every day. While it'll take us all some time to break the plastic circle and start relying on more eco-friendly alternatives, you can do your part by repurposing the plastic water bottles around your house. For instance, if your garden is looking a little sad, you can DIY adorable wind spinners by splitting the bottle's body into individual vanes.
This project is both simple and economical, so you don't need to be an experienced DIYer or buy specialized items. In fact, you can find most supplies in your humble abode. For example, you're sure to have certain types of glue on hand for home and garden upkeep. You can use common adhesives like hot glue or super glue for this project. Besides, you'll need an empty plastic bottle with its lid, a sharp pair of scissors, some paint, some scrap wire, and an extra bottle cap. You'll also require a drill, but if you don't have one handy, you can always use a hot needle or a pointy skewer stick instead.
How to craft a wind spinner out of an old plastic bottle
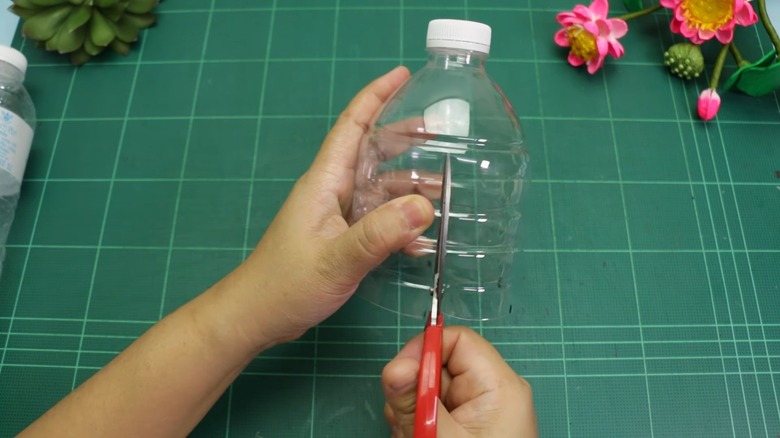
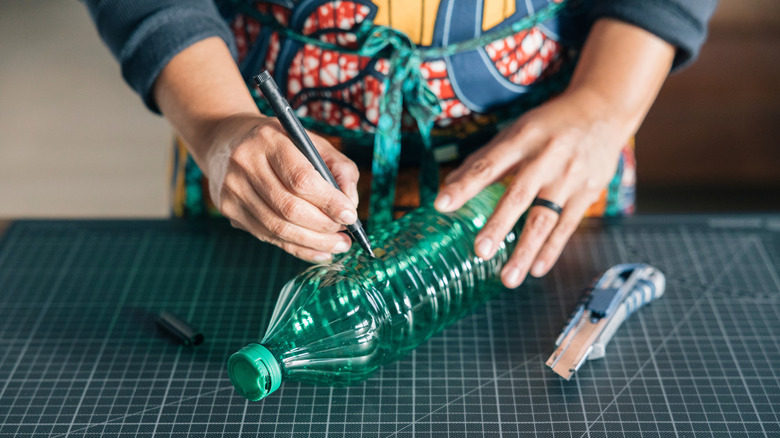
Start by cleaning out your plastic bottle. You don't want your wind spinner collecting dust or leaving sticky residue in your yard. Then, leave it out in the sun so it dries out completely. Meanwhile, gather your supplies and set up your workspace. When the bottle is dry, cut off a thick layer from the bottom. The section you remove will determine the length of the blades, so plan accordingly before cutting. Since you don't want sharp edges or an uneven surface, it's better if you mark the part you'll be cutting out beforehand. You can use a marker or painter's tape for this. In case the bottom looks slightly jagged, take a sandpaper to even out the imperfections.
Now, for the fun part: creating vanes for your wind spinner. Decide how thick or thin you want each blade to be and start cutting across your bottle vertically. To ensure smooth blades, mark the spacing between each cut with a marker. You can even extend the dots into full lines if you aren't confident in your ability to move in a straight line. Then, work your scissors over the drawn lines. Finally, fan them out or give them a slight twist for a dramatic effect.
Put finishing touches on your wind spinner

Take the cap off your wind spinner and drill a small hole in its center. Next, find another cap of the same size and glue it to the inside of the spinner. This will help stabilize your decor item. Then thread scrap wire through and create loops on both ends to prevent it from sliding out. In case the hole is too big even after the loops, add a little hot glue on both sides to keep it in place. This way, you won't have to worry about your spinner breaking down during inclement weather.
Now, let your imagination run free and decorate the spinner using colors, glitter glue, fancy beads, and sequins. You can even style the blade edges into flower petals and paint them in tones matching your favorite flower, so it complements your garden. While switching between different shades, use a disposable glove to prevent your paintbrushes from drying out. Want to go the extra mile? Craft a smaller spinner and connect the two together for a mesmerizing finish. Alternatively, use different colored tapes to make your decor stand out. Though if you go this route, it's best you attach strips before you turn your plastic bottle's body into a wind spinner's blades. Remember, the more unique the design, the more eye-catching your spinner will be. Stake it in your flower bed or have it grace your fences.