Say Goodbye To Pantry Clutter With A Storage Solution You Can Build Yourself
We may receive a commission on purchases made from links.
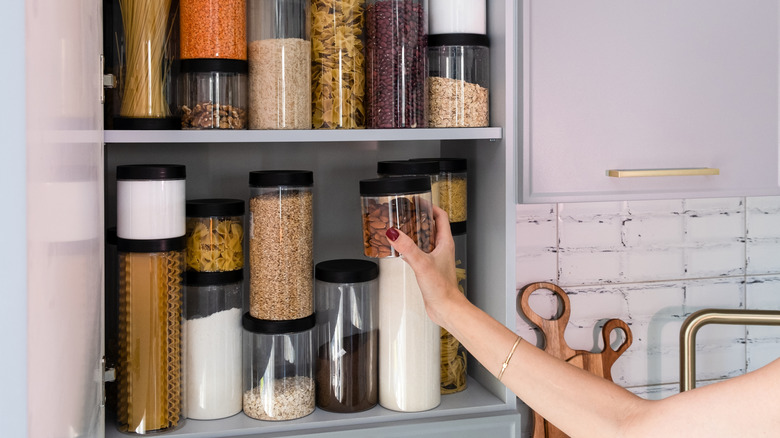
When it comes to pantry storage, visibility is a real problem, because if you can't find it, it might as well not even be there. Shelf risers are an elegant solution to declutter and organize your pantry, and with this DIY from Guardian Woodworking, you can follow along with free plans to make a staggered shelf riser set that includes a sliding inner piece. This makes it adjustable so you can shorten or lengthen it as your pantry organization needs change.
A shelf riser set made from ½-inch plywood sheet material is a beginner-friendly project that can stretch your woodworking skills. Plus, you'll get more for your money than you would with store-bought alternatives. Starting with a 4-by-8 sheet of 15/32 Plywood Sheathing from Home Depot, which costs about $27 right now, along with some edge banding, a little wood glue, and brad nails, and this whole build comes in well under $50. When you're finished, you will have a two-piece nesting set of risers that can slide to fit different pantry widths. If you're looking for pantry shelf ideas that will transform your kitchen, it works especially well for storing canned food, spices, jars, or anything else that can get lost in the back rows on your pantry shelves.
Discover how this adjustable tiered pantry shelf comes together
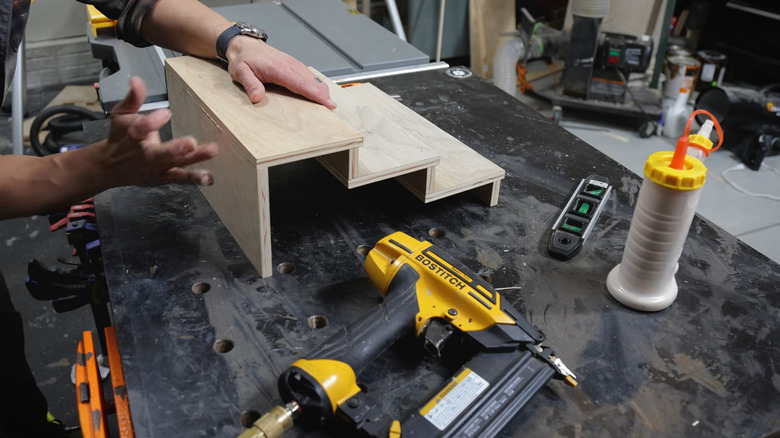
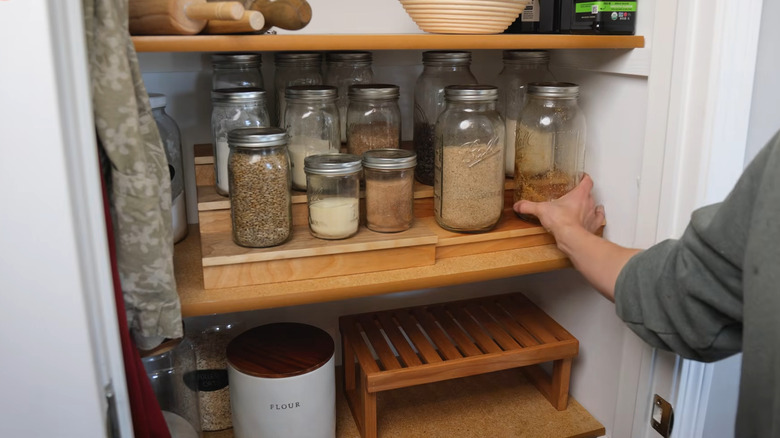
This adjustable tiered pantry shelf helps you get the most storage out of kitchen pantries with deep shelves. It's made in two parts, with a smaller riser that's built to slide into the first one. Making the first and larger part of this riser shelf is straightforward. With three tiers, each shelf has iron-on edge banding applied to the fronts for a finished look. Start by cutting the pieces for the large riser first, including a 5½-by-14-inch back, three shelves measuring 5-by-14 inches, and three runners measuring 1½-by-14 inches. You'll need one shelf support piece, which is easier to cut after you put the shelf together and trace a pattern on a piece of wood.
Assemble everything with wood glue and brad nails, starting by attaching the shelf panels to the runners, stacking each tier with a ¼ inch reveal for aesthetics. After you put all the panels and runners together, trace and cut the shelf support for the end, then attach it using wood glue and nails. The second tiered shelf set is built almost exactly the same way, but is slightly smaller, so it fits inside. The pieces you need to cut include the top shelf panel, which is 3¾ by 13½ inches, and 2 smaller shelf panels measuring 5 by 13½ inches. You'll also need two small shelf runners measuring 1½ by 13½ inches, plus a base runner, which is slightly smaller than the top two at 1 inch by 13½ inches.
Complete the tiered pantry shelf assembly and apply finishing touches
Just like with the larger riser shelf, you need to cut a support for the side from a piece of scrap wood after you assemble the smaller riser shelf. Once both shelves are assembled, you can slide the inner one into the larger one, and it should sit flush at the end when it's fully inserted. At this point, cut a handle into the bottom of the end cap of the small riser so you can just grab and pull it out to adjust it.
Next, fill the nail holes with wood putty and let everything dry thoroughly before sanding and finishing with a wood stain and sealer. In the free plans offered by Guardian Woodworking, Jordan recommends using Rubio Monocoat Wood Oil. Available in a variety of colors, it's a good finish for wood projects in the kitchen because it's food-contact safe. But you can personalize this project by finishing with anything from leftover chalk paint to a new color of alkyd that's heavy duty enough for cabinetry.
You can make this in different sizes, add a lip to the shelves to help keep items in place, or skip the smaller riser for a shelf that's not adjustable but still just as practical. Another design option is a macrame or crocheted edging to add some cottage or Victorian charm. Fair warning, however: with so much added style, it will be too adorable to leave in the pantry.