How To Landscape With Railroad Ties: 14 Tips & Ideas For Your Yard
For the 20 years I've been working with clients as a master gardener, I've seen railroad ties be a persistent garden trend. And I understand why. They're rustic, heavy, and solid, and they last. Plus, people think they're doing a good thing by repurposing something that would otherwise end up in a landfill. But even if I weren't a permaculture specialist, I'd advise caution. People often don't fully understand what they're working with, or the inherent and significant dangers. I always get a sinking feeling when I walk into a yard and see raised beds made from railroad ties.
The wood itself isn't the problem; it's what it's treated with. Most reclaimed railroad ties, if they've been pulled from active rail lines, are problematic. They're soaked in creosote, which is a coal tar preservative identified by the EPA as a probable human carcinogen with no registered residential use.You need to take particular caution if you're using creosote-treated railroad ties around edible plants, play structures, or even areas where pets will come into contact with them. If, however, you've got landscaping timbers from a home and garden store, they look like railroad ties but are treated with safer alternatives. Knowing what you have and how to use it safely are the keys to successfully landscaping with railroad ties.
Tip: Know the difference between new versus reclaimed ties

If you buy landscaping timbers from the lumber section of your local home improvement store, they're almost certainly railroad tie look-alikes, and they'll be treated with modern preservatives deemed to be safer to humans and the environment than creosote. And these are considered safe for residential use. But I still don't recommend them for edible gardens. If, on the other hand, you go to a reclamation yard or buy ties from a railroad surplus dealer, a random Joe Schmoe on Facebook Marketplace, or a friendly neighbor who is clearing out their property, there's a high chance you're dealing with wood soaked in creosote. Which is not safe. And it can be really hard to tell the difference.
Once weathered, both types look very similar. However, creosote-treated timbers tend to be a little darker and have an oilier surface that has a sharp, pungent, unmistakable scent on warm days or if you scratch them. You can ask a reputable supplier about the treatment type, and they should know. If they don't, I'd walk away, as creosote-treated wood is no longer considered suitable or safe for residential use. Building raised vegetable beds with old railroad ties seems like such a simple, neat, Insta-worthy solution — but it's an old school gardening trend that it's time to let go of.
Tip: Never use creosote-treated railroad ties near edible garden beds
I cannot emphasize this enough. No matter what trendy influencer nonsense you've seen online, do not, under any circumstances, use creosote-treated ties near edible garden beds. This doesn't just mean that you shouldn't build a raised bed from them, but you shouldn't use them anywhere near edible plants. Creosote can leach out of the wood and contaminate the surrounding soil, which poses a health hazard, both via handling of the soil, and ingesting produce that has come into contact with the contaminated soil.
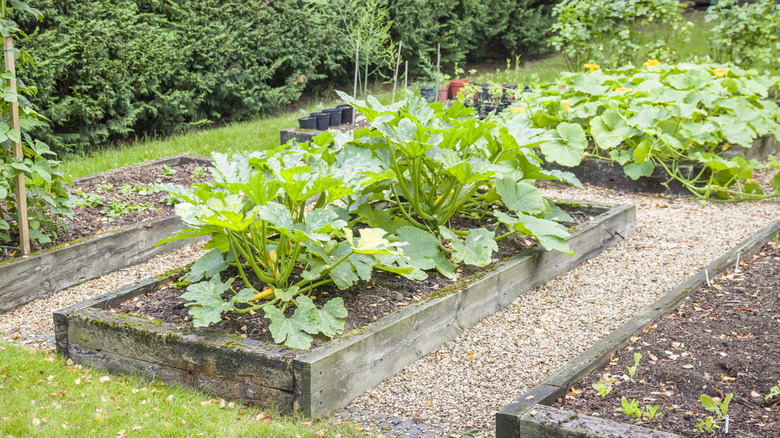
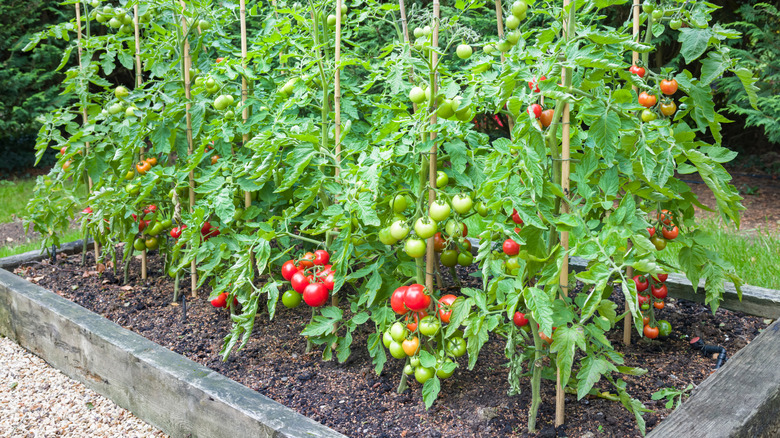
For food beds, use untreated cedar, Douglas fir, or redwood for bed edging or frames. These woods are naturally tough and rot resistant and don't require any chemical treatment. Western red cedar, in particular, will outlast most alternatives, including treated pine. Cedar is one of the best woods to use for raised beds or planters, as it naturally repels insects. For ornamental beds and garden builds, you can use treated lumber, including the landscaping timbers that look just like railroad ties. And remember that creosote can persist in the soil for many years, so just ripping out the old ties and replacing them with safe wood doesn't remove the danger. You either need to fully dig out and replace the contaminated soil, or spend some time growing things like sunflowers that will draw up the contaminants from the soil and sequester them in their cells, in a fascinating process called phytoremediation.
Tip: Keep creosote-treated railroad ties away from play areas and water sources
If you're determined to use reclaimed railroad ties, then at the bare minimum, keep them as far away from water sources as possible. The same goes for areas where kids play or places your pets frequent. Prolonged skin contact with creosote can cause blistering and skin irritation. And, of course, there is the long-term risk of being in regular contact with a probable carcinogen. If you have a play area or sand box edged with railroad ties, I'd strongly recommend you replace them as soon as possible. You can keep it affordable by building a DIY sandbox with something like red cedar.
Besides posing contact-related risks, creosote can also get into waterways. It's damaging to aquatic life and is contaminant that we don't want in the groundwater or fresh water sources. For disposal, know that creasote-treated wood should never be burned, as the smoke is toxic. Burning treated wood is also illegal in most states. You'll need to check your local regulations for proper disposal guidelines.
Tip: Wear PPE when cutting or drilling
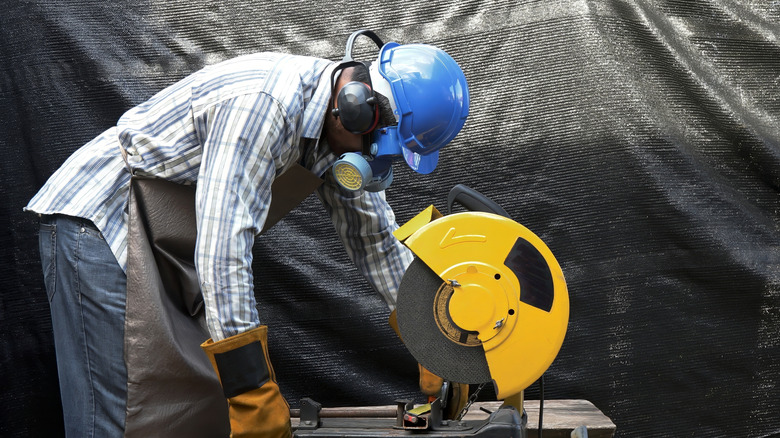
Personal protective equipment is absolutely essential when cutting or drilling treated railroad ties. Obviously, any time you're doing anything that generates sawdust, you should at the very least wear a simple paper mask so none of the particles get into your lungs. With creosote-treated timbers, you need a proper dust respirator, as the tiny dust particles carrying the preservative chemicals, polycyclic aromatic hydrocarbons (PAHs), will be in the air around you, and these can pass through a standard paper mask. You also don't want the particles getting on your skin, so make sure you wear long sleeves and pants, chemical-resistant gloves, and cover as much of the rest of you as reasonably possible. You should also wear safety glasses to protect your eyes from larger particles. My best trick is to wear two layers of clothes.
Make sure you work outside in good airflow and do the cutting or drilling well away from doors and windows, spaces where kids and pets play, vegetable beds, or water sources. Don't tarry. Get the job done safely, then wash all exposed skin when you're done. And don't walk back inside in your clothes and shoes. Instead, take off your shoes and your outer layer of clothing, and put the clothes in a garbage bag, then straight in the laundry, and wash them separately. I know this sounds like overkill for a simple landscaping project, but the compounds in coal tar creosote are persistent, should be contained as much as possible, and genuinely shouldn't stay on your skin or be loose in your house.
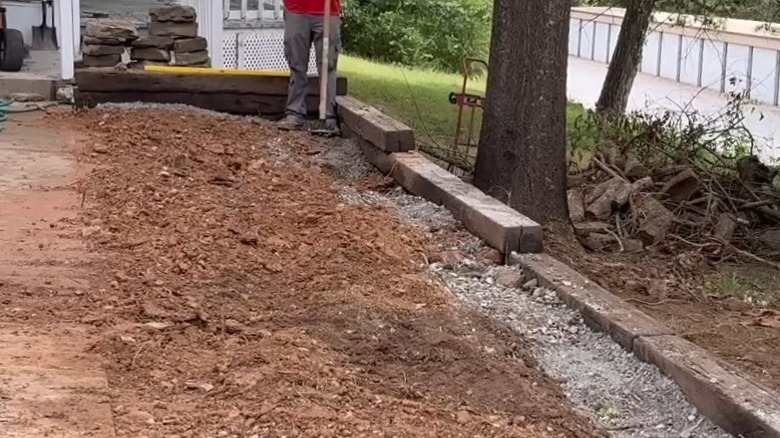
Tip: Start with a level trench and compacted base
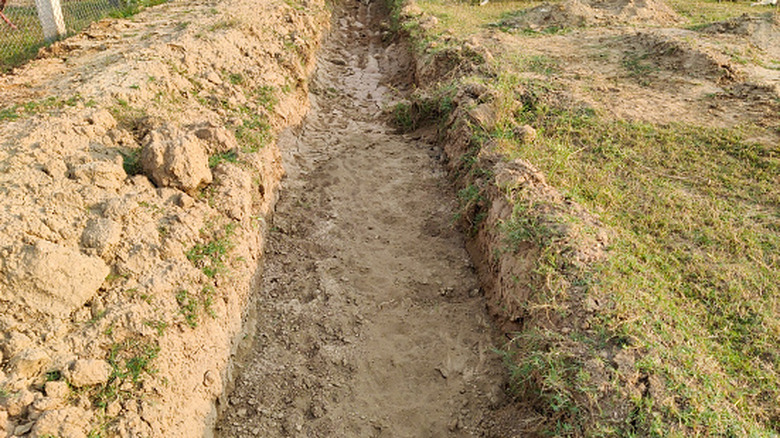
Railroad ties are surprisingly heavy, but they're still not that stable on their own. If you sit a loose tie on uneven or uncompacted ground, eventually it'll shift. And while a little movement in a single tie isn't too dramatic, it's a real problem if you've got a stack or a wall. There's a good chance it will eventually topple over, undoing all your hard work.
Your best option is to dig a shallow trench for the first course or ties. Level the trench and compact the base. You could even bring in crushed stone or gravel to act as a sturdy, compacted base. A 4-inch compacted base layer is usually sufficient for decorative edging or ornamental beds. But for retaining walls carrying any real soil load, make that base layer at least 6 inches thick to be on the safe side.
Idea: Build a retaining wall to terrace a slope
A railroad tie retaining wall is one of the most practical and cost-effective ways to deal with a sloping backyard. A slope that's too big to properly plant, mow, or maintain usually also increases runoff issues, so terracing it just makes good sense. It then becomes usable growing space when you terrace it into flat steps. Railroad ties are much cheaper per square foot than stone or concrete, so they're a solid budget-friendly option.
You'll want to use deadman anchors, keep wall height to 4 feet or under, and make sure the base of each wall sits on solid, compacted ground. For steeper slopes, building two or three shorter walls with planting terraces between them is a more stable, longer-lasting option, as it spreads the structural load instead of overloading a single wall. It also looks better, in general. I've used this technique to help establish permaculture food forests on slopes that were previously too steep to work, although I used local stone, not railroad ties. The retained terraces provide flat pockets for trees and shrubs to establish themselves properly.
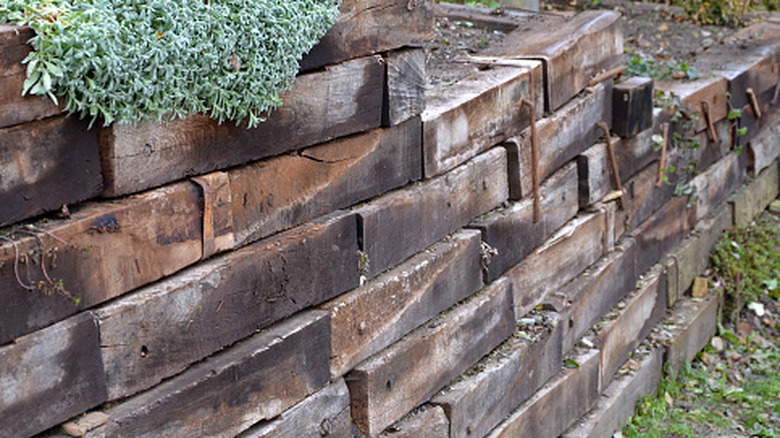
Tip: Stagger the joints when you stack ties
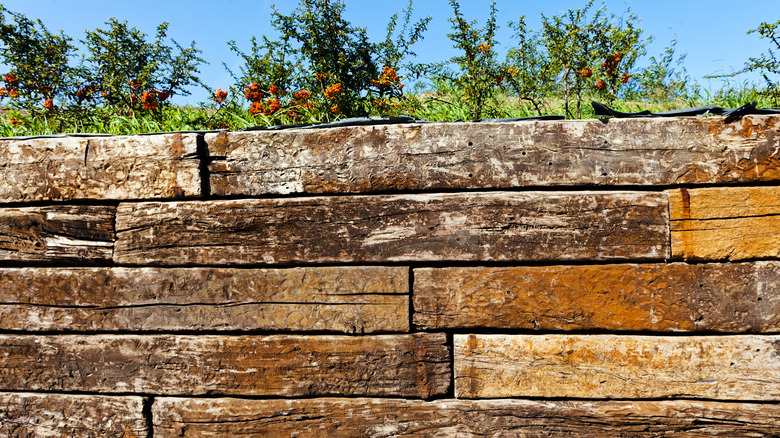
This is a simple tip that often gets overlooked or considered optional. If you're stacking ties, you need to stagger the joints, just as you do when laying bricks. Even if you're only going two or three courses high, you'll have a much stronger, more stable result if you stagger them. It doesn't matter if you're building a retaining wall or a simple planter. If you just stack them without staggering, all you've done is create a kids' wooden brick "tower." It's just a series of columns that can tip independently of each other at the slightest provocation.
Staggered joints give you a much safer, secure structure because there are no columns to move independently. The whole thing is instead structurally tied together. Ideally, just as with bricks, every joint should be roughly half a tie's length from its nearest joint. It's such a simple thing, yet I've seen projects go badly wrong when people decide they can skip this step. Staggering the joints takes no extra time, money, or materials.
Tip: Anchor ties properly with rebar or steel spikes
As I mentioned above, unsecured railroad ties will shift over time. They'll creep, lean, and generally misbehave. And they'll do it faster in wet climates where soil shifts more often or is generally less stable. It's one of the common reasons using the ties becomes one of those popular garden ideas that people regret. To prevent this, the standard approach is to drill ⅜-inch holes through each tie and drive rebar pins down through the ties and into the ground below.
For the base course, place one rebar at each end (at a minimum). For each subsequent layer of ties, use rebar or steel spikes to pin them to the layer below. This, combined with staggered joints and a well-built compacted base, gives you a much stronger structure that should hold up well over time.
Tip: Use deadman anchors for walls more than two courses on a slope
Railroad ties can help fix a sloped backyard, but if you're building on an incline and going two or more ties high — gravity and the weight of the ties alone aren't enough to hold them steady. This is particularly true if there's any soil pressure behind the wall. That pressure increases with every inch of height you add.
A deadman anchor is pinned to the wall face with rebar and runs perpendicular to the wall face, extending back into the hillside behind. Use one deadman anchor every 8 feet along the wall from the second course, every other course. Every anchor should be at least 1.5 times as long as the wall is high at that level. So a wall that's 4 feet tall at the point where the deadman is attached needs an anchor that's 6 feet long. Bury the anchors, then backfill over them. These anchors essentially lock the wall into the slope it's retaining and stop the wall tipping forward. They act as counterweights, resisting the pressure of the soil and keeping the wall in place. Walls over 3 feet tall need T-shaped anchors at the end of each deadman anchor so they can't slide through the soil when they're under load.
Tip: Add gravel and drainage behind any wall that's retaining soil
Water is the enemy of railroad ties and retaining walls. And adding drainage is one thing people often forget. They get their anchors in place and build a really steady foundation, but they don't consider how the wall will handle water. If water sits at the base of the wall, it creates hydrostatic pressure against the back of the wall that increases over time and will eventually shift or topple the wall, even if it has anchors.
Backfill with a minimum of 12 inches of coarse gravel against the back face before adding soil. This lets water percolate through and away into the ground slowly, rather than building pressure. Adding a perforated drain pipe to the gravel layer right at the base of the wall, then adding the rest of the gravel, can also help significantly. The pipe should have an outlet with a slope of at least 2% at one end that extends beyond the wall. This is a reliable way to reduce water and drainage issues for a railroad tie retaining wall.
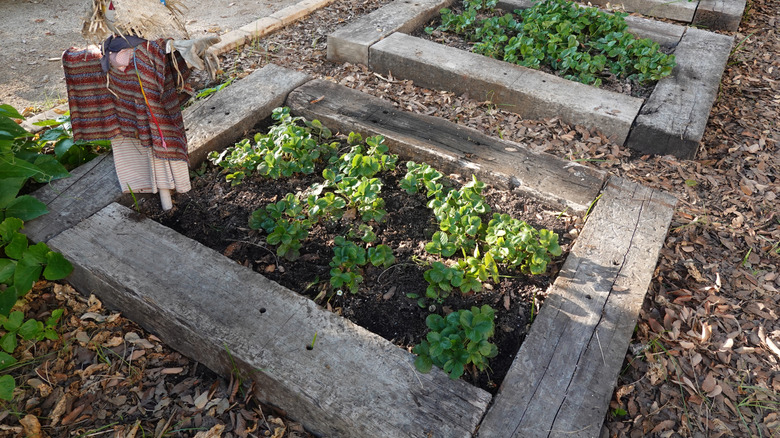
Idea: Frame a raised ornamental bed
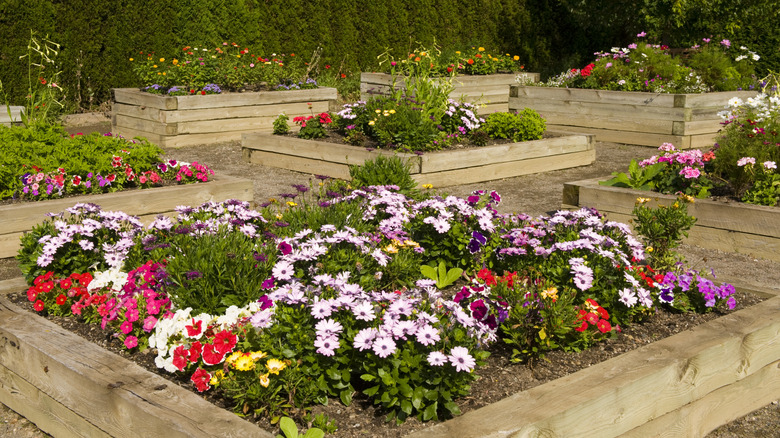
A single-course frame of railroad ties laid flat on level ground is one of the simplest and most affordable ways to define a raised ornamental bed. You'll need to pin the corners with rebar and use compacted soil or crushed stone for the base. Once it's in place, you can fill it inexpensively by starting with a thick layer of clean cardboard, followed by several inches of sticks, leaves, grass clippings, hedge trimmings, and even whole logs or branches. This is a simple technique that saves you money on filling a bed. Then finish with a layer of topsoil or compost, and plant right away. Over time, the lower layers break down and turn into lovely, earthy compost. And, if you mulch the top of the bed every season, you won't even need to top it up with soil as it rots down.
This works particularly well for beds filled with flowering perennials, ornamental grasses, or native shrubs where the uptake of preservative chemicals is not the concern it would be with vegetables. You can, of course, also do the same thing with untreated lumber or landscaping timbers. It's also a super simple project that's perfect for newer DIYers just getting started with their own garden builds. For larger frames with multiple sections, staggering the joints at the corners gives a more solid result than butting ends together.
Idea: Stack a tiered pyramid planter
The next step up from a single bed is to create a pyramid planter. Basically, you stack ties in progressively smaller squares or rectangles, which creates a terraced pyramid effect. It's a great way to start vertical gardening and, with the stepped appearance, is visually interesting. It's also not at all difficult to put together.
Essentially, you build the bottom layer just like the raised ornamental bed above. Fill that bottom layer with soil. Then stack the next layer of ties on the top. They should be smaller than the first layer, leaving you enough room to plant all the way around on the bottom layer. Then fill this layer with soil, too. Add your third layer and fill, then the fourth. You can then plant up the gap around the edge of each level. If you want to make the structure more permanent, anchor each layer to the one below. Because it's not necessarily easy to get to the upper layers, I recommend filling this kind of planter with low-maintenance, drought-tolerant native species that don't need a ton of care and pruning.
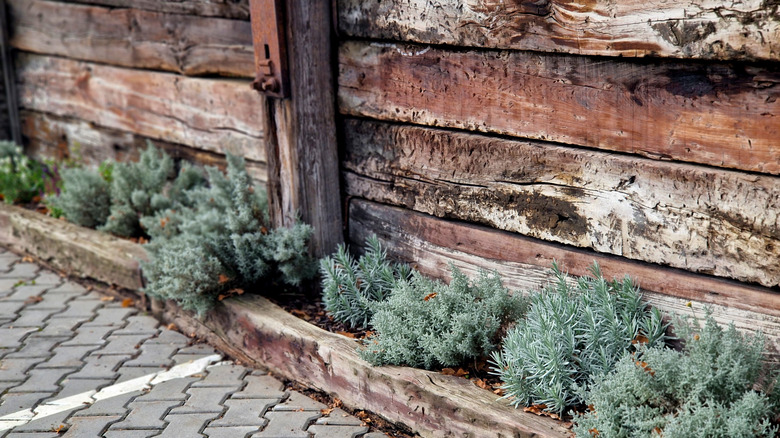
Idea: Define pathways and lawn edges with flat-set ties

If you lay ties flat as edging, you create strong, long-lasting borders between the different areas, like lawn and garden beds. You can also do this to define path edges and to contain a loose fill, like gravel, keeping it on the path and out of your beds and lawn. Bury them so just a small portion of the top face sits above grade. Drive angled rebar stakes through pre-drilled holes to prevent the ties from lifting or shifting out of position over time.
Filling the pathway between the ties with pea stone, stone chips, or gravel, will give you get a permeable, well-draining pathway that looks professionally landscaped, is easy to maintain, and helps to stop the fill escaping into the lawn. This is also one of the more forgiving railroad tie applications in terms of working with imperfect material. The flat-set ties don't need to be perfectly matched in height or condition the way stacked courses do.
Final tip: Keep roof runoff and downspouts away from railroad tie walls
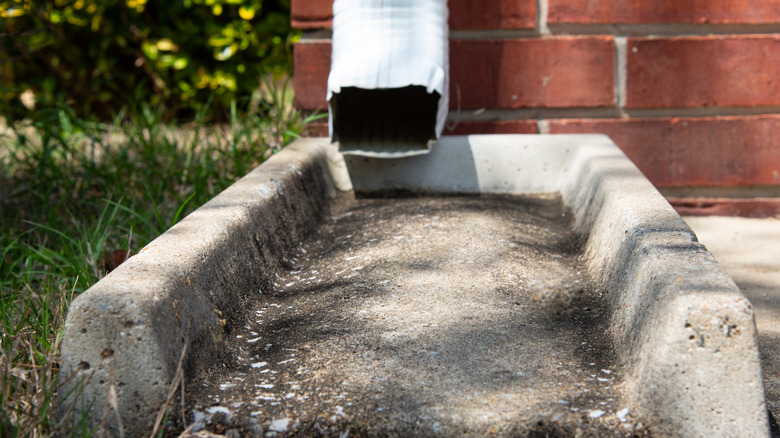
Concentrated water from a downspout or a gutter outlet takes more of a toll on wood, even tough old railroad ties, than regular rainfall. When water constantly flows toward a single point, it can cause a few different problems. Eventually, it can wear away at, and rot, the wood. With a "wall" of stacked ties, the water can overwhelm the drainage layer behind the wall, undercut and erode the base, and make the structure dangerous and unsound.
Make sure you direct all downspouts away from any ties. You can use downspout extenders or diverters, or install splash blocks to redirect the water. If your yard naturally slopes toward a tie wall or another wooden structure so that runoff regularly hits it during heavy rain, it's a good idea to install a swale. A swale is a wide, shallow channel in the landscape — something of a favorite feature of mine. It gets planted with moisture-loving plants and those with phytoremediation capabilities, like yellow iris, red fescue, rushes, and sedges. The shallow, vegetative depression catches storm runoff and temporarily holds it, allowing it to slowly soak away into the ground instead of rushing up against walls and structures.