Turn Used Spray Can Lids Into Mini Succulent Propagation Planters

Succulents are not only some of the most exotic beauties of the plant world thanks to their peculiar appearance, but also some of the easiest to propagate and care for. When propagating, however, the cuttings may take several weeks to develop roots and have significant enough growth for the repotting phase. But that does not mean you have to stow them away waiting for them to fully develop. Instead, have them on display to enjoy the beauty of all the phases of their growth cycle. All you need is cute propagation planters to house them during this time. You can do that at zero cost and make the perfect mini succulent garden using old spray can lids.
If you have your own collection of spray can lids, they're likely in colors you love the most, and when you look at the shape and size of these spray caps, they're perfect for holding little succulent cuttings and pups. Set aside two used spray can lids (one will serve as the base and the other as the plant pot), glue sticks, a hot glue gun, and a drill for making drainage holes. You should also have your succulent potting mix ready and your favorite stunning succulent that makes a statement piece houseplant. With that, you're ready to make mini succulent propagation planters perfect for display on windowsills or as giftable plant sets.
DIY a mini succulent propagation planter from old spray can lids
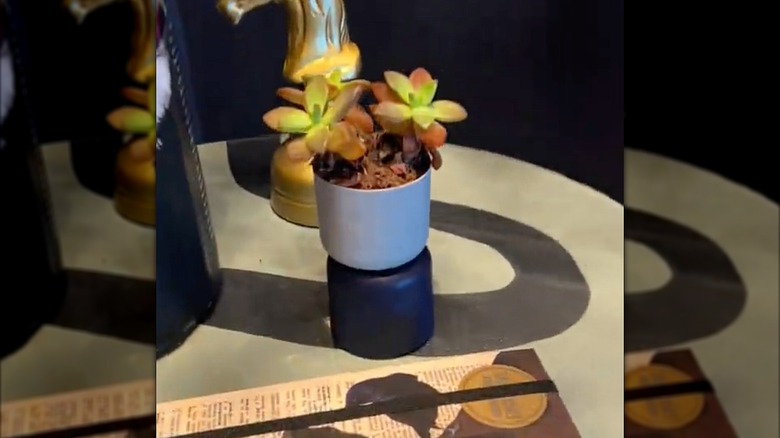
Once you've gathered all your supplies, wash the lids and dry them thoroughly so they'll adhere well to each other when glued together. After that, spread hot glue to the top center of one lid and place the other lid directly on top of the glue. Hold the lids in place for a few minutes until the glue dries into a firm hold, and voila! You've created a tiny pedestal planter for your succulents.
The final step is to make drainage holes using the drill and a tiny bit. Alternatively, take a pointed screw driver and heat the tip on a flame from a lighter or even on your stove and use that to pierce holes into the plastic lid planter. Now, pour your potting mix into the tiny propagation planter and add your leaves or stem cuttings, pressing the soil gently around them. Place the mini planter on your desk or windowsill so the cuttings get adequate light.
@redeux_style Time for another spray paint lid Upcycle! #spraypaintupcycle #spraypaint #paint #spraypaint #upcycle #rework #diy #thriftflip #homedecor #upcycling #homedecor #upcycles #rework #upcycling #thriftflip #reuse #recycle #secondhandstyle #transform #oldtonew #upcycleddesign #makers #upcyclersoftiktok #makersoftiktok #tablescape #neworleans #sustainableliving #sustainsblestyle #diystyle #ecostyle #ecodesign o#behrtodiyforcontest #vintage #thriftflip #diycandle
If you make several of these DIY propagation planters, you can turn them into a display by arranging them on an old thrifted Keurig cup holder. Another way to customize this project is to create a hanging succulent planter by making two holes on each side of the planter cup then passing twine through the holes. Feel free to also experiment with different planter looks by spray painting the lids using a color that'll match your indoor decor.