Not Brick, Not Pavers: The Versatile Driveway Edging Idea To Consider

It's time to clean up the driveway, and you want to do something to make it look a bit nicer than it does now. Your neighbors had edging put in along their driveway, and it looks really sharp. But you don't want to break the bank or commit to something permanent like brick or pavers. You'd like to find something a bit more versatile, maybe something you can DIY that still looks professional and clean. If you need driveway border ideas to boost curb appeal that are also budget-friendly, pound-in edging is a great option to consider.
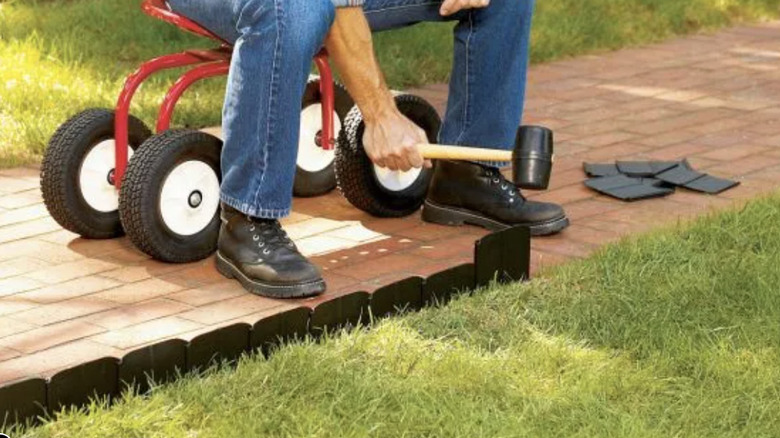
Pound-in edging comes in pieces that you literally pound into the ground using a hammering tool, like a rubber mallet, along the edges of your driveway. You can find it in a myriad of different materials, from plastic to corrugated metal and galvanized steel. There's an equally wide array of price points, making it easy to find something within your budget. Most types of pound-in edging are made flexible enough to be used on even the windiest of driveways.
Of course, driveway edging is way more than just for looks. With pound-in edging, the top of the edges don't have to be flush with the ground but can be higher to create a larger barrier. If you have a loose-filled driveway, like gravel, it works to keep the rocks from spilling over into your yard. Likewise, it keeps things from the yard, such as compost or wood chips, from getting onto the driveway. A solid edging also creates a clear and obvious boundary, helping drivers keep the vehicle where it belongs, because no one likes tire marks mucking up their freshly manicured lawn.
How to install pound-in edging along your driveway
Once you decide on the material and style of pound-in edging, measure both lengths of the driveway so you know exactly how much edging you need. Before you get too carried away with the project, be aware of the installation mistakes to avoid with your DIY landscape edging, like neglecting to prep the ground. Clear out any debris along the edges of the driveway, raking away any grass cuttings or runaway twigs and leaves. Then, grab a hose and spray the ground to moisten the soil.
While the basic installation of pound-in edging is generally the same across the various styles, always be sure to read the product details before beginning. Lay the edging along the driveway edges to double-check that you have enough material. Starting at one end, hold a section of edging in place and pound it in with a rubber mallet to the depth that leaves the top as high above ground level as you desire.
Overly dry or rocky soil can make it difficult to pound in the edging. If you're having trouble, try watering again and lightly push a small shovel into the ground to make a minor opening that will allow the edging to be pushed in more easily. Continue all the way down one side of the driveway and then repeat on the opposite side. Some edging comes with optional stakes that can be used in equal distance from each other along the length of the edging to offer extra anchoring support.