Turn Any Wall Shelf Into A Stunning Bookcase With A Space-Saving Solution
Well-designed bookcases, with their built-in cupboards and sturdy shelves, make smart additions when you need extra storage space. Unfortunately, if you're decorating a room that's, shall we say, cozy, a bulky book bunker might be too much for the space. For Instagrammer pdxdinorama, painting a wall to look like the arched silhouette of a bookcase, combined with some stunning floating shelves, created a design that didn't add to the room's visual bulk yet left her plenty of space for her things.
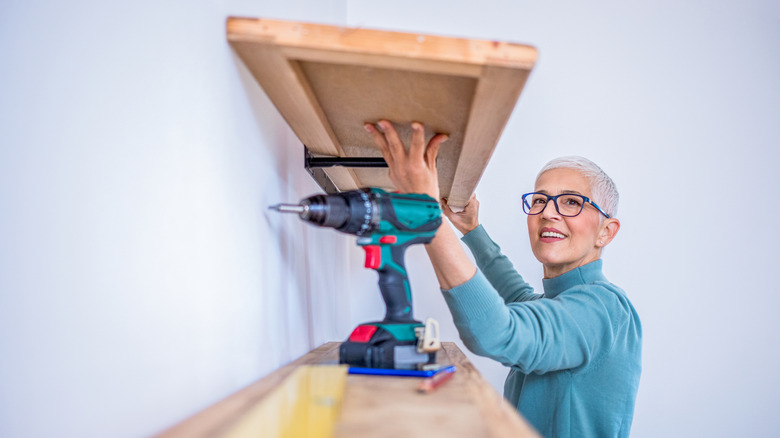
Aside from the floating shelves, you'll need some paint brushes and rollers, paint pans, painter's tape, and drop cloths to implement this idea. You may also require sand paper, a drill, screws, a pencil, scissors, string, a tape measure or ruler, and a few thumb tacks to bring your fool-the-eye DIY to life.
Additionally, for this to work from a visual perspective, it's best if you paint both the floating shelves and the bookcase "outline" on the wall the same color. By painting an area of the wall to look like a bookcase and then adding shelves of the same hue to the colored area, you help your brain to see that your personal space is visually cohesive. This, in turn, can reduce the appearance of clutter, making you feel more relaxed in your space.
Building your bookcase one brush stroke at a time
Despite being simple in design, this project requires quite a bit of pre-measuring before you start painting. First, measure the length of the shelves. Your painted bookcase silhouette will be a couple of inches wider than the floating shelves. Mark the wall to create the two vertical sides of the bookcase. If there is a base board, stop at the top of the trim, but leave the area above where the top shelf will go alone for now. Apply tape to the area outside of the pencil marks to help you paint straight lines and stay within the borders of the lines. Try this viral hack for a quick and easy painter's tape application.
Using a DIY compass is the easiest way to create the arched top of the bookcase design. Just tie a pencil to a long piece of string. Then tack the other end of the string to the wall, positioning it in the center of where the top shelf will go. You may have to experiment a bit with the length of the string before the reach of your compass aligns with the tops of the pencil lines. Once you've marked everything, paint inside the pencil marks, arched spot and all.
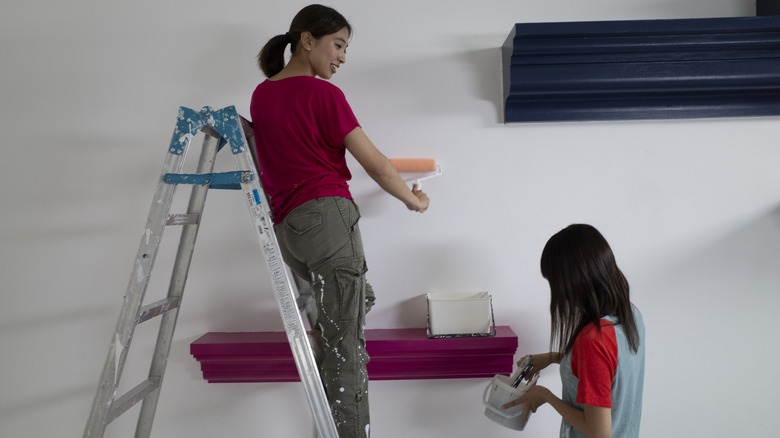
While that dries, it's time to style the floating shelves for your space. Sand them if necessary and give them a coat of paint. Once they're dry, hang them up, keeping the ends of each shelf inside the boundaries of the painted bookcase's silhouette. Pull the tape off the walls, and then, add your favorite books to the shelf.